
GIMP FOR WRITERS OR OTHER NEWBIES:
![]() This is a shortcut for self-published authors and writers who are creating their own book covers. This will save you at least two hours in design time and even more if you are a beginner.
This is a shortcut for self-published authors and writers who are creating their own book covers. This will save you at least two hours in design time and even more if you are a beginner.
HOW DOES THIS WORK?

- You need to make a copy of the front and back of your paperback. Save separately as jpg files.
- Add the back and front into the proper size hardback cover template
- Create a new background
- Add the Spine so that everything fits exactly.
DOES IT WORK FOR ALL COVERS?
My chosen size for the Hardcover book is 6 x 9 inches. My paperback is in a 5.06 X 7.81. So I'm only going up about an inch. This technique won't work if you need to grow your book cover much more than that. But with the amount of time saved, it may be worth the trial!
WHAT IS THE PROCESS?
 You need to get the proper hardcover template from KDP. There is a Paperback and Hardback calculator here
You need to know the exact number of pages your hardback book is. Special note to beginners: This isn't the book page count. This is the real page count when you count all of the skipped "even pages" before the chapter odd pages. For example: My Sanctuary book has 257 pages but the real count is 262. So when I went to the KDP calculator, I entered 262 as the page count.
Once the KDP Hardcover Calculator creates the book cover template, download to your computer. You may have to open the zip file. If you have any trouble with it -- like I did in the video below -- try shortening the name of the folder. When I shortened the name, I was able to extract the files in the zip folder.
WHEN DO WE GO TO GIMP?
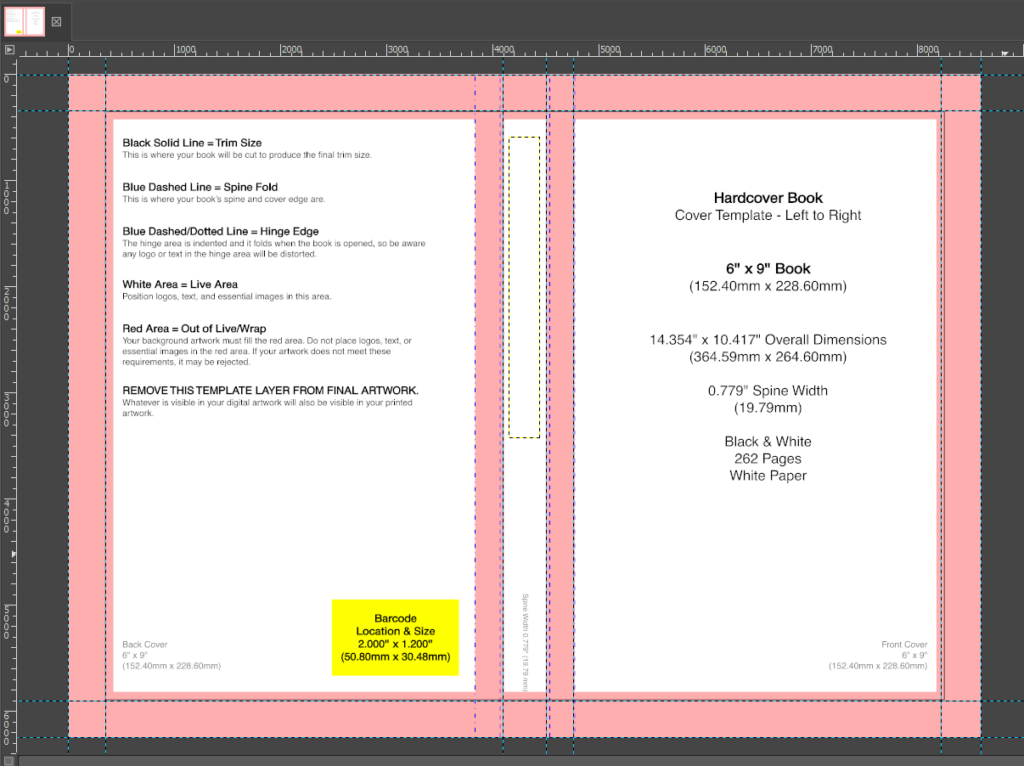 Open the hardback cover pgn document in Gimp. Everything in pink is margin. The spine text must fit into the white area in the center between the front and back.
The first order of business is to put guides around the pink margin areas. If you don't know what this means, check the video below where I show you how to do it.
START WITH A JPG OF YOUR PAPERBACK BOOK COVER:
Pull up a jpg of your paperback cover. You cant use the gimp file with all the layers. If you do, you will go insane. So make sure it's a single document. If you saved it as a pgn, that will work too. Open the cover as one layer, either a jpg or a png file.
HOW TO COPY A SELECTION AREA IN GIMP:
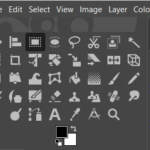
Choose the Gimp Selection tool -- it's the second or third one in the top row -- and drag a selection box around the front of your ebook.
Right click on the selection area and choose Edit > Copy visible. This tells Gimp to only focus on the selected area. Now it's copied to your invisible clipboard.
Click on FIle > Create > From Clipboard. This will take the front cover from your clipboard and throw it into a new image. Save that as the frontcover.jpg. Do the same for the back cover.
Referring to the template with the pink margins above, bring in the front and back covers you just saved. File > Open as lawyer > find and click on the individual jpg files.
Once you bring in the front cover, click on the move tool, and put the front cover inside the white area in the template. Center it as best you can.
Click on the Resize tool and click on the front cover image. You will see a dialogue box come up and lines with boxes will form around your image. Hold your control key and grab one corner of the image and drag out slowly, making sure to fit the cover exactly into the white area. Avoid the spine area.
Repeat this process for the back cover.
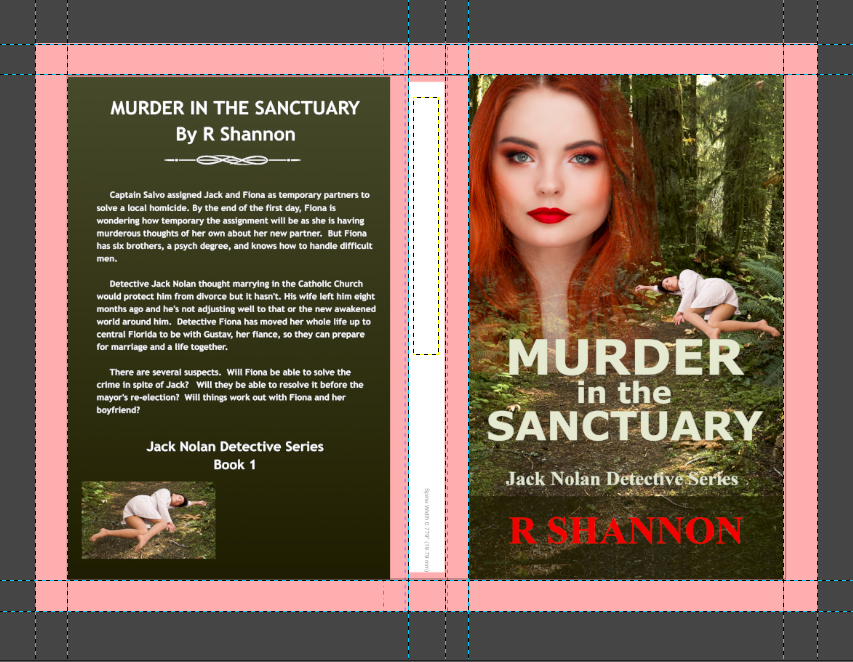
This is what your cover should look like now. Just has the front and back in place. Notice that neither cover is going into the pink margin areas.
MAKE A NEW BACKGROUND:
In my cover, I used a gradient as my original background color. As I demonstrate in the video below, using the color eyedropper, I made my foreground color the lighter olive green and the background color the dark olive green.
Then using the gradient tool and holding my shift key down to keep my line straight, I drew a line from top to bottom, inserting a new background that is the same as my original background.
WHAT ABOUT A PICTURE BACKGROUND?
If you used a picture scene as your background, you will bring in the picture as a new layer. File > open as layer > and click on your background picture. Just as you pulled your front and back covers into place using the resize tool, do the same with your background.
NOW FOR THE BOOKCOVER SPINE:
 Once my background was in place. The only thing left was adding a new spine that fit exactly into place.
My text is white, so I changed my foreground/background colors back to black and white. I made sure my foreground color was white as that is the color the text tool pulls from.
Click on the text took and type in your title. Highlight it all and increase or decrease the size that will fit into the spinal area. Make sure you are looking at the guides. The title and author need to fit in the center of these guides.
Once I was finished typing and resizing my title, then it's time to click on the rotate tool. This took throws up a dialogue box too. In this box, type in 90 in the top area. Then click Rotate. It will put your text into position to be moved into place using the move tool.
Do the same for the Author name. Special Note for Beginners: If you need to change the text after it is rotated, Gimp will need to take the text back to being text. Once you rotate it, it makes it into an object.
So if you need to do that, simple click on the right layer, and click on the text tool and then click on the title. Gimp will then automatically return it to being text only. Fix the text size and you will need to rotate it again.
YOU'RE DONE!
Once you have created the new spine, you're done. Save the document as a gimp file. Then export as a jpg file. I never save from a gimp file directly to a pdf, because when I do, I have had problems with the text falling off the page. It may have been corrected through the years with Gimp, but I still export first as a jpg and then I open the jpg and export that as a pdf.