The Power of Creative Breaks: Recharging Your Mind and Boosting Creativity and Productivity:
While writing a novel, or just in today’s fast-paced work environment, we often find ourselves buried under a mountain of tasks, deadlines, and responsibilities. A feeling of being overwhelmed by your how-to lists can happen, zapping what’s left of your daily energies.
Just like a cluttered workspace, a crammed mind can hinder creativity. A break allows your brain to hit pause, letting go of unproductive thoughts and making space for fresh ideas.
Clear the cobwebs out of your mind. It’s important to take a step back to recharge your batteries. One effective way to do this is by incorporating creative breaks into your daily routine.
TAKE A BREAK AND COLOR SOMETHING OR ADD A PAGE TO A SCRAPBOOK:
When you immerse yourself in a creative activity, you allow your mind to wander and explore new ideas. This mental freedom can shake off your daily work enough to give you a respite from things.
By delving into another unrelated creative endeavor, it can also give your mind a chance to operate on its own. Be amazed at how new ideas will come to you regarding your daily work, including new strategies or shortcuts to help you get a better handle on things.
By setting your mind free to create something that has no deadline and no boss, you will create your own respite, a resting place to completely clear your mind.
THE RETURN OF MENTAL CLARITY:
After just a short hour or so of this creative activity, your mind will be clear. You will begin again with a rested mind, a mind that has been on a creative journey and will bring with it renewed energies and even new and better ideas.
REDUCED STRESS AND ANXIETY:
This respite will also reduce stress and anxiety. Even if you add this respite and need to make it up on the other end, it can still make your work more enjoyable. It can whisk you away from that point where you want to pull your hair out.
TRY IT – HERE IS A COLORING PAGE OF A CAT WITH FLOWERS.
Click on image to download a pdf from Google Drive
I’ve always found that infographics can give you an instant bird’s eye view of any information, system, or strategy that makes understanding the information so much easier.
I’ve also found that organizing information in a way to make an infographic is a good way to actually study a subject. Most of the style of infographics come from color, symbols, icons, and shapes. The test of it is made up on bis and pieces of organized information.
INFOGRAPHICS AS A WAY TO LEARN INFO:
The last few times I was wrestling with learning something, I “took notes” and then organized them into an infographic or two. What I found was that the process was easier than I thought.
After analyzing what makes an infographic, I realized that it all starts with the organized information set up in some kind of hierarchy, sectioning or divisions
Once you know how many containers of information you will need, your design begins there. The rest of it is color choice, container sizes and shapes, and whatever illustrations, charts or icons you want to use to dress it up.
INFOGRAPHICS AS A WAY TO PASS ON WHAT YOU’VE LEARNED:
Once you are done, you know the material much better. And with an infographic now in your hands, it’s easy enough to pass it on. People love to have easy-to-understand information or directions at their fingertips!
If you would like to download an infographic about organizing information for infographics, sign up below. This list only gets one email newsletter a month with other infographics, sales, deals and steals.
This is a shortcut for self-published authors and writers who are creating their own book covers. This will save you at least two hours in design time and even more if you are a beginner.
HOW DOES THIS WORK?
You need to make a copy of the front and back of your paperback. Save separately as jpg files.
Add the back and front into the proper size hardback cover template
Create a new background
Add the Spine so that everything fits exactly.
DOES IT WORK FOR ALL COVERS?
My chosen size for the Hardcover book is 6 x 9 inches. My paperback is in a 5.06 X 7.81. So I'm only going up about an inch. This technique won't work if you need to grow your book cover much more than that. But with the amount of time saved, it may be worth the trial!
WHAT IS THE PROCESS?
You need to get the proper hardcover template from KDP. There is a Paperback and Hardback calculator here
You need to know the exact number of pages your hardback book is. Special note to beginners: This isn't the book page count. This is the real page count when you count all of the skipped "even pages" before the chapter odd pages. For example: My Sanctuary book has 257 pages but the real count is 262. So when I went to the KDP calculator, I entered 262 as the page count.
Once the KDP Hardcover Calculator creates the book cover template, download to your computer. You may have to open the zip file. If you have any trouble with it -- like I did in the video below -- try shortening the name of the folder. When I shortened the name, I was able to extract the files in the zip folder.
WHEN DO WE GO TO GIMP?
Open the hardback cover pgn document in Gimp. Everything in pink is margin. The spine text must fit into the white area in the center between the front and back.
The first order of business is to put guides around the pink margin areas. If you don't know what this means, check the video below where I show you how to do it.
START WITH A JPG OF YOUR PAPERBACK BOOK COVER:
Pull up a jpg of your paperback cover. You cant use the gimp file with all the layers. If you do, you will go insane. So make sure it's a single document. If you saved it as a pgn, that will work too. Open the cover as one layer, either a jpg or a png file.
HOW TO COPY A SELECTION AREA IN GIMP:
Choose the Gimp Selection tool -- it's the second or third one in the top row -- and drag a selection box around the front of your ebook.
Right click on the selection area and choose Edit > Copy visible. This tells Gimp to only focus on the selected area. Now it's copied to your invisible clipboard.
Click on FIle > Create > From Clipboard. This will take the front cover from your clipboard and throw it into a new image. Save that as the frontcover.jpg. Do the same for the back cover.
Referring to the template with the pink margins above, bring in the front and back covers you just saved. File > Open as lawyer > find and click on the individual jpg files.
Once you bring in the front cover, click on the move tool, and put the front cover inside the white area in the template. Center it as best you can.
Click on the Resize tool and click on the front cover image. You will see a dialogue box come up and lines with boxes will form around your image. Hold your control key and grab one corner of the image and drag out slowly, making sure to fit the cover exactly into the white area. Avoid the spine area.
Repeat this process for the back cover.
This is what your cover should look like now. Just has the front and back in place. Notice that neither cover is going into the pink margin areas.
MAKE A NEW BACKGROUND:
In my cover, I used a gradient as my original background color. As I demonstrate in the video below, using the color eyedropper, I made my foreground color the lighter olive green and the background color the dark olive green.
Then using the gradient tool and holding my shift key down to keep my line straight, I drew a line from top to bottom, inserting a new background that is the same as my original background.
WHAT ABOUT A PICTURE BACKGROUND?
If you used a picture scene as your background, you will bring in the picture as a new layer. File > open as layer > and click on your background picture. Just as you pulled your front and back covers into place using the resize tool, do the same with your background.
NOW FOR THE BOOKCOVER SPINE:
Once my background was in place. The only thing left was adding a new spine that fit exactly into place.
My text is white, so I changed my foreground/background colors back to black and white. I made sure my foreground color was white as that is the color the text tool pulls from.
Click on the text took and type in your title. Highlight it all and increase or decrease the size that will fit into the spinal area. Make sure you are looking at the guides. The title and author need to fit in the center of these guides.
Once I was finished typing and resizing my title, then it's time to click on the rotate tool. This took throws up a dialogue box too. In this box, type in 90 in the top area. Then click Rotate. It will put your text into position to be moved into place using the move tool.
Do the same for the Author name. Special Note for Beginners: If you need to change the text after it is rotated, Gimp will need to take the text back to being text. Once you rotate it, it makes it into an object.
So if you need to do that, simple click on the right layer, and click on the text tool and then click on the title. Gimp will then automatically return it to being text only. Fix the text size and you will need to rotate it again.
YOU'RE DONE!
Once you have created the new spine, you're done. Save the document as a gimp file. Then export as a jpg file. I never save from a gimp file directly to a pdf, because when I do, I have had problems with the text falling off the page. It may have been corrected through the years with Gimp, but I still export first as a jpg and then I open the jpg and export that as a pdf.
BELOW IS THE VIDEO WHERE I GO THROUGH THE ENTIRE PROCESS.
In my last blog post, I went over how to find the right genre for your ebook. I also suggested you choose one or two book cover 'templates' from the ebooks you see during this journey. That's our starting point for this blog post. Now that you know where you want to go, it's time to learn about the technicalities: the sizes, resolutions, etc. It's all here on one page.
If you are planning to work with a designer, it is best if you are in control of most things about your cover. Not knowing what font the designer will use could be a problem if you want to change the font down the road or add a second book to a series. Unfortunately, I'm speaking from experience. So be sure to choose everything about your book cover even if you will be working with a designer.
WILL YOU NEED A COLOR SCHEME?
Often the ultimate colors of your cover will come from the pictures you choose. But there are techniques to wash a scene in a very subtle color in order to cast a certain mood into an image. You may want to take a look at a website or two where you can find some great colors. Here are two:
IMAGE SIZE: The best and recommended size for the ebook cover is 2560px by 1600px. This number comes from KDP itself. This is the size for the eBook cover.
RESOLUTION SIZE: Create the cover using 300dpi, which is high resolution. Don't compress the size, as Amazon compresses the sizes a bit itself.
COLOR PROFILE: RGB - If you don't know what this is, don't worry about it. It just means we will be using RGB which is the color for the web as opposed to CMYK which is color for printers.
RULE FOR WHITE COVERS: If your cover will have a white background, you will need to add a narrow 3 to 4 pixel border in a medium gray to define the background.
THE TECHNICAL INFO ON PAPERBACK COVERS:
The more versions of your book offered, the more Amazon will want to offer them for sale. So having an eBook and a Paperback is a minimum. Many authors are offering audio versions of their books and now hardcovers now too.
The paperback template is based upon how many pages your book will be when finished. The size of the cover will depend upon what size paperback you choose to produce as well. You can find the calculator below at this link.
Once you click through to the paperback template calculator shown to the left, fill in the following information based upon your own choices. Once you put in your particular page count, click on Calculate Dimensions.
At that point, it will throw up a template with measurements. Unless you are an actual graphic designer, the dimensions will mean nothing to you. You will work from the template.
Download the template and save it onto your desktop -- or somewhere else you will be able to find it later. If it downloads into a zip file, right click on the folder and choose "Extract all". It will allow you to extract the files and save them into a folder that will default to the same name.
Binding Type: Hardcover or Paperback
Interior Type: Black and White or Standard
Paper type: White or Cream
Page Turn Direction: Left to right
Measurement Units: Inches
Choose a size: (I use 5.06 x 7.81) - You can see what dimensions the other authors in your main category use. I would go with the crowd on this choice.
Fill in the page number and click "Calculate dimensions".
It will throw up a template like the one below:
Click on the button that says 'Download Template".
WHAT DO I DO WITH THE TEMPLATE?
If you plan to have a graphic designer create the cover for you, then pass on the png file to them. Tell them you want the artwork produced in 300dpi and you want it delivered in a png file -- not a pdf. Be firm about this. Tell them you won't pay for a PDF. A PDF is useless if you decide you want to tweak the artwork. If you can get them to give it to you in a xcf file (gimp) or a psd file (photoshop), even better. That is the best of all worlds. Not all artists will agree to that, but give it a try.
If you plan to design your own book cover, you can right click on the png file and select 'open with' and then select the Gimp program. I'll pick up in my next blog post with creating only the eBook cover in Gimp. We'll start there.
SHORTCUT TO CREATING THE PAPERBACK COVER:
When you create the eBook front cover, you can design the back cover at the same time. I suggest this because when your manuscript goes out to the editor, there will be about a month of 'free time' and if you want to get a jump on getting your back cover done, this is a good time but it is before you will know the exact page count.
Then once you have your page count, the only thing that will really change is the spine of the book. As long as you are using a one color background or a unifying blend of colors, you can easily create a spine to unify the front and back covers and it will fit perfectly into the template.
This is also a good way to keep your spines consistent. I wish I had known this when I first started out!
At some point your manuscript will get closer to publication. At that time, you will need to start thinking about dressing it up for publication. The book cover. You can find any number of places, including KDP itself where you can create your own cover for free. Not recommended, but it's possible.
If you are writing a non-fiction book, you can probably get away with using the KDP cover creator as the non-fiction books are more 'content related' than fiction.
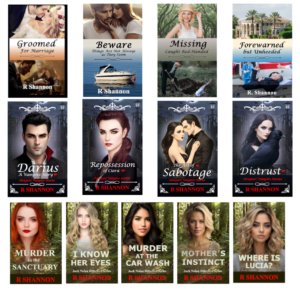
Every new author begins to have visions of scenes they want etched onto the front of their book while writing it. I personally did the same thing. The book cover doesn't have to reflect any scenes from the book. The book cover is more sales pitch than any type of a summary or hint at what the book is about.
SO WHAT SHOULD DETERMINE THE BOOK COVER?
Answer: Genre and mood. Genre or theme. That's what should guide your choice in a book cover. The best practice for a newbie self-publisher is this: Find your genre and then see if there is a sub-genre where your book fits. Above you will see some of the subgenres under romance and some under mystery, thrillers. Finding your exact niche is what you want to target before you set your heart on any design.
What does this mean? Let me explain for the ultra newbies. It means that romance is a large genre by itself. However, Amazon has created all kinds of subgenres under romance like billionaire romances, cowboy romances, small town romances, etc. With all the analytics in the world, Amazon knows that people tend to like the same types of books, and by having these subgenres, it's now easy for people to find exactly what they want. As a new self-publisher, you need to make this work for you.
REAL WORLD EXAMPLE OF CHOOSING THE WRONG GENRE:
I wrote a vampire series that was really best suited as a paranormal romance. I never heard of paranormal romance. I didn't even know they had a paranormal romance genre. I was operating on the antique system where all vampire books were in the horror section. WRONG!
Not knowing all this, I originally designed a cover for "gothic vampire". Big mistake. I'll go into that experience a little more as I explain how to work with fiverr and still maintain control over your design. My point here is that I found out too late how important these sub-genres were. I had already paid for a fantasy gothic cover. Then when I went to change it, the fiverr designer who charged only $50 a cover now wanted $250 a cover. I had four books in my series! More on that in another blog post.
The way this became a problem for me was that my book covered looked like a high fantasy horror, but there wasn't enough blood in my story for that genre. My vampire series is more of a paranormal romance, a modern family drama. So it just was on the wrong shelf, so to speak. The cover was the main problem. It said gothic and it wasn't projecting the right "genre" or the right mood.
I have since fixed it, but it was an expensive lesson I learned the hard way. Anyway, I think you get the drift that knowing what book shelf, so to speak, you are designing for is very important.
TO SUM UP: Find your genre first and see if you also belong in a sub genre. Then search out this sub-genre best seller list on Amazon and look at all the covers there. Pick two of your favorites. They will be your inspiration covers.
NOW WHAT? HOW DO I GO FROM FINDING A BOOK COVER I LIKE TO CREATING MY OWN?
The answer to this question is determined by your budget. In the world of self-publishing, there are dozens of companies and freelancers that serve the self-publishing community. They do everything from ghost writing, editing, book covers, marketing, social media and more. You can spend a small or even a large fortune on these services -- and you may be in a position to do that. If you are, good for you. If I had all the money in the world and had it all to do over again, I would get a publishing coach who could hold my hand and direct me on the path the entire way. I would make sure this consultant was an editor first and consultant secondly. This is probably the least stressful way to self-publish.
One Word of Caution: Be careful as you choose services to help you as there are good companies and some shady companies.
However, if you are publishing on a shoestring, then you've come to the right place. Keep reading as there are two different routes you can take, each will be determined by how much of a shoestring you are operating on.
TWO ROUTES TO THE SAME SELF-PUBLISHING END:
If I had to make one recommendation to new self-publishers, I would tell them to spend their money on a good line-editor and learn to do the other services yourself. It is possible to find an excellent freelance editor for four to five hundred dollars. If this is the main expense of publishing a book, that's still considered a reasonable budget.
Don't worry if you are a single mom or supporting a family and you don't have a spare four hundred. If there are kids in your house, I can only imagine how fast they can eat money! I operated on less than $400 in the beginning. I've got you covered below.
THE FREE ROUTE TO A GREAT BOOK COVER:
With Gimp (free graphic design program) and www.pixabay.com, you can teach yourself how to create a great cover. It's not necessary for authors to learn every single tool in the Gimp program to produce a great cover. You merely need to learn how to remove a background, blend pictures together and a few other easy-enough techniques.
I'm producing a Gimp for Authors Series to teach only enough to make a cover. This reduces the learning curve drastically. Look for my Gimp for Author videos on YouTube.
THE LOW COST ROUTE TO A GREAT EBOOK COVER:
Now another paid but affordable route to making your own book cover is to work alongside someone at Fiverr.com. There are lots of people who will create a nice book cover for $25 or $50. This may be worth it for some of you who are busy and don't have the time to learn Gimp. It always comes down to money vs. time.
Join www.fiverr.com. Search for book cover design. Each graphic designer will have a portfolio of some kind. They all also have a rating based on past jobs. Fiverr is the go-between. You pay this person through the website. Fiverr protects both people in the deal. They make sure you pay when the work is delivered and they make sure the person who has offered to do the work has done it as agreed. So it's very safe.
MONEY SAVING TIPS FOR USING FIVERR
If you can, reduce what you need to have done down to a single task. For example: If you ask them to create an entire book cover, they will own and control the entire design. You will have no idea what they did to create it, how many components they used, what font they chose, etc. If you want to tweak it down the road, it's impossible to do on your own.
However, if you learn enough graphic design in Gimp to create the components used in your cover, know EXACTLY what font you want, then you can only pay for one or two tasks: Can you remove the boring sky from this picture and add this nice one? Can you turn this picture of guy into a silhouette and put him on a transparent background for me? That is much cheaper work than: Can you make me an original book cover?
As long as you can arrange your graphic components onto an eBook template in Gimp (beginner level task), then you can control your expenses and keep them very, very low.
LET ME SHOW YOU HOW:
Below is a video where I jump into Amazon.com and show you how to find the subcategories. It's not that easy anymore! This will help you, as a self-publishing author, find your niche category. That's Point A. From there, it's easy to find a template book cover from one of the many you will see. With that template, you are less than 10 Gimp techniques away from creating your own cover.
Gimp is a free graphics program and it's fairly easy to use. But a lot of the program is not self-explanatory. So you can get lost really easily. A graphics designer needs to know how the entire program works. For authors, writers and other self-publishers, you only need to know a few of the tools to do pretty much everything you need to do.
The purpose of this blog post and video below is to give an overview of what authors will need to know about Gimp in order to be able to make social media posts, ad banners and book covers.
OPEN A NEW DOCUMENT VS. OPEN AS A LAYER:
Once you download the software, you will open the program and your first move will be to 'create a new image'. Click on FILE > NEW IMAGE. This will open a new dialogue box. Fill in the dimensions of how big or small you want the image to be.
PPI - This controls how big the image is. If you are creating something for a printer, or a paperback cover, you need to fill in 300ppi. If you are creating a social media image, fill in 72ppi. Printers need BIG pictures and the internet likes smaller pictures because they are easier to pull up from the servers.
HOW THE LAYERS PANEL WORKS:
All images are created in layers. The layers are built up one over the other. This is another reason why transparency is important -- which I'll cover below -- because you don't want to cover up the image or work below the layer you are on.
If you don't see your layer's panel open with the default settings, click on Windows > Dockable Dialogue Boxes and Layers will be one of the first choices in the long list of choices. You can get to it by using the shortcut key Control L.
CHANGING COLORS FOR TEXT:
The graphic to the left is a closeup of the tools panel. Each tool is represented by an icon. Below the tools is a graphic representation of your foreground color (the color on top) and the background color (the color in the back).
When you open a blank layer, it will default to your chosen background color.
The text tool uses the foreground color. So if you want to create a layer of black text, click on the text tool, click where you want to type on your image, and the text will render in black.
However, if you want to change the color of your text, before you click on the text tool, click on the black foreground color icon, and a color box will open. Choose another color and then click okay. Then click on the text box and your text will render in that color.
TIPS ON USING THE TEXT TOOL:
The text took can be tricky for a beginner because you can't as easily use the shortcut keys. For example, if you change your text size and then click on M for the move tool, it only adds an 'm' next to the text size. This can drive a new user mad! So be aware of this, that the shortcut keys can be a bit tricky when using the text tool.
It's best to click out of the text box and then click on the move tool icon. I wish I had known this when I first started using Gimp!
USING THE ALIGNMENT TOOL:
In order to align everything in the center on your image, you will need to use the alignment tool. There are two steps in using the alignment tool. Most tools are as easy as just clicking once on them. However, when using the alignment tool, click the tool to make it active. Double click to bring up the tool box. Then choose to associate this to the background layer. Once it has been assigned, then you click inside the image to the area you want to align. Four very tiny dots will surround the object you are about to align. These tiny dots are easy for a beginner to overlook. Once you see these tiny dots, then you click on the 'center' or 'left-align', etc. inside the tool itself.
When you see the video below, you will see it in action and it will become clearer.
SAVE VS. SAVE AS VS. EXPORT AS:
There are three ways to save documents. I'll post below the three ways and when you want to use that particular save:
Save or Save as - This saves the image as a .xcf document. These documents are only recognized by the Gimp program itself. You may want to save a social media image you made as a .xcf document. This way, when you open it, you open the document and all the layers you created. You can easily reuse these files to make future social media images.
Export as - In order to use the images on the web or even send to a printer, they will need to be saved in the proper format. So you will save as a .jpg or .png for the web. If you have a job that a professional printer will use, you will most likely have to use a pdf.
SPECIAL INSTRUCTIONS ON SAVING FOR GIMP BEGINNERS:
It's important to know that .jpg images do not allow transparency. They will default to having a white background. .png images do allow transparency backgrounds. This means that if you have a round logo with no background, you need to save it as a pgn file. Otherwise, it will throw in a white background if you save it as a jpg.
Now, there is a little glitch in Gimp for saving PDF files, especially when saving book covers. The work around is to save the book cover as a xcf document for safekeeping. Then save it as a jpg file. Open the jpg file and then save that as a pdf.
If you just save the xcf file as a pdf, it starts throwing thing into different places. It took me hours and hours to figure this out, so I'm passing on this tip to other beginners! Save as a jpg, then open the jpg and save that one layer document as a pdf.
HOW THE TRANSPARENCY WORKS:
In the project below, the Banner for Bookfunnel, you won't really need to now about the transparency layers. But I offer this as a beginner tip.
If you choose to make an image and choose the transparency layer from the getgo, then each layer above your first layer will also be a transparency layer.
However, if you just open the document and try to add something that needs a transparency, it will cause a lot of frustration because the transparency won't work. If you do this, open with a white or black background, then go over to the layers panel, right click on the layer and select "add alpha channel". When you do this, nothing will happen, no noise is heard. It feels like nothing happened. But it did.
If you then click over into the image and then click your delete button ono your computer, the background color will disappear and in its place will be the grey and white checkerboard, as seen above, which represents the transparency.
For your convenience, I have posted the time stamps for the how to video that follows in case you want to watch a short clip more than once.
Video Timestamps:
00:01 - How to properly size a graphic 01:19 - How to open a picture vs. how to open a picture as a layer 02:00 - How to resize an image with the scale tool 03:15 - The layer's panel - How to find it - how it works 04:00 - How to change text color with the eye dropper 04:33 - How to use the text tool, a text box, and create a headline (T) 05:02 - How to resize the text size and make two text lines 06:02 - How to use the alignment tool (Q) 07:00 - How to move the text box (M) 07:21 - How to save the graphic as a XCF document (Gimp document) 07:58 - How to export the graphic as jpg/png graphic for internet 08:30 - How to save your project as a Template and reuse it 09:36 - How to turn a black background layer into a transparency layer
I used Photoshop in the past, which is a great tool. They have a subscription where you get to use the latest tools in their whole suite of products, but the price starts at $50 a month. When I was doing web design, that was fine. But now I'm retired and I'm on a fixed income; so now $50 a month is no longer okay!
Gimp is an open source software that is free. They do take donations as they have a team of developers who put this together for 'people of the world'. They are part of the group of unsung heroes who get no acclaim in the media. So if you want to think about making a donation to them, you can do that here. You can also download the software here.
Gimp is similar to but different from Photoshop. These companies copyright and trademark many of their "techniques" so everything has to be done slightly differently and called a different name. So there is a tiny learning curve in trading Photoshop for Gimp, but it's well worth it.
MARKETING WITH GRAPHICS
As a self-published author, all marketing for my books falls to me. I can outsource it, but that costs money too. I have figured out, after publishing 11 novels, where my money is best spent. The answer is on line-editing, which costs between $400 to $500 or more depending upon how long your book is.
So learning to make graphics is very important for the self-published author. Using Gimp can make this easy for you as you can reuse some of the same templates. It's easy enough to learn as authors and writers only need to know how to make book covers, social media graphics and website banners.
BOOKFUNNEL AND SITEORIGIN:
Two of the most popular websites to give away or sell your book is through bookfunnel.com and siteoriginapp.com. These two companies offer the opportunity to join other authors in featuring your book. Everyone has a 'share date' and they share the promotion with their newsletter list and also with their social media following. It's a win/win for everyone.
HOW TO MAKE THE BANNER - WRITTEN INSTRUCTIONS
I have a video below that shows how easy it is. I'll post the written instructions here in case you want to keep them handy!
Open a new document.
Make the dimensions 1500 px wide and 500 px tall.
Change the ppi to 300
Expand the Advanced options and choose a transparency background.
Right-click (RC) on the background layer and choose 'fill with background color'.
Get a royalty-free graphic from depositphotos.com or pixabay.com. Save to your computer and note where you are putting it so you can find it for the next step.
Open as a layer. It will pull the picture into your project. It will most likely be way too big.
Using your mouse, hold down control and scroll up or down to zoom out on the new picture layer. Then go over and click on the scale tool.
Once you have activated the scale tool, hold down the control key and grab a corner of the photo (you may only see the yellow dotted line). Drag it in to resize it on the background layer. Let go.
Click on M to activate the move tool, or click on it in the toolbox. Move the graphic into the center of your background, or wherever you want it.
Click on the Text tool and pull out a text box. Click inside the box and begin to type your headline. Use Control A to surround all the text to resize it or change the color. Make however many text layers you need. Once you click on the text tool, it automatically puts it on its own layer.
To align to the center: Click on your background layer. Make sure the tool panel is open. (Double click the tool itself to bring up the tools panel for that align tool) Chose to assign the reference point to be the selected layer. Then click on the individual elements within the graphic and align them to the center.
Once you are done with your graphic and are happy with it, you have two choices to save it. (1) You can "Save as" and this will save the Gimp document that you can open next time and just change the picture and headlines. I would suggest you save at least one of these to reuse. (2) If you want to use the headline or graphic elsewhere, you want to save it as a jpg or png file. Use Export As and then choose the folder and name for the graphic.
That's it! Easy-peasy -- well, maybe the second or third time you do it it will be easy.
I chose to write this blog post for new authors who struggle, like I did, when it comes to getting things together right before self-publishing your own books. I managed to flip upside down when it came time to uploading and publishing.
One reason I went upside down was because I was nervous about doing something I wasn't familiar with. The second reason was that I had done so much research that I was overwhelmed with information and I had the information in different places. Sheer confusion.
WHAT DO YOU ABSOLUTELY NEED TO UPLOAD AN EBOOK COVER AND A PAPERBACK COVER ON KDP.AMAZON.COM?
The ebook cover needs to be 2560px (height) x 1600 px (width). The instructions say the ebook only has to be 76 dpi, but I always make sure mine are 300dpi. It's just more high quality. Amazon has a way of compressing them and they always look good online, so I would suggest you do the same.
It's all about the size.
76dpi, 150dpi and 300dpi - What's the difference?
The difference is size in dots per inch. Without getting too technical, which isn't necessary, 76dpi is the most common size to use online, on websites, anywhere that you want your pictures to load fast.
150dpi is a bigger size, and that is seen sometimes online. But that would usually be used for someone publishing actual artwork or photography.
300dpi is what a printer would need to print a color copy of anything.
72 dpi is referred to as "low resolution" and 300dpi is considered high resolution.
IMPORTANT LINKS TO KEEP HANDY:
Amazon offers a Cover Creator, but the covers are template based and it's best to learn how to use Gimp or some other free graphics program in order to make a cover. They aren't hard to do. Stay tuned for videos on how to easily make a cover.