Check out my Book Series!
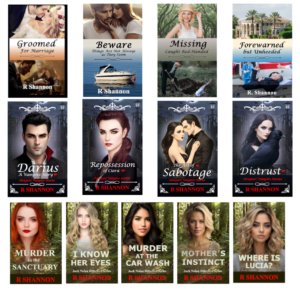
All my books have a thread of Catholicism running through them.
Ryan Mallardi Private Investigations
Jack Nolan Detective Series
Newport Vampire Stories Series
Author Marketing Website
All my books have a thread of Catholicism running through them.
Ryan Mallardi Private Investigations
Jack Nolan Detective Series
Newport Vampire Stories Series
All my books have a thread of Catholicism running through them.
Ryan Mallardi Private Investigations
Jack Nolan Detective Series
Newport Vampire Stories Series
All my books have a thread of Catholicism running through them.
Ryan Mallardi Private Investigations
Jack Nolan Detective Series
Newport Vampire Stories Series
All my books have a thread of Catholicism running through them.
Ryan Mallardi Private Investigations
Jack Nolan Detective Series
Newport Vampire Stories Series
Click above to download an 8.5" x 11" graphic from Google Drive.
All my books have a thread of Catholicism running through them.
Ryan Mallardi Private Investigations
Jack Nolan Detective Series
Newport Vampire Stories Series

Click above to download from Google Drive
All my books have a thread of Catholicism running through them.
Ryan Mallardi Private Investigations
Jack Nolan Detective Series
Newport Vampire Stories Series
 In this blog post and video, which I will post below, I'm going to go over all the steps you should take in preparing to contact an artist at Fiverr to purchase an eBook cover. These tips will be helpful to both those who have money to publish but no time and also those on a shoestring budget.
It's all about organizing your thoughts, your examples, and asking for exactly what you want. That's what this blog and video will be all about.
 I'll use my own book entitled Darius - A Vampire Story as a reference. Although the story in Darius is a modern-day contemporary story and differs greatly from the classic Dracula story, the 'low fantasy elements' like the vampire powers and magic rules are about the same. My book also has references to sex but nothing happens on the page. That is true of Dracula as well. So that's why I have chosen Dracula as my 'guiding light' book.
I go over more in the video what a 'guiding light' book is, but it almost speaks for itself. It's at least one book you are sure would fit with your book. In other words, the same readership that likes your guiding light book, those readers would most likely like your book too.
The first goal is to find the three best categories at Amazon.com. It sounds easier than it is because there are now dozens and dozens of subcategories and new genres everyday. So a little research is needed to make sure you choose the best three categories for your book and this choice will also dictate what your book cover should look like.
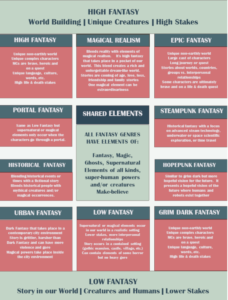 All Fantasy books contain make believe and magical powers but the subgenres differ from one another in many ways. I have an infographic that notes what the subgenres have in common and what the names of the most popular subgenres are and how they are different from each other. If you want a copy of this, you can download it here.
If you can pick out your fantasy genre from this list, you can start there. If your book is other than a fantasy book, continue reading as I will show you how to use AI to find your categories.
ONE TECHNIQUE:
You can start with a guiding light book, or a solid category. I use gemini.google.com as my go-to ai tool. I've used it several times regarding best sellers and also book categories and it's surprisingly quick and knowledgeable. Go to gemini.google.com and type right into the prompt box and then enter. I'll post three example prompts below:
It's possible to also write up a short but concise outline description of your book and ask Gemini to suggest the top 3 categories at Amazon for your book. This may be easier for you.
Either technique will work.
 Another tip I can pass on is that if you choose a classic as a guiding light book, or a popular book that has been professionally published, by analyzing those books and seeing where they are positioned, in a way you are getting the advantage of the marketing department that is behind this bestseller. The publishing companies have a marketing department and they work all day positioning books. By watching those bestsellers, you can profit, so to speak, from all of their education and know-how.

STEP ONE: Start researching the books you find using AI or using the keywords for your category. Open each book and scroll down to see what categories the book is listed in. You will see categories you have never heard of and didn't know existed. If you think the category would be a good fit for you book, click on the link and it will open an Amazon Best Seller's List in that sub-category.
This Bestseller list will give you a scrolling view of what kinds of books are positioned in this category. It will also give you a lot of information about what kind of book covers are popular in that subcategory. Pay particular attention to the colors used, are there more popular colors than others? For example, in Gothic Fiction, black and red are dominant colors as are gothic fonts. Make note of these.
As a new writer, it is tempting to want to have a "scene" on the front of the book that will represent the story, but this can be a newbie trap. It's better to have a book cover that fits the category than one that is in your favorite colors with too much action going on. You will see what I mean when you do this research.

STEP TWO: Keep notes on the names of books you find that are similar to yours. Keep notes on any categories you feel are a good fit for your book. Remember, in this process you are looking for best categories and you are also finding 3 or 4 book cover designs that you want to use as examples for the Fiverr artist.
Just a word of caution about not taking notes. You will not be able to use your memory only. By the time you open several books and categories, you will not be able to keep them all straight, so take notes!
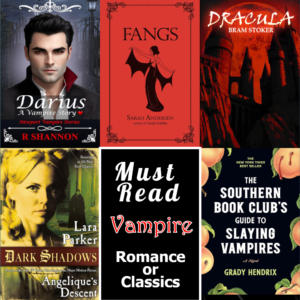 Try to put all the pictures of the books on one page. You can do this in Word. If this seems like too much work, you can save the inspirational covers and keep them all in a folder so you can upload them to your fiverr Request.
I go into details in the video below about why it's important to know which font you want to use. If you hire a Fiverr person today to make a book cover for you for $50, when you go back for a change in two months, or you have another book in the series, his or her prices could have skyrocketed. They only start out at $5.00. This happened to me and I always make it a rule to choose my own font.
Here are three websites that have free fonts:

While writing a novel, or just in today’s fast-paced work environment, we often find ourselves buried under a mountain of tasks, deadlines, and responsibilities. A feeling of being overwhelmed by your how-to lists can happen, zapping what’s left of your daily energies.
Just like a cluttered workspace, a crammed mind can hinder creativity. A break allows your brain to hit pause, letting go of unproductive thoughts and making space for fresh ideas.
Clear the cobwebs out of your mind. It’s important to take a step back to recharge your batteries. One effective way to do this is by incorporating creative breaks into your daily routine.
 When you immerse yourself in a creative activity, you allow your mind to wander and explore new ideas. This mental freedom can shake off your daily work enough to give you a respite from things.
By delving into another unrelated creative endeavor, it can also give your mind a chance to operate on its own. Be amazed at how new ideas will come to you regarding your daily work, including new strategies or shortcuts to help you get a better handle on things.
By setting your mind free to create something that has no deadline and no boss, you will create your own respite, a resting place to completely clear your mind.
 After just a short hour or so of this creative activity, your mind will be clear. You will begin again with a rested mind, a mind that has been on a creative journey and will bring with it renewed energies and even new and better ideas.
This respite will also reduce stress and anxiety. Even if you add this respite and need to make it up on the other end, it can still make your work more enjoyable. It can whisk you away from that point where you want to pull your hair out.
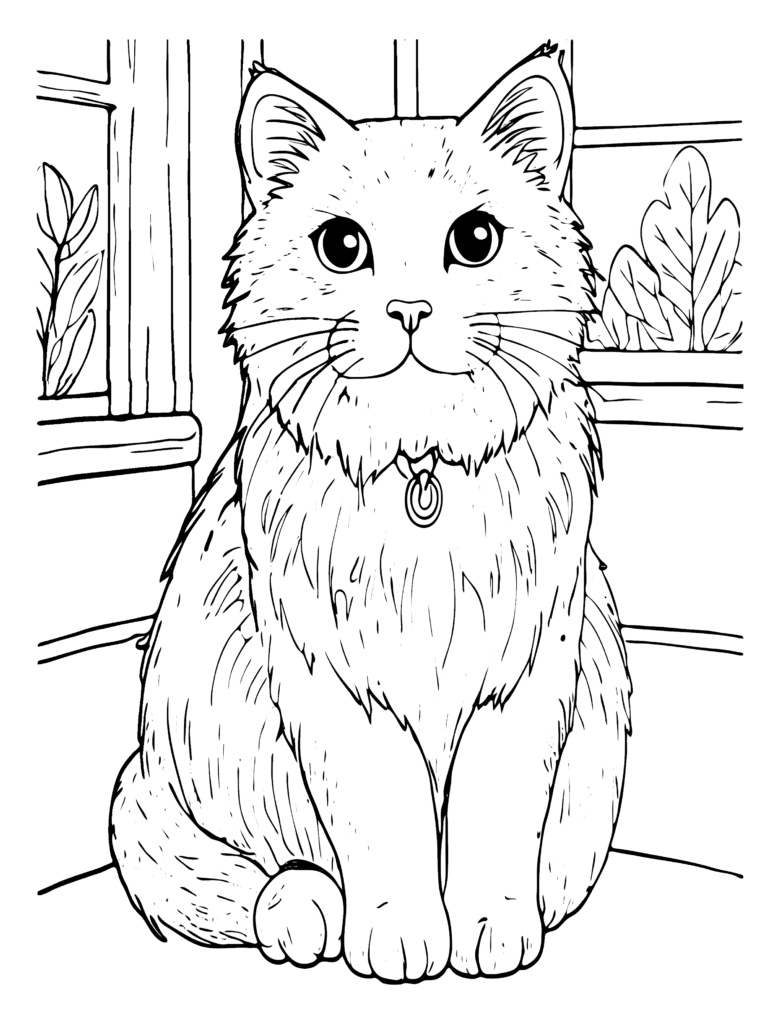
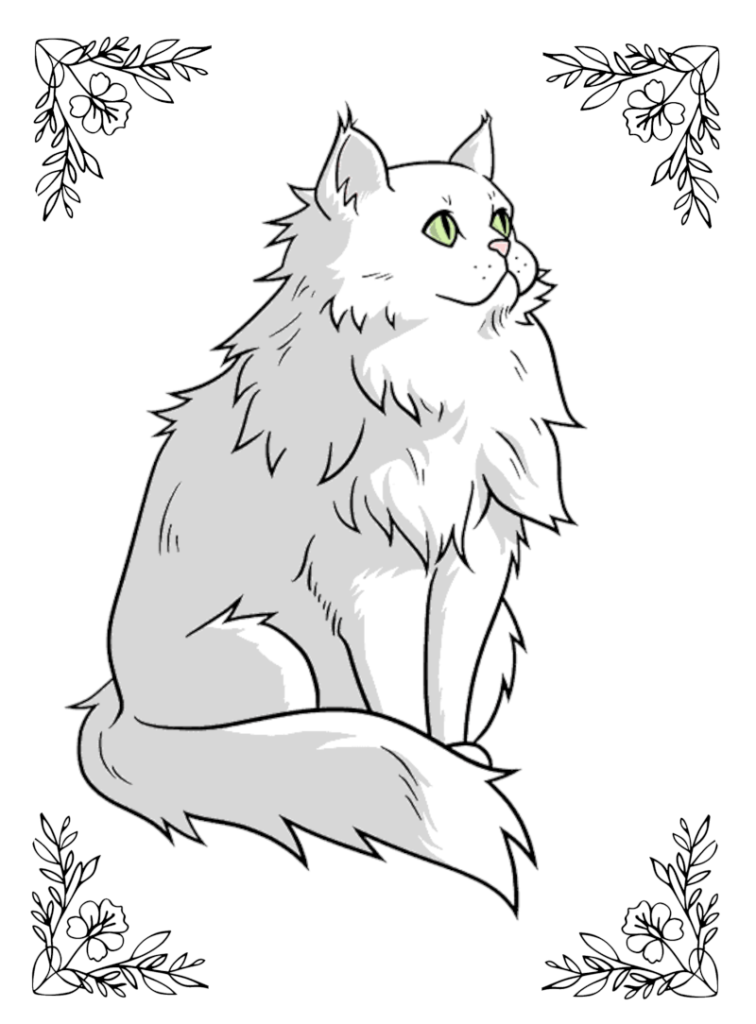
TRY IT – HERE IS A COLORING PAGE OF A CAT WITH FLOWERS.
Click on image to download a pdf from Google Drive
 I’ve always found that infographics can give you an instant bird’s eye view of any information, system, or strategy that makes understanding the information so much easier.
I’ve also found that organizing information in a way to make an infographic is a good way to actually study a subject. Most of the style of infographics come from color, symbols, icons, and shapes. The test of it is made up on bis and pieces of organized information.
 The last few times I was wrestling with learning something, I “took notes” and then organized them into an infographic or two. What I found was that the process was easier than I thought.
After analyzing what makes an infographic, I realized that it all starts with the organized information set up in some kind of hierarchy, sectioning or divisions
Once you know how many containers of information you will need, your design begins there. The rest of it is color choice, container sizes and shapes, and whatever illustrations, charts or icons you want to use to dress it up.
 Once you are done, you know the material much better. And with an infographic now in your hands, it’s easy enough to pass it on. People love to have easy-to-understand information or directions at their fingertips!
If you would like to download an infographic about organizing information for infographics, sign up below. This list only gets one email newsletter a month with other infographics, sales, deals and steals.
 This is a shortcut for self-published authors and writers who are creating their own book covers. This will save you at least two hours in design time and even more if you are a beginner.

My chosen size for the Hardcover book is 6 x 9 inches. My paperback is in a 5.06 X 7.81. So I'm only going up about an inch. This technique won't work if you need to grow your book cover much more than that. But with the amount of time saved, it may be worth the trial!
 You need to get the proper hardcover template from KDP. There is a Paperback and Hardback calculator here
You need to know the exact number of pages your hardback book is. Special note to beginners: This isn't the book page count. This is the real page count when you count all of the skipped "even pages" before the chapter odd pages. For example: My Sanctuary book has 257 pages but the real count is 262. So when I went to the KDP calculator, I entered 262 as the page count.
Once the KDP Hardcover Calculator creates the book cover template, download to your computer. You may have to open the zip file. If you have any trouble with it -- like I did in the video below -- try shortening the name of the folder. When I shortened the name, I was able to extract the files in the zip folder.
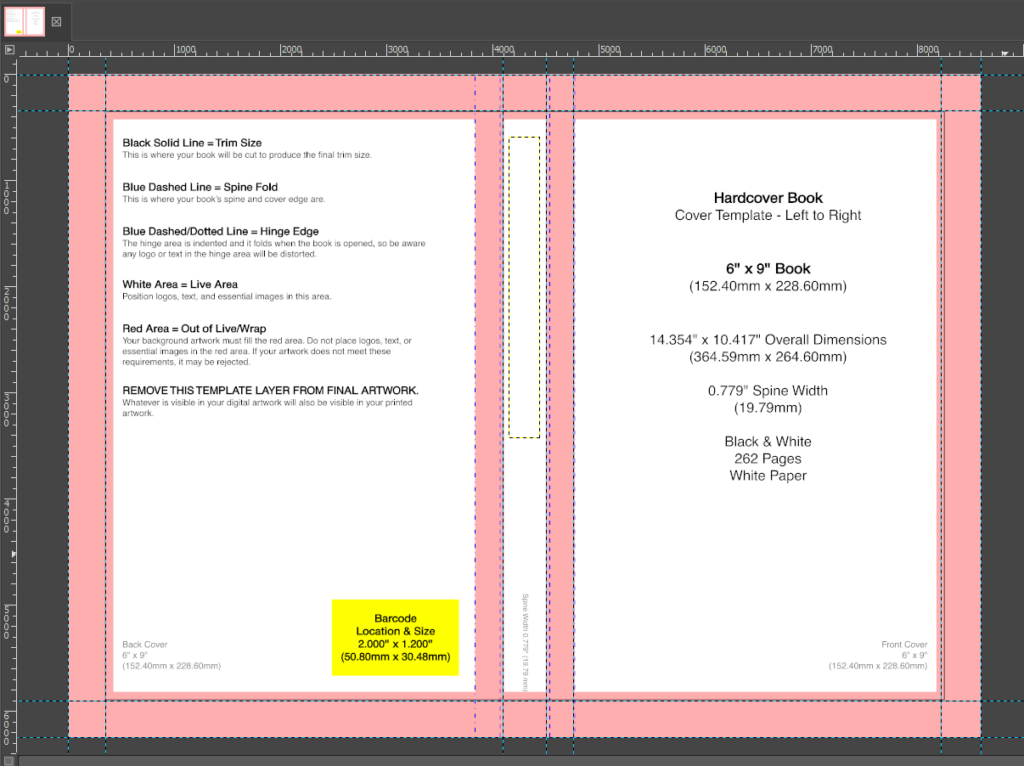 Open the hardback cover pgn document in Gimp. Everything in pink is margin. The spine text must fit into the white area in the center between the front and back.
The first order of business is to put guides around the pink margin areas. If you don't know what this means, check the video below where I show you how to do it.
Pull up a jpg of your paperback cover. You cant use the gimp file with all the layers. If you do, you will go insane. So make sure it's a single document. If you saved it as a pgn, that will work too. Open the cover as one layer, either a jpg or a png file.
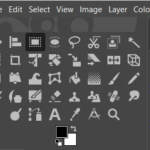
Choose the Gimp Selection tool -- it's the second or third one in the top row -- and drag a selection box around the front of your ebook.
Right click on the selection area and choose Edit > Copy visible. This tells Gimp to only focus on the selected area. Now it's copied to your invisible clipboard.
Click on FIle > Create > From Clipboard. This will take the front cover from your clipboard and throw it into a new image. Save that as the frontcover.jpg. Do the same for the back cover.
Referring to the template with the pink margins above, bring in the front and back covers you just saved. File > Open as lawyer > find and click on the individual jpg files.
Once you bring in the front cover, click on the move tool, and put the front cover inside the white area in the template. Center it as best you can.
Click on the Resize tool and click on the front cover image. You will see a dialogue box come up and lines with boxes will form around your image. Hold your control key and grab one corner of the image and drag out slowly, making sure to fit the cover exactly into the white area. Avoid the spine area.
Repeat this process for the back cover.
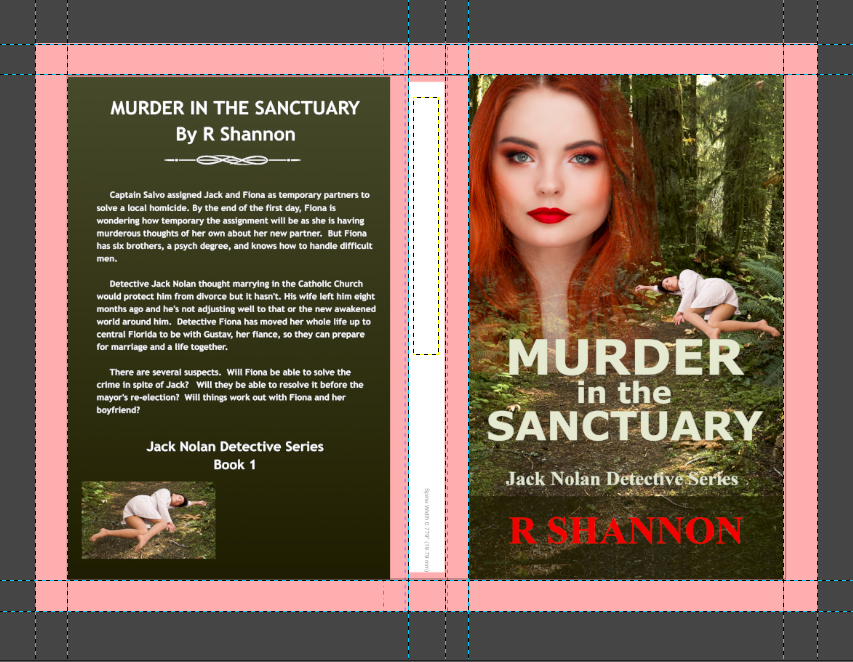
This is what your cover should look like now. Just has the front and back in place. Notice that neither cover is going into the pink margin areas.
In my cover, I used a gradient as my original background color. As I demonstrate in the video below, using the color eyedropper, I made my foreground color the lighter olive green and the background color the dark olive green.
Then using the gradient tool and holding my shift key down to keep my line straight, I drew a line from top to bottom, inserting a new background that is the same as my original background.
If you used a picture scene as your background, you will bring in the picture as a new layer. File > open as layer > and click on your background picture. Just as you pulled your front and back covers into place using the resize tool, do the same with your background.
 Once my background was in place. The only thing left was adding a new spine that fit exactly into place.
My text is white, so I changed my foreground/background colors back to black and white. I made sure my foreground color was white as that is the color the text tool pulls from.
Click on the text took and type in your title. Highlight it all and increase or decrease the size that will fit into the spinal area. Make sure you are looking at the guides. The title and author need to fit in the center of these guides.
Once I was finished typing and resizing my title, then it's time to click on the rotate tool. This took throws up a dialogue box too. In this box, type in 90 in the top area. Then click Rotate. It will put your text into position to be moved into place using the move tool.
Do the same for the Author name. Special Note for Beginners: If you need to change the text after it is rotated, Gimp will need to take the text back to being text. Once you rotate it, it makes it into an object.
So if you need to do that, simple click on the right layer, and click on the text tool and then click on the title. Gimp will then automatically return it to being text only. Fix the text size and you will need to rotate it again.
Once you have created the new spine, you're done. Save the document as a gimp file. Then export as a jpg file. I never save from a gimp file directly to a pdf, because when I do, I have had problems with the text falling off the page. It may have been corrected through the years with Gimp, but I still export first as a jpg and then I open the jpg and export that as a pdf.