Miscellaneous – Read First Chapter.com

Inflation Busting #8 – House Cleaning Products & Paper Towels

Inflation Buster #8: DIY Floor Cleaners & Reusable Paper Towels

Welcome back to our Inflation Buster series! Today, we are targeting another major area where sneaky "Cash Eaters" live in your budget: house cleaning products and single-use paper towels.

Between disposable mop pads, specialized tile and hardwood sprays, duster refills, and constant rolls of paper towels, keeping a house clean can feel like feeding an insatiable money pit—not to mention the synthetic chemicals brought into your home.

The good news? You can ditch the chemical cleaners and disposable tools for simple, budget-friendly DIY alternatives that cost mere pennies to make and work just as well (if not better!).

The Ultimate Low-Cost Cleaning Tool: The Cuban Mop

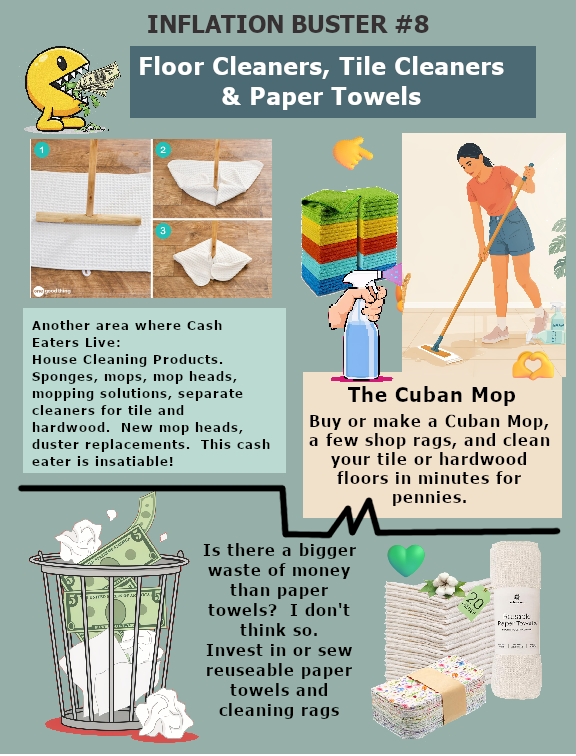
Instead of buying pricey commercial mop systems with disposable pads and expensive refill bottles, consider a Cuban mop. It’s a simple T-shaped wooden stick that uses standard cloth rags folded around the head—no plastic clips, no single-use pads, and no unnecessary gadgetry.

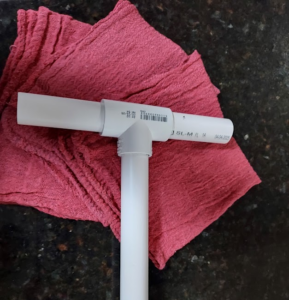
DIY Your Own Mop for Under $5!


You don't even need to buy a store-made Cuban mop. You can easily build your own custom version using:

  • ½-inch PVC pipe

  • A PVC T-connector

DIY Tip: Make the base piece slightly smaller than standard Cuban mop models. This makes the mop lighter and allows you to reach into tight corners and smaller spaces that standard mops can't hit!

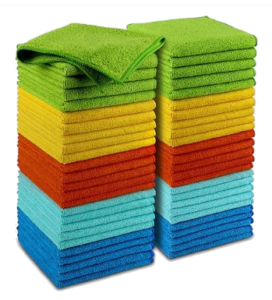
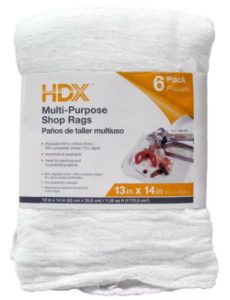
Pair your mop with a few inexpensive shop towels or car-washing microfiber cloths. Be sure to look in the car section or tools/hardware sections in the big box stores because kitchen towels cost about quadruple the amount of car washing towels and shop towels.

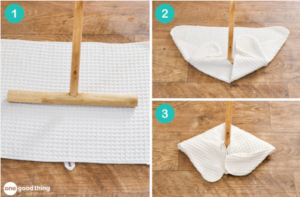
For the PVC/Cuban mop method, you can cut a small hole or slit in the center of the towel to slip it right over the handle before wrapping it around the head.  This is the way I do it.  However, some women wrap a towel around the mop as shown in the diagram.

Stop Burning Money on Paper Towels

Is there a bigger waste of household money than paper towels?  Tossing out 30 to 40 sheets a day is essentially throwing dollar bills straight into the trash can.  Paper towels are costly with one or two people, but in a family, it can create its own financial problem.

Even keeping small kitchen paper napkins for single-wipes can be a savings, but buying any kind of paper products (except toilet paper, of course) is a complete waste of money!

The Fix: Use those same shop rags or microfiber towels as reusable paper towels.  It only takes a few days to retrain yourself and family members to use the clean rags instead of reaching for another paper towel.  Shop rags are 100 times more absorbent than even Bounty!

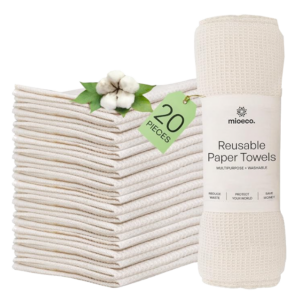
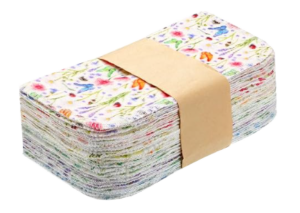
They even sell re-useable paper towels and re-useable cleaning rags, so a one-time purchase of these can set you up to save big as the weeks go by without any paper towel purchases.  I still keep paper towels to clean tops of jars, etc., but one roll lasts me over a month -- sometimes up to 3 months!

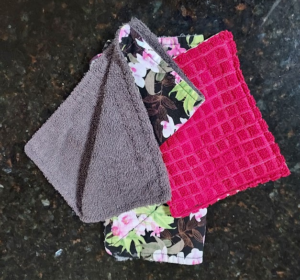
  • DIY Sewing Idea: If you want something prettier for your kitchen, invest in commercial reuseable paper towels as shown here, or if you like to sew, stitch a pretty patterned fabric onto one side of a shop rag or inexpensive face cloth. Stack them in a basket on your counter, use them for daily spills, and throw them straight into the laundry!

3 Simple, Eco-Friendly DIY Cleaner Recipes

Ditch the toxic store-bought sprays and whip up these effective, natural recipes using everyday ingredients.

1. Hardwood & Tile Floor Cleaner

  • 3 cups Water

  • ¼ to ⅓ cup Vinegar

  • ½ tbsp Dr. Bronner’s Biodegradable Sal Suds (for extra cleaning power)

  • 5–10 drops Essential oils (optional, for scent)

2. Specialized Wood Flooring Cleaner

(Always test on a small hidden spot first)

  • 3 cups Water

  • ½ cup Vinegar

  • 1 tbsp Castile soap

  • 15–20 drops Lemon essential oil

  • 5 drops Tea Tree essential oil

3. Daily Shower Spray

Keep soap scum at bay without harsh fumes.

  • 3 cups Water

  • ½ cup Hydrogen peroxide

  • ½ cup Rubbing alcohol

  • 1 tbsp Dishwashing liquid (or Dr. Bronner's Sal Suds)

  • 1 tbsp Dishwasher rinse aid (optional)

  • Combine all ingredients in a standard spray bottle.

How to Clean Tile & Hardwood Floors in Minutes

Here is the quickest, easiest routine for sparkling floors using your DIY setup:

  1. Prep: Vacuum or sweep all loose dust and dirt off the floors.

  2. Dampen the Cloth: Spray a shop rag or car-washing microfiber towel generously with your DIY Floor Cleaner. (For hardwood, keep the cloth damp rather than soaking wet).

  3. Mop: Slip the towel over your Cuban mop and wipe down the floors. No rinsing required!

  4. Spot Clean: For stubborn spots, spray the solution directly onto the floor and scrub with the mop.

  5. Switch as You Go: For larger homes, flip the shop rag over to the clean side or toss it in the laundry hamper and grab a fresh one.

Bonus Polish for Hardwood: Once your hardwood floors are clean and dry, spray a fresh shop rag with a little Murphy’s Oil Soap or Pledge and run it over the floor. In just minutes, you’ll leave behind a rich, subtle shine!

Summary Checklist to Save This Week:

  • Build or buy a simple Cuban mop.

  • Swap paper towels for shop rags / cloth towels.

  • Mix up a bottle of DIY Floor Cleaner with Sal Suds or Castile soap.

writing-in-layers-short-list

Have a peek behind a real novel.

Check out my novelette Writer's Block that I wrote and narrated!  It's available on Audible but if you want to download for free, click below to get professional audiobook delivery from Bookfunnel

I wrote and narrated it.  It's my first attempt at narration!

Inflation Busting #4 – Room & Laundry Deodorizers

Inflation Buster #4: Stop Burning Cash on Store-Bought Air Fresheners

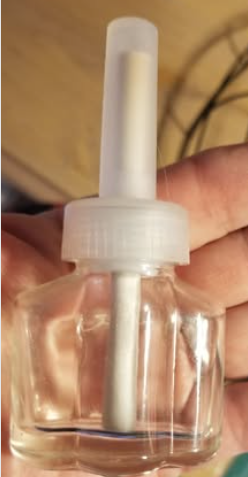
Commercial air fresheners and fabric sprays are sneaky cash eaters. Store-bought plug-in refills hold a tiny fraction of liquid—often just 0.38 oz per bottle—yet can easily set you back $120 or more a year just to keep a small home smelling fresh. The good news is that you do not need to keep paying name-brand prices. With a few basic household ingredients, you can make your own plug-in refills and fabric fresheners for pennies.

Here is how you can slash your budget, ditch the artificial chemicals, and keep your home smelling amazing.

Save Big with DIY Plug-In Refills

Instead of tossing out your empty plug-in bottles and buying expensive store replacements, reuse them!  This simple recipe costs next to nothing to whip up.

Ingredients & Tools

  • Empty plug-in air freshener bottles
  • A butter knife

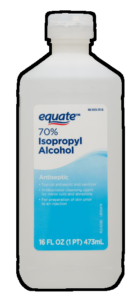
  • Equate 70% Isopropyl Rubbing Alcohol (or similar)

  • Essential oil of your choice (such as lavender)

  • Water

  • A dropper

Step-by-Step Instructions

  1. Remove the Cap: Use a butter knife to gently pry off the cap or wick assembly from your empty air freshener bottle.

  2. Add Alcohol: Fill the bottle halfway with rubbing alcohol.

  3. Add Scent: Using a dropper, add about 8 drops of your favorite essential oil directly into the alcohol.

  4. Top It Off: Fill the rest of the bottle with water, snap the cap back on, and give it a gentle shake. You are done!

Non-Toxic DIY Fabric Spray (Febreze Alternative)

Why buy expensive fabric deodorizing sprays when you can make a non-toxic version at home? This simple mix uses alcohol and baking soda to neutralize tough odors rather than just covering them up.

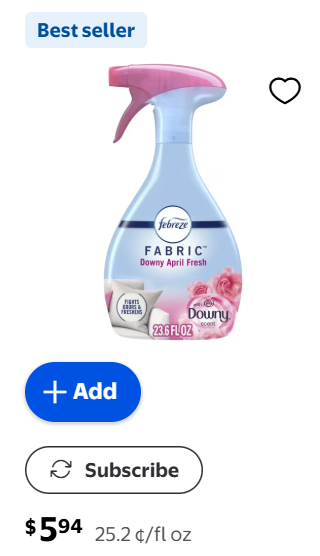
Here is Walmart's best seller, Febreeze spray -- almost $6.00 for a small bottle.  This is one of the products that has quadrupled in the last two years!

There comes a time when paying for convenience turns into gouging.  In my opinion, Febreeze and other deodorizing sprays have crossed the line into gouging the public.  Especially when you see below how easy and inexpensive it is to make your own!

Basic Essential Oil Fabric & Room Spray

Ingredients:

  • ¼ cup isopropyl alcohol (vodka or witch hazel also work great)

  • ½ cup distilled water

  • 15–25 drops essential oil (lavender, citrus, or peppermint)

Instructions: Pour the alcohol and water into a clean spray bottle. Add your essential oils, shake vigorously, and spray onto furniture, curtains, or into the air.

Heavy-Duty Odor Control Option

For extra-stubborn odors, mix 1 tablespoon of baking soda with 15–25 drops of essential oils first. Then, stir that mixture into 1 cup of distilled water and 1 cup of alcohol before pouring it into your spray bottle.

Bonus Laundry Hacks: DIY Softeners & Sheets

While you are tackling room deodorizers, take your savings into the laundry room with these easy, natural fabric softeners.

100% Natural Wool Dryer Balls

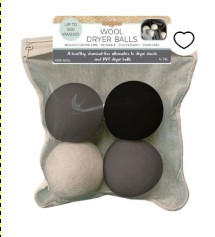
Skip chemical dryer sheets entirely.  You can pick up four laundry balls on your next run to Walmart or other supermarket.  They cost slightly more than one bottle of fabric softener but you can use them over and overr again.

If there are any knitters or crocheters out there, to make wool dryer balls yourself, wrap 100% wool roving tightly around your fingers to form dense balls. Wash and dry them repeatedly in hot water to felt the wool. Toss 3–6 felted wool balls into the dryer with your laundry to naturally soften fabrics, reduce static, and cut down overall drying time.

DIY Washing Machine Fabric Softener

Mix up a batch of liquid softener to add directly to your wash cycle.

Ingredients:

  • 2 cups water

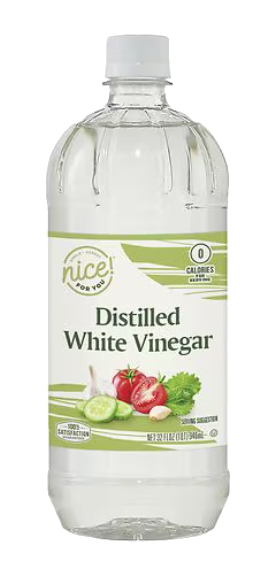
  • 2 cups distilled vinegar

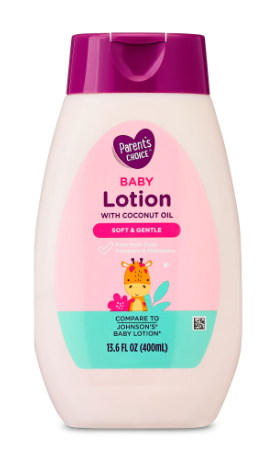
  • Food-grade vegetable glycerin (optional, acts as a conditioner)  You can also use baby lotion as that is manufacturered for a baby's skin!

  • 20–30 drops essential oils (optional for scent)

How to Use:

Add ½ cup of this liquid directly to the final rinse cycle of your washing machine.

DIY Reusable Fabric Sheets & Sponges

You can also turn your homemade liquid softener into reusable dryer/washer sheets!

  1. Pour 1 cup of the DIY liquid fabric softener mixture into a mason jar.

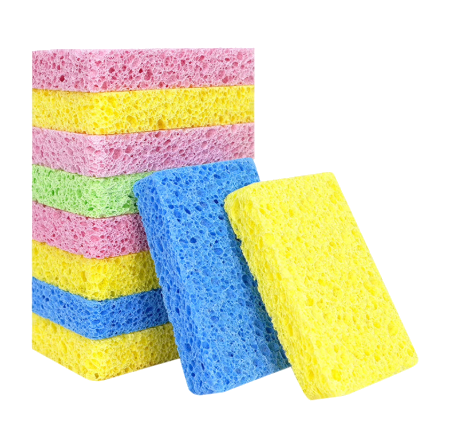
  2. Grab a few inexpensive sponges or face cloths from the dollar store. Cut the sponges into halves or quarters.

  3. Submerge the cut sponges or cloths into the liquid inside the mason jar.

  4. Wring out one sponge or cloth and toss it in with your laundry load to keep clothes soft without ongoing store expenses.

writing-in-layers-short-list

Have a peek behind a real novel.

Check out my novelette Writer's Block that I wrote and narrated!  It's available on Audible but if you want to download for free, click below to get professional audiobook delivery from Bookfunnel

I wrote and narrated it.  It's my first attempt at narration!

Inflation Busting #3 – Laundry Room Cash Eaters

Inflation Buster: Get Rid of the Cash Eaters in Your Laundry Room

If you take a close look at your monthly household expenses, you’ll quickly spot a few sneaky "cash eaters"—everyday products that cost way more than they should while draining your budget bit by bit.

One of the biggest offenders hiding in plain sight? Store-bought laundry detergent.

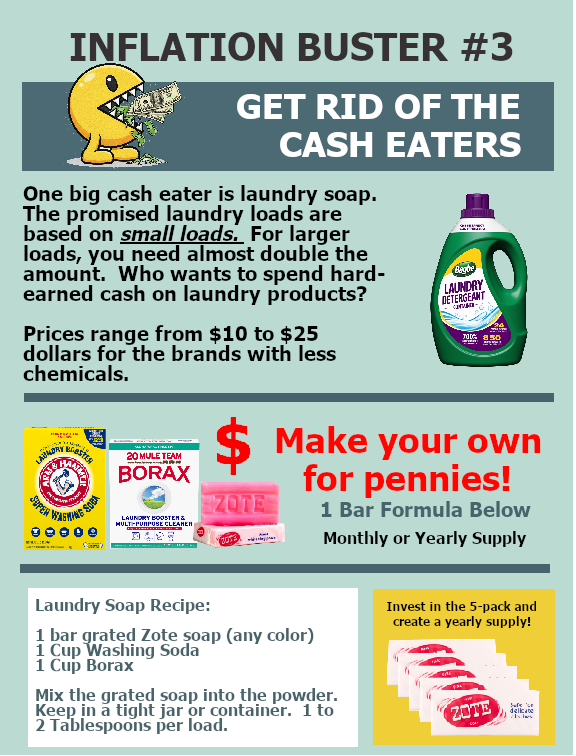
Commercial laundry soaps—especially the brands advertised with fewer chemicals or for sensitive skin—can easily run anywhere from $10 to $25 per bottle. To make matters worse, those "100 loads" promised on the front label are almost always based on tiny loads. Once you fill the tub for a normal or large family load, you end up using double the recommended amount, causing your money to wash right down the drain.

Fortunately, you can reclaim control over your laundry routine and save serious money by making a few simple, high-impact changes.

Make Your Own Laundry Powder for Pennies

Instead of spending top dollar on commercial detergent, you can whip up your own powerful, low-chemical laundry soap at home for just a fraction of the cost.

The 1-Bar DIY Laundry Soap Recipe

Ingredients:

  • 1 bar Zote soap (grated, any color)

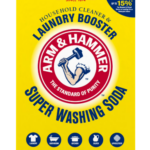
  • 1 cup Washing Soda (Arm & Hammer Super Washing Soda)

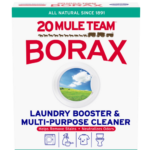
  • 1 cup Borax (20 Mule Team Borax)

Instructions:

  1. Grate the bar of Zote soap finely using a hand grater or food processor.

  2. In a large bowl, mix the grated soap thoroughly with the washing soda and Borax.

  3. Transfer the mixture to an airtight jar or container.

How to Use: Use just 1 to 2 tablespoons per load.

Pro-Tip for Maximum Savings: Buy a 5-pack of Zote soap bars to mix up a batch that can easily last your household for months—or even a full year—for a tiny upfront investment.

Keep your eyes open if and when you're in Walmart or any of the Dollar Stores.  They often carry Zote or a sister product in their laundry or soap aisles.

I keep a list of "Always Looking for These" and Zote laundry soap is on it.  I read this list every time I enter a big box store to refresh my memory for things I'm always looking to replenish or things I'm looking for a good deal on.  It also prevents me from wandering aimlessly through the stores.  I know exactly where I want and need to look.

The Power of Pre-Soaking: Target Deep Dirt and Stubborn Spots

If you have clothes with set-in grime, underarm yellowing, or stubborn food spots, don't waste money buying expensive specialty stain removers or dumping extra detergent into the wash. Instead, rely on pre-soaking.

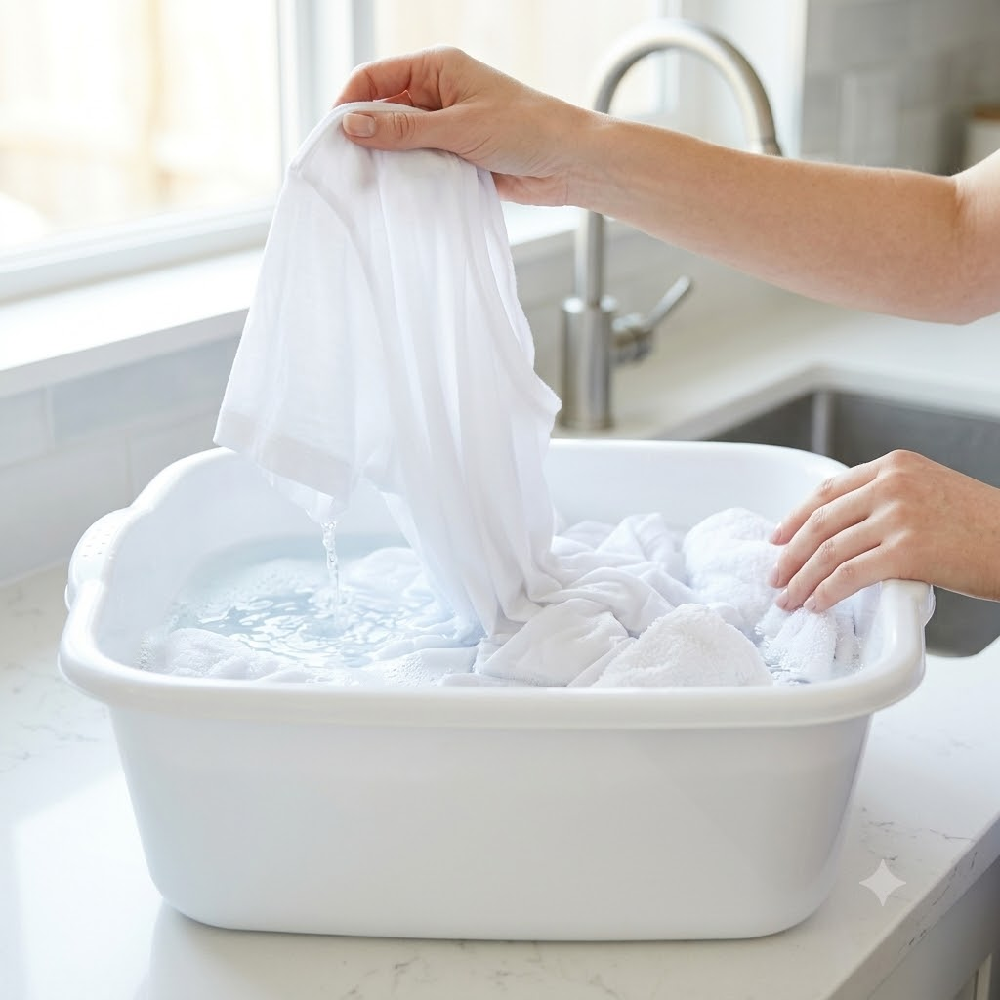
Before running a standard wash cycle, fill a bucket or your washing machine basin with warm water and a scoop of your DIY mix (or a little extra washing soda and Borax). Submerge your heavily soiled items and let them soak for 2 to 4 hours—or even overnight for extreme stains.

Why this works:

  • Breaks down oils and dirt: Giving the cleaning agents time to work without agitation allows deep-seated oils and grime to loosen naturally.

  • Brighter whites without harsh bleach: Borax and washing soda act as natural water softeners and boosters, delivering significantly whiter whites and brighter colors without damaging fabrics.

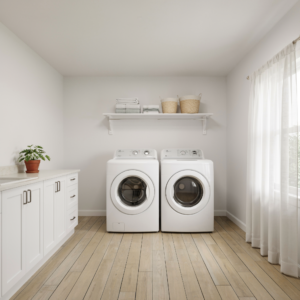
Slash Electric Bills with a Stand-Up Drip-Dryer

Your clothes dryer is one of the single most energy-hungry appliances in your home. Running it multiple times a week quietly jacks up your monthly electric bill.

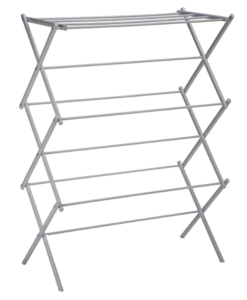
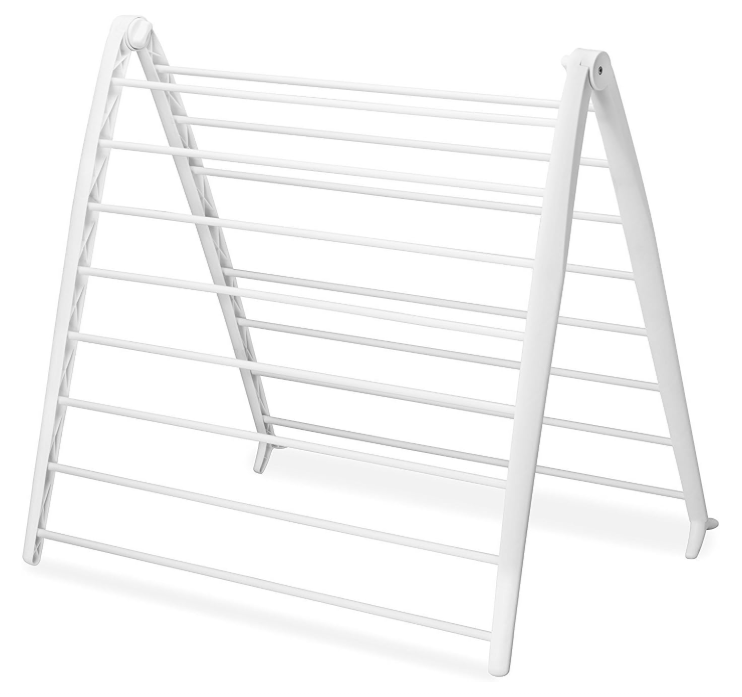
An easy, zero-electricity alternative is to invest in a stand-up clothing drip-dryer or drying rack.

  • Drying Indoors or Out: Set up a folding drying rack in a laundry room, guest room, near a sunny window, or outside on a porch or patio.

  • Fabric Preservation: Tumble drying bakes heat into fibers and causes friction that wears out clothing, fades colors, and causes shrinkage. Air-drying keeps your wardrobe looking new much longer.

  • Zero Cost Per Load: Every load you air-dry is money kept directly in your pocket.

Phasing Out High-Maintenance "Dry Clean Only" Clothes

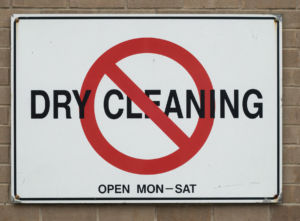
Dry cleaning is another hidden cash trap that eats away at a frugal budget. Paying $5 to $15+ per item every few weeks adds up fast.


To build long-term financial resilience, start making a conscious shift away from dry-clean-only fabrics:

  • Audit Your Closet: Identify high-maintenance items and evaluate whether they can be gently hand-washed or washed on a cold delicate cycle at home (many polyesters, rayons, and blends can be).

  • Buy Washable Replacements: As dry-clean-only clothes wear out, gradually replace them with stylish, washable alternatives like machine-washable knits, cotton blends, and high-quality synthetics.

  • Adopt Frugal Habits for the Long Haul: Whether you swap these items out temporarily to weather inflationary times or make it a permanent lifestyle upgrade, eliminating dry-cleaning bills creates permanent room in your budget.

Take Back Your Laundry Budget Today

Trimming the fat from your budget doesn't mean compromising on clean, fresh clothes. By mixing your own laundry powder, utilizing pre-soaks, air-drying, and ditching expensive dry cleaning, you can eliminate the "cash eaters" in your laundry room once and for all!

writing-in-layers-short-list

Have a peek behind a real novel.

Check out my novelette Writer's Block that I wrote and narrated!  It's available on Audible but if you want to download for free, click below to get professional audiobook delivery from Bookfunnel

I wrote and narrated it.  It's my first attempt at narration!

Inflation Busting #7 – A Second Life for Bread & Fruit

Inflation Busting #7: Give Your Kitchen Scraps a Delicious Second Life

With grocery prices doing what they do, throwing away food feels like tossing cash right into the trash. But two of the most common kitchen "waste" items—fruit that’s starting to look a little tired on the counter, and those end slices of bread nobody wants to eat—happen to be the exact ingredients for two incredible, budget-saving treats.

Here is how you can stretch your food budget, eliminate waste, and dress up your daily meals without spending an extra dime.

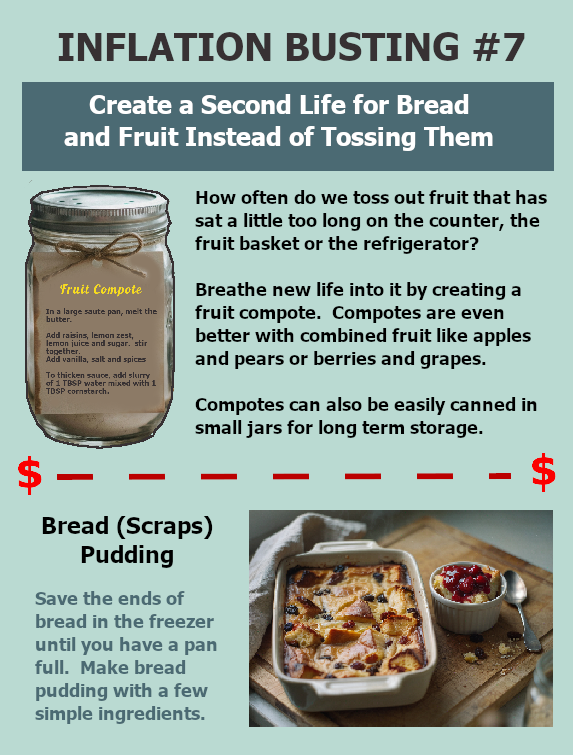
1. Quick Warm Fruit Compote

Instead of tossing out apples, pears, or berries that have sat out a bit too long, turn them into a rich, sweet compote.

Why It Saves You Money

Forget buying expensive flavored syrups, dessert toppings, or specialty jams. Fruit compotes make amazing toppings for everyday staples you already have in the kitchen:

  • Breakfast: Spoons perfectly over oatmeal, pancakes, waffles, yogurt, or buttered toast.

  • Desserts & Snacks: Elevates plain ice cream, cheesecake, pudding, cake, or even a cheese & cracker board.

Great Fruits to Use

Strawberries, peaches, blueberries, raspberries, blackberries, cherries, pears, apples, or cranberries.

Ingredients

  • Fresh fruit, chopped into small pieces

  • 1 tbsp butter

  • 1/4 cup raisins

  • 1 tsp lemon juice & lemon zest (orange works great, too!)

  • 3 tbsp sugar or sugar substitute

  • 1/2 to 1 tsp vanilla extract

  • 1/8 tsp nutmeg

  • 1/8 tsp ground ginger

  • 1/8 tsp cloves or allspice

  • Slurry: 1 tbsp water mixed with 1 tbsp cornstarch

Cooking Directions

  1. Melt the butter in a large sauté pan over medium heat.

  2. Add the fruit, raisins, lemon zest, lemon juice, and sugar. Stir together.

  3. Stir in the vanilla extract and spices.

  4. To thicken into a rich sauce, stir in the cornstarch slurry and simmer for a minute until clear and thickened.

Storing Your Compote: Freezing vs. Water-Bath Canning

If you have a bumper crop or a mountain of leftover fruit from a barbecue or party, save it for later!

Option A: Freezing (Short to Medium-Term)

  • Best Method: Cook the compote without the cornstarch slurry. Freeze in small, individual portion containers for 8 to 12 months. When ready to use, thaw, reheat, and stir in your cornstarch slurry right on the stove.

  • Want to freeze it pre-thickened? Swap cornstarch for ClearJel, Tapioca starch, or Arrowroot before freezing, as standard cornstarch can break down and get watery after thawing.

Option B: Water-Bath Canning (Long-Term Storage)

Want pantry-stable jars? You can safely water-bath can your compotes, but you must follow core home-canning safety rules:

  1. Prep Safely: Peel and core apples and pears (do not leave skins on). If using Asian pears, you must add commercial bottled lemon juice to ensure proper acid levels.

  2. NO Thickeners: Never add cornstarch, flour, or tapioca to jars before canning. It interferes with heat distribution and is unsafe. Thicken after opening the jar later.

  3. Hot Pack: Bring cooked fruit and liquid to a rolling boil. Ladle into warm jars, leaving 1/2-inch headspace.

  4. Process: Remove air bubbles, wipe rims, and process in a boiling water-bath canner (15 minutes for pints, 20 minutes for quarts at 0–1,000 ft elevation). Let cool 12–24 hours and test seals.

2. Freezer Bread Scrap Pudding

Never throw away bread heels, crusts, or stale slices again! Keep a zip-top bag in your freezer and toss in bread ends whenever you have them. Once you have enough to fill a baking dish, it's time for comfort food.

Ingredients

  • 6 slices day-old (or thawed freezer scrap) bread, torn into pieces

  • 2 tbsp unsalted butter, melted

  • 1/2 cup raisins (optional)

  • 2 cups milk (or swap in evaporated/sweetened condensed milk for extra richness)

  • 3/4 cup sugar or sugar alternative

  • 4 large eggs, beaten

  • 1 tsp ground cinnamon

  • 1 tsp vanilla extract

Directions

  1. Preheat your oven to 350°F (175°C).

  2. Place the torn bread pieces and raisins into a baking dish. Drizzle the melted butter over the top and allow it to soak into the bread.

  3. Make the Custard: In a bowl, whisk together the milk, sugar, eggs, cinnamon, and vanilla until thoroughly combined.

  4. Pour the custard mixture evenly over the bread and raisins.

  5. Let it sit and soak for about 20 minutes while your oven finishes heating up.

  6. Bake for 45 minutes until set and golden brown. Serve warm!

Once you begin to feel the ease and convenience of these methods, you may find yourselves taking advantage of the seasonal fruit sales, thinking ahead to these delicious compotes, healthy food additives, and bread puddings!

writing-in-layers-short-list

Have a peek behind a real novel.

Check out my novelette Writer's Block that I wrote and narrated!  It's available on Audible but if you want to download for free, click below to get professional audiobook delivery from Bookfunnel

I wrote and narrated it.  It's my first attempt at narration!

Inflation Busting #2 – The Sell-to-Buy Strategy

Inflation Busting #2: Master the Art of "Sell to Buy"

Welcome back to Part 2 of our Inflation Busting series!  In our last post, we kicked off our journey by looking at quick ways to stretch your dollar and stop inflation from eating away at your hard-earned cash.  Today, we’re shifting gears from just cutting costs to actively bringing money back into your household budget.

The concept is simple but powerful: "Sell to Buy."

Instead of opening your wallet or reaching for a credit card when you or your family need something new, turn around and see what you already have—or what you can acquire for free—to cover the cost.  This is a great technique for not only finding money at home, but it can be a solution to the accumulation trap.  (Those of you who have had to deal with an elderly relative's home after they died will know what I mean!)

1. Local Flipping: Nextdoor.com & Facebook Marketplace

When you need something new, commit to making your budget net-zero.

  • Need new clothes?  List a bundle of outgrown or unworn clothes online.  See my shopping tip below to create more 'clothing bundles' that can attract more customers!

  • Need a new dining room table?  Sell your current set first to fund the swap.

Watch for Freebies

One of the easiest ways to build your buying fund without spending a dime upfront is leveraging the "For Sale & Free" tab on Nextdoor.com.  People frequently post perfectly good furniture, home decor, toys, and household items just to clear out space quickly.  Pick up a solid free item locally, clean it up, take a few great pictures, and re-list it on Facebook Marketplace.

Those $20 and $30 wins add up fast into a serious fund for your own household purchases!

And if you search 'free' on Marketplace, you can find giveaway furniture, clothing and bric-a-brac.

2. Expanding to eBay & Etsy (With a Smart Shipping Routine)

If you have smaller items, collectibles, vintage goods, or unique crafts, widening your reach to platforms like eBay and Etsy opens you up to millions of buyers nationwide.

To keep this from taking over your schedule, streamline your listing and shipping routine.  I did this for years while working a full-time legal assistant job!  Check out the strategy below:

  • The 5-Day Monday Strategy: List your items on Monday using a 5-day auction or sale window.  This creates urgency for buyers and aligns all your closing times for the end of the week.

  • Batch Your Shipping:  Don't waste time and gas making daily runs to the post office.  Create a free account at USPS.com to weigh, pay for, and print your postage labels directly from home.  Pack up your orders as they close and make just one single drop-off trip on Saturday morning.

3. Become a Big Box Clearance Hunter

Want another simple way to keep your resale inventory stocked? Make it a habit to check the hidden corners of your local big box stores.

Every major retailer has specific shelves or clearance endcaps tucked away in the back corners of the store. Next time you're swinging in to grab groceries or everyday essentials, take two minutes to check those racks.  If you're a first-timer, you may need to hunt to find these little hiding places, but it's worth the effort.

Big box stores will practically give away perfectly good, brand-new merchandise to clear shelf space for upcoming holidays—whether it's clearing inventory for Halloween, Christmas, or Mother’s Day—or just making room for current bestsellers.  Grabbing an item marked down to next to nothing and putting it up on Marketplace or eBay is an effortless way to keep your resale profits rolling in.

PRO TIP:  Once you find a nice item, take advantage of the store lighting and the item being on an eye-level shelf to take your pictures even before you put it into your trunk!

Get the Whole Family Involved!

Resale hunting doesn't have to be a solo chore. Get the kids involved in the treasure hunt!  Turn weekend trips to garage sales, BOGO sales, Nextdoor freebies, and neighborhood Junk Days into a game.  Teaching them how to spot value, bargain, and sell is a fantastic hands-on lesson in practical finance that pays off for the whole family.


Stay tuned for Inflation Busting #3, where we'll dive into another practical strategy to keep your hard-earned money right where it belongs: in your pocket!

writing-in-layers-short-list

Have a peek behind a real novel.

Check out my novelette Writer's Block that I wrote and narrated!  It's available on Audible but if you want to download for free, click below to get professional audiobook delivery from Bookfunnel

I wrote and narrated it.  It's my first attempt at narration!

Inflation Busting #1 – Bulk Buying & Cooking

Beat Inflation at the Dinner Table: Buying & Cooking in Bulk.

Whether you live alone and only cook occasionally for one, or you have a tribe of kids, this method of watching the sales, buying in bulk, cooking in bulk, and storing in individual meals works for anyone or everyone.

In retirement, this method helps me cooks once a month!  I'm not kidding.  Plus, it's ALWAYS worth my while to go where the sales are.  I don't get a sale on one chicken dinner -- it winds up being a sale on all of my chicken dinners!

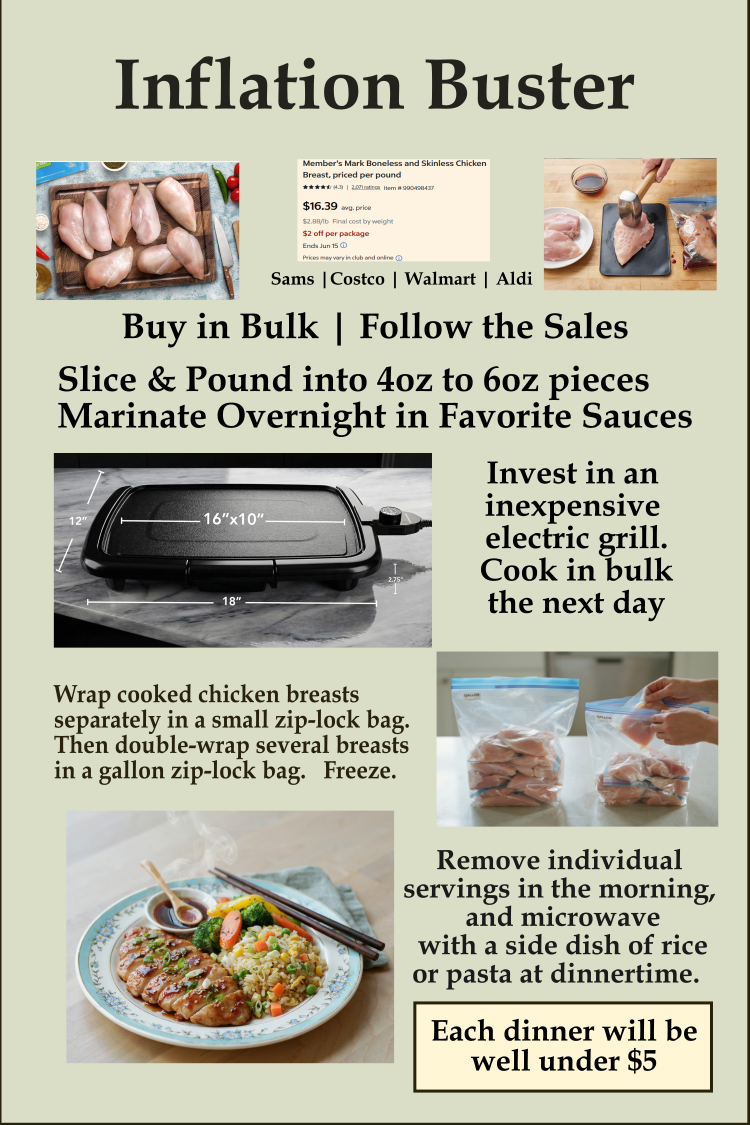
I'm going to talk specifically about cooking chicken below, but this can be done with pork, sausage, beef, fish, pizzas, and more.   All the strategies are contained in this one graphic -- that I included in my newsletter.

SEVERAL STRATEGIES IN ONE:

I've compiled several strategies that I call Inflation Busting that have to do with saving money, saving shopping time, saving cooking time, and all the thinking and worrying that goes along with it.

Starting in 2025 and continuing into 2026, I believe everyone is looking for ways to stretch their budget right now. With grocery prices soaring, it can feel like your favorite family meals are becoming a luxury. But with a bit of planning and a few clever techniques, you can enjoy delicious, healthy, and satisfying dinners every night for a fraction of the cost.

My first "Inflation Buster" strategy is incredibly effective, but I want to dive deeper and share the simple, step-by-step process I use to consistently provide my family with amazing meals for well under $5 per serving.

How to Beat Inflation: Step-by-Step

This approach is all about strategic buying and bulk preparation, creating a "convenience store in your freezer." Here’s exactly how to make it work for you:

  1. The Strategic Buy: The entire process begins at the grocery store. This method leverages economies of scale.

    • Buy in Bulk: Head to your local club stores like Sams Club or Costco, or watch the weekly circulars for Walmart, Aldi, and other grocers. A huge, multi-pound package of chicken breasts will always cost significantly less per pound than the smaller, pre-trayed options.

  2. The Master Prep: This is the magic step that sets you up for weeks of success. Dedicate an afternoon (maybe a Saturday or late in the day on Sunday) to get your protein ready.

    • Slice and Pound: Take your massive chicken haul and portion it. Slice thick breasts horizontally and pound them with a mallet into uniform 4oz to 6oz pieces. This has two key benefits: it ensures fast, even cooking and creates perfectly sized individual servings.

    • The Big Marinate: The secret to restaurant-quality flavor is simple: time. Overnight. Prepare a huge batch of your family’s favorite marinade (Italian, teriyaki, BBQ, garlic-herb, etc.). Divide your pounded chicken pieces into a few gallon-sized zip lock bags.  Pour a different marinade sauce over each group.  Massage the sauce easily by massaging the chicken inside the bag and let it marinate overnight.

  3. The Efficient Cook: This step was and is the game-changer for batch cooking.

    • Invest in a Large Electric Grill:  Forget juggling multiple small pans on your stovetop. A large, inexpensive electric griddle can cook 10–12 chicken breasts at once!  This method is faster, ensures consistent temperature, and results in gorgeous char marks and juicy flavor. Cook all of your marinated chicken in one big, satisfying batch.

  4. The Freezer-for-Convenience Pack:  This is where you create true "fast food" at home.

    • Double-Wrapped for Freshness: After your cooked chicken has cooled, individually wrap each breast in a smaller sandwich bag. This prevents the pieces from sticking together. Then, cluster 4–6 individually wrapped breasts into a large gallon-sized freezer bag for an extra layer of protection against freezer burn. This is crucial for maintaining flavor and texture for weeks.

  5. The Effortless Dinner: The strategy is complete, and now you reap the daily rewards.

    • Pull-and-Go: In the morning, simply take an individual chicken breast from your freezer-store and let it thaw in the refrigerator. At dinnertime, your protein is already cooked, flavored, and thawed.  

    • This even works if you forget to take the meat out in the morning.  One or two chicken breasts can be laid in warm water and thaw at light speed.

    • 3-Minute Prep: Pop your pre-cooked chicken breast in the microwave for 90–120 seconds to heat. In the same time it takes to heat the chicken, whip up a simple side dish: some microwave rice, a quick pasta, or a fresh side salad. Your entire dinner is ready to serve in less than 5 minutes!

    • And I'll be talking soon about bulk buying and cooking side dishes, so the entire meal takes less than 5 minutes to prepare and with little effort, it has high-end taste.

The Bonus Benefits Beyond Your Wallet

This system is about more than just a low price tag. Here is why you will fall in love with it:

  • Saving Time and Effort Every Day: The most incredible benefit is that you have eliminated the question, "What’s for dinner?" Your primary protein is ready. Your "cooking" time is reduced from an hour to 5 minutes. No more scrambling to prep dinner on a tired weeknight.

  • Maximum Freshness and Less Waste: Pounding the chicken ensures it cooks perfectly and evenly, preventing it from drying out. More importantly, this entire process locks in freshness. When you pull a chicken breast months later, it will taste as flavorful and juicy as the day you cooked it. You’ll never again throw away a spoiled piece of chicken that you forgot about in the fridge.

  • A "Fresh-Not-Frozen" Experience: Because you handle the entire cooking and flavoring process, your "convenience food" is made from high-quality, whole ingredients. You know exactly what is in your marinade, avoiding the hidden sodium and preservatives found in pre-cooked, store-bought freezer meals.

This "Inflation Buster" is a true life-hack that puts money back in your pocket and gives you back your valuable time. Give it a try, and let me know how much you save!

writing-in-layers-short-list

Have a peek behind a real novel.

Check out my novelette Writer's Block that I wrote and narrated!  It's available on Audible but if you want to download for free, click below to get professional audiobook delivery from Bookfunnel

I wrote and narrated it.  It's my first attempt at narration!

Inflation Busting #6 – Use the Flipp App to Plot Your Route

Level Up Your Meal Planning Game with the Best Local Deals

Hey everyone! You know how much I love finding the best deals, especially on books. But my passion for savings doesn't stop there. Lately, I've been refining my meal planning process, and I've found a way to significantly cut my grocery bill.

I used to start by deciding what I wanted to eat for the week and then I'd build my shopping list around those ingredients. That approach works, but I always felt like I was spending more than I needed to.

Then, I tried reversing the process, and everything changed!

The Game-Changer: The "Flyer-First" Method

Here’s how it works in my household:

  1. Start with the Deals: Before I even think about recipes, I take a few minutes to look at the store flyers and digital circulars for the grocery stores nearby. You can always find the biggest and best sales, often on the very front page!

  2. Plan Around the Sales: This is the fun part! I let the deals dictate the menu.

    • If a great cut of pork is on sale, looks like we are having a succulent pork tenderloin for our Sunday dinner.

    • Find a great deal on shrimp? That's a perfect excuse for a delicious and healthy weeknight stir-fry.

    • When I spot a favorite snack or a non-perishable on deep discount, I stock up!

  3. Create Your List: With my main meals and some great deals mapped out, I fill in the gaps with other needed items and create my final shopping list.

For many of us who considered ourselves too busy to bother with sales and coupons, the extreme rise in prices of groceries and everything else is challenging every budget.  Even people with money are experiencing sticker shock.  For me, it's more about the principle of the matter.  I can afford the high prices, thank the Lord -- at least at this writing -- but I think of younger women with teenages who eat like machines!  How can they manage?  Being retired, I've decided to use some of my time to explore what some solutions can be!

By letting the local deals inspire my weekly menu, I’m able to create exciting, varied, and, most importantly, cost-effective meals. The best part is that I don't feel like I'm sacrificing quality for savings; I'm just being more strategic.

I hope this helps inspire you to try a slightly different approach to your meal planning. Happy cooking and happy saving!

writing-in-layers-short-list

Have a peek behind a real novel.

Check out my novelette Writer's Block that I wrote and narrated!  It's available on Audible but if you want to download for free, click below to get professional audiobook delivery from Bookfunnel

I wrote and narrated it.  It's my first attempt at narration!

Making Money Online – Earn more money with your typing

WHAT IS TYPING WORTH?

just keep writingThe answer to this questions is how fast you can type, what you’re typing, and what else you do besides typing.  Basic typing would be considered ‘data entry’ and this is considered an entry level skill level.  You won’t make much money by just copying something and typing it into a computer system.

However, if you can add just a few extra skills to your typing skills, you can double or triple your salary.

HOW TO QUICKLY UPGRADE YOUR TYPING TO AN ADVANCED SKILL:

One rank up from data entry is secretarial.  So if you can develop telephone

Young beautiful woman with laptop

skills and a workable message system, you can move into a secretarial job with very little additional education.  This would require the ability to take messages, keep a running log of them, and deliver them to whoever needs to receive them.

Often there could be an additional task or two that you will need to perform based on whatever business you enter, but it’s nothing that you will need extra training for.

Once you have experience in secretarial, you can climb up to administrative assistant and even up to legal assistant and that is where you will double and/or triple your salary.


FOUR OF THE MAIN JOB AREAS WHERE TYPING IS A STAPLE:

1. Data Entry:

  • Accurately entering and updating data into databases and information systems
  • Maintaining data quality and consistency (checking errors)
  • Verifying and correcting data errors
  • Following data entry procedures and guidelines.  Each office has their own procedures,
  • Working efficiently to meet deadlines.  For this you will need a good tickler system.
  • May involve using specific data entry software such as Word or Google Sheets, or even one unique to the business you will be working with

2. Secretarial:

  • Providing scheduling and calendar management for executives or teams
  • Answering phones, taking messages, and directing calls
  • Composing and formatting business letters, emails, and reports.  Often this will entail listening to audiotapes and typing from them.
  • Proofreading and editing documents
  • Managing travel arrangements — nothing you can’t learn from watching about 10 YouTube videos
  • Preparing presentations and meeting materials.  This could entail using PowerPoint or some other software.  This would not be expected in an entry level position.
  • Maintaining office supplies and equipment.

3. Administrative Assistant:

  • Providing general administrative support to a department or executive.  Be sure to see my next blog post about analyzing the job you just got!
  • Managing calendars and scheduling appointments.
  • Composing and formatting business documents
  • Answering phones and emails
  • Organizing and maintaining filing systems
  • Preparing presentations and meeting materials
  • Booking travel and making arrangements
  • Performing research and compiling reports
  • May involve social media management or light bookkeeping tasks

4. Legal Assistant:

  • researching-law-courtsAssisting lawyers with legal research and case preparation.  This would require a bit of additional study from an administrative job, but nothing you can’t self-study.
  • Drafting legal documents (e.g., motions, letters, pleadings)
  • Managing and organizing legal files and documents
  • Scheduling appointments and meetings with clients and attorneys
  • Communicating with clients and court personnel
  • Preparing legal correspondence
  • Maintaining confidentiality of client information
  • May involve legal research databases and online court filing systems


QUICKEST UPGRADE IN A TESTING FIELD:

You can test out your a new position by becoming a ‘virtual assistant’ on Fiverr.com.  This way you can test out and get basic experience in doing many of the tasks you will need to do in a secretarial and/or administrative assistant job.