EMERGENCY WATER SUPPLY – Part 1
After a lot of research over several years, and living through several Florida hurricanes, I came to the following conclusions about emergency preparation and the best way to prepare for food shortages.
Second freezers vs. Canning Foods:
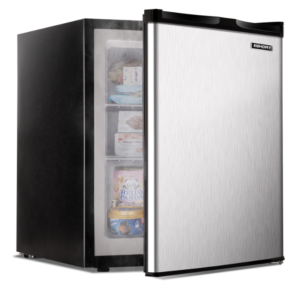 This freezer is from Amazon and it is approximately $179. They come in all sizes and all price ranges. However, if the electricity goes off for a few hours, it is virtually impossible to save frozen foods. No matter how many second freezers you have with extra food, they will all spoil at the same time. And eating everything in the freezer is not going to do anything for you except make you too full and maybe get sick.
On top of that, there’s an emotional toll watching all of your food go bad one minute at a time takes on you. No matter how many bags of ice you buy and how many Styrofoam chests you get, you won’t be able to keep up with the food spoilage. I know, I’ve been there. You’ll be lucky if you save some coffee milk.
Buying food on sale and keeping it in a freezer is a great hedge against inflation. That’s where having an extra freezer or two can really pay off, especially in times when inflation is getting worse every week. But if you anticipate being in a situation where you there electricity may go off, then you will wish your food was canned.
PRESSURE CANNING:
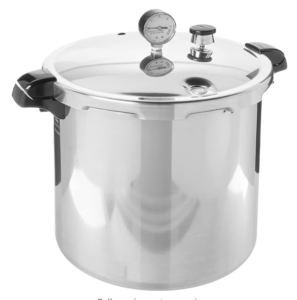
Investing in a Pressure Canner is much cheaper than the cheapest refrigerator. This canner, which is the one I have, is only $131 dollars. I have canned meat in this many, many times.
I got into canning when signs of civil unrest became too great to ignore. By watching YouTube Videos, I have taught myself to can and I mainly can meat. I don’t bother canning vegetables as I believe they will be easier to find during tough times. We have local farms in the area and I even taught myself to grow lettuce, celery and tomatoes. So instead of canning vegetables, I always make sure I have plenty of seeds on hand. I keep them refrigerated.
WHAT DOES CIVIL UNREST LOOK LIKE?
Most Americans, including myself, don’t now what war looks like as none of us remember the civil war or the revolutionary war. We also don’t know exactly what happens when civil unrest occurs. However, during the summer after 2020, we saw BLM and Antifa jump into action, and there were fires, riots, looting, cars set on fire, police stations attacked, and even a section of a city was taken over in a few places around the country. That was only a glimpse of what a mob can do when it decides to.
So canning enough food to be able to hide out for a few weeks until the worst of the unrest occurs will be one safety measure you can take. By canning about $120 worth of chicken, you can feed a family for over 30 days — as long as you have pasta or rice to bulk out the meals.
HERE ARE MY OWN TEACHERS:
These are two channels I watched and I was able to teach myself how to can chicken, beef and pork. They both have great channels and you’ll enjoy lots of their videos.
CANNING INSTRUCTIONAL:
I will assume that if you are really interested in learning canning that you will watch a few of the above-referenced videos. It’s important to see a few people canning as everyone has their own techniques.
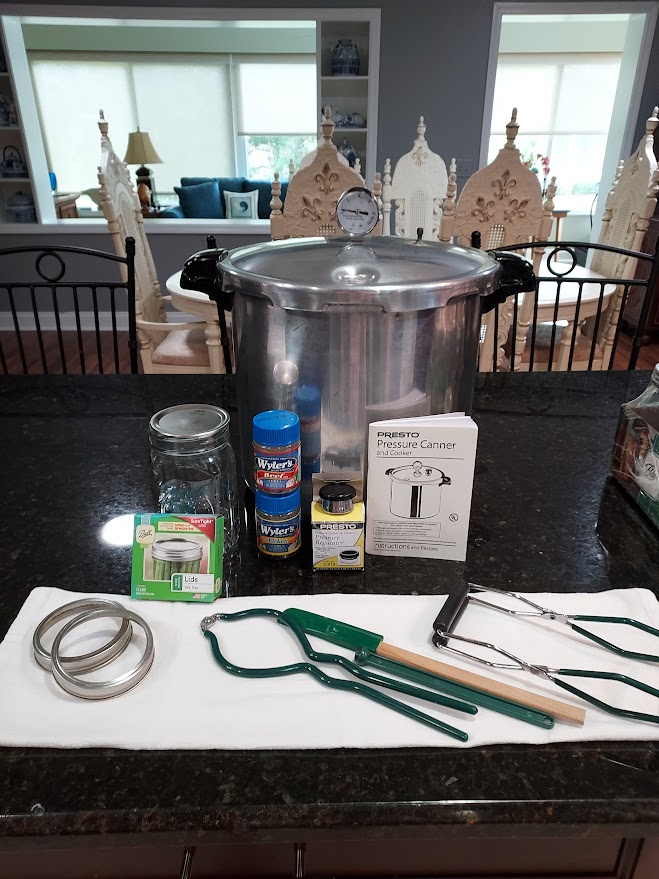
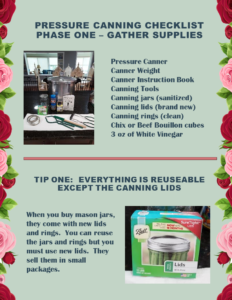
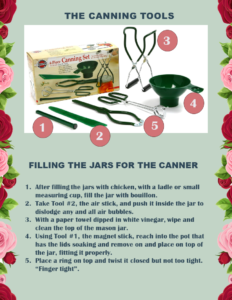
Above are the tools that you will need. The canner and lid. I use one that requires a pressure weight (in the yellow box), canning jars, canning rings and brand new lids. Everything can be reused except the actual lids. So each time you do a new canning session, you can wash and sanitize everything except the lids. They must be new.
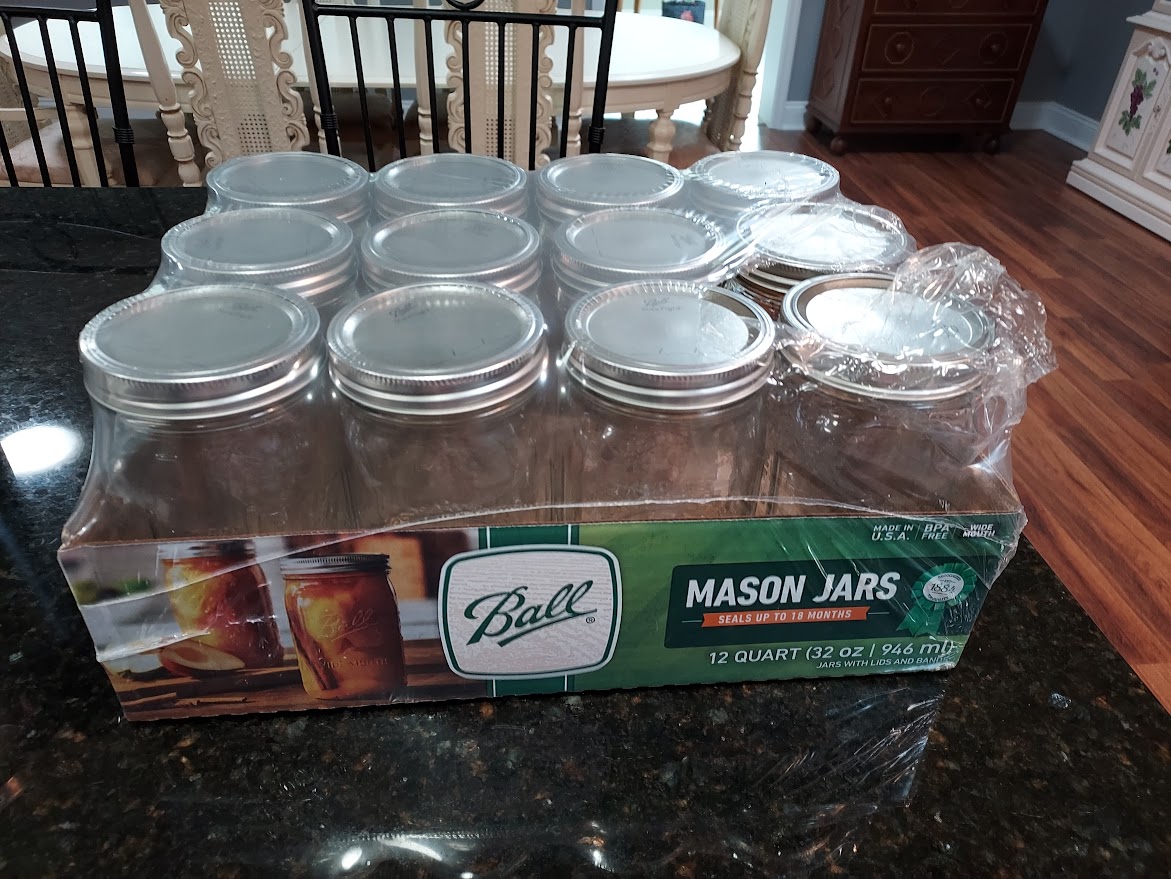 When you buy a package of canning jars, they all come with lids and rings. But once you use those lids, you need to purchase a small package of new lids as shown in the picture above this one.
TO BROWN THE MEAT OR NOT:
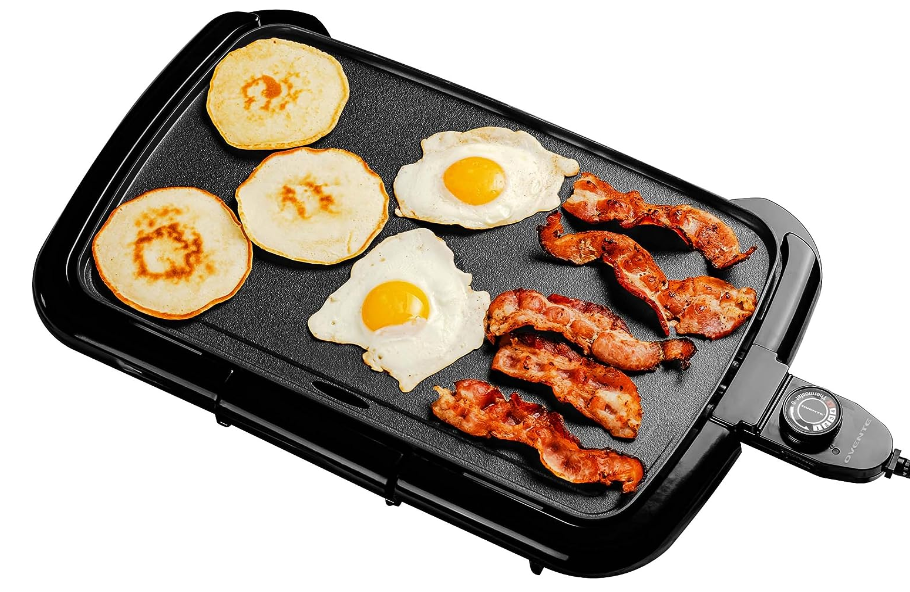
I don’t like the way raw chicken or beef looks in the jars, so I always brown my meat just a tiny bit. To do this, I use a small grill that I picked up at Walmart. At the time it was $20. They are probably $25 or $30 now.
HOW LONG OF A CANNING SESSION WOULD BE GOOD FOR YOU?
If you’re young, you can do this whole process in one long afternoon. However, if you are over sixty like me, you may be more comfortable breaking this down into two days of work.
DAY 1:
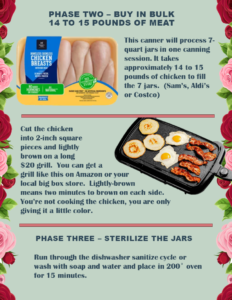
On Day 1, I go to the store and buy the chicken at my local Sam’s or Aldi’s in a big family size tray. Then I come home and cut it up into the small 2 inch square pieces. I set up my electric grill and brown the meat just to give it some color.
At the same time, I put 8 empty mason jars into my dishwasher and run it on the sanitize cycle. This cycle takes a while but they will be sanitized and ready to go in the morning.
Once all the chicken has been lightly browned — not cooked, only browned — I put the chicken in a covered container in the refrigerator. I brown the chicken for 2 minutes on each side just to give it a little color. I mention this because the chicken will be “cooking” when being canned for over an hour so thoroughly cooking the chicken at this point is unnecessary.
DAY 2:
Then the next morning, I take the chicken out of the refrigerator and place it close by where I’ll be working.
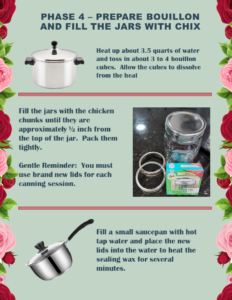
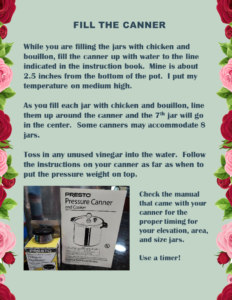
On one stove burner I heat up the water with the bouillon cubes on medium heat and allow them to melt. On another burner, I fill my pressure cooker with the manufacturer’s suggested amount of water. In my pressure canner, it’s about 2.5 inches from the bottom. I set this on medium heat.
As the bouillon cubes are melting, I get the jars out of the dishwasher and line them up next to where I will be working.
Then I run the sink water until it gets really hot. I fill a small saucepan 1/2 way with the very hot tap water. I place the brand new canning tops into the water. This will allow the reddish waxy substance to soften a little and give you a good seal.
Once the bouillon is good and hot, I begin to fill each jar with chicken and then ladle the bouillon over it until it is 1/2 inch from the top. This is where you will use the funnel that comes in the canning tool kit. Then I plunge the air stick, which also comes in the canning kit, into the jar to remove any air bubbles. Once or twice into the jar is good.
Then I wet a paper towel with white vinegar or pour it into a little dish to have beside me. Once you are finished filling each mason jar, use the vinegar soaked paper towel to clean off the top of the mason jar, the area that will touch the new lids. Then using the magnet stick, which also comes in your canning tool kit, take out a top from the hot water and place it onto the top of the new-clean jar. Once the top is on, then twist on a ring and make it finger tight. Finger tight means you would be able to open it without using any arm strength, only finger strength.
Now the jar is ready to add to the canner, with the can mover tool that comes in the kit. The water in the canner will be slowly heating up, so the cold chicken from the refrigerator will get a chance to come up to heat slowly. By placing the jars in the canner one at a time, they will heat the chicken up a little at a time.
Fill all the 7 or 8 jars with chicken and bouillon and place them into the canner. Toss in any extra white vinegar that you poured out and didn’t use. This will prevent your jar contents from getting cloudy.
CLOSE THE CANNER AND BEGIN THE CANNING PROCESS:
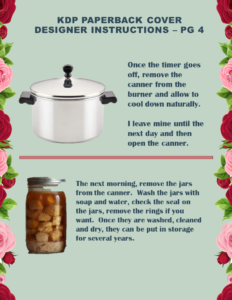
Then following the manufacturer’s instructions, properly close your canner. There will be instructions on how to create a vacuum. On my particular canner, I need to bring the heat up and allow the canner to heat until there is a stead stream of steam escaping from the top hole on the lid for a full 10 minutes. This allows the canner to work properly.
After the steam escapes for a full ten minutes, then I place the weight on the little stack that sticks out of the top of the pot lid. Then I must watch the canner until it comes to the proper pressure. I live in Florida and canning meat requires 1 hour and 15 minutes at 11 pounds. You will need to check the little book that comes with your canner to find the right pressure for your elevation and area.
The first couple of times, it can get a little tricky to figure out how to keep the pressure at a stead level. I have an electric stove and I need to start my canner on high to get it to get up to 11 pounds. Then I need to put it down to just under half in order to maintain 11 pounds.
I set my cell phone to check it every 15 or 20 minutes to make sure it doesn’t go below 11 pounds. If it goes below your mark, then you have to start over. So when you are first canning, have a chair handy and be ready to watch it like a hawk and even take notes on how your stove works.
TIMINGS FOR FLORIDA:
MEAT:
Pints: 75 minutes at #11 (1 hour/15 minutes)
Quarts: 90 minutes at #11
Head Space: 1 inch
CHICKEN WITHOUT BONES:
Pints: 75 minutes at #11 (1 hour/15 minutes)
Quarts 90 minutes at #11 (1 hour/15 minutes)
Head space: 1.25 inch
If you want to download the above Canning Instructional, click below:
 A second choice is a garden rain barrel system. Now, this doesn’t have to be in a garden, but it has to be somewhere in the open where it can catch rainwater. It can be next to your house or even on a balcony or a cement yard as long as it is able to catch the rain.