book formatting – Read First Chapter.com

Book Formatting – Turning an eBook into a Paperback

BLOG TO VIDEO – HOW TO MAKE A PAPERBACK FROM AN EBOOK:

WHAT YOU WILL NEED:

This post is about creating a Paperback manuscript (5.6 x 7.81") from an eBook in Microsoft Word.  Now, if you already know how to take Microsoft Word instructions and reinterpret them into Google docs, then I'm sure you will be able to learn how to use Google Docs to achieve the same ends.

FIRST IMPORTANT STEP:

Open the eBook and IMMEDIAELY SAVE as the Paperback Manuscript so you don't mar the finished eBook.  It's important to note that Word has an automatic save that happens in the back, so you need to save it immediately so you don't ruing your final ebook manuscript.

You will only need your eBook in Microsoft Word, and any chapter graphic you choose to use.  Now, if you already know how to take Microsoft Word instructions and reinterpret them into Google docs, then I'm sure you will be able to learn how to use Google Docs to achieve the same ends.

FIRST IMPORTANT STEP:

Open the eBook and IMMEDIAELY SAVE as the Paperback Manuscript so you don't mar the finished eBook.

FROM EBOOK TO PAPERBACK – THE OVERVIEW:

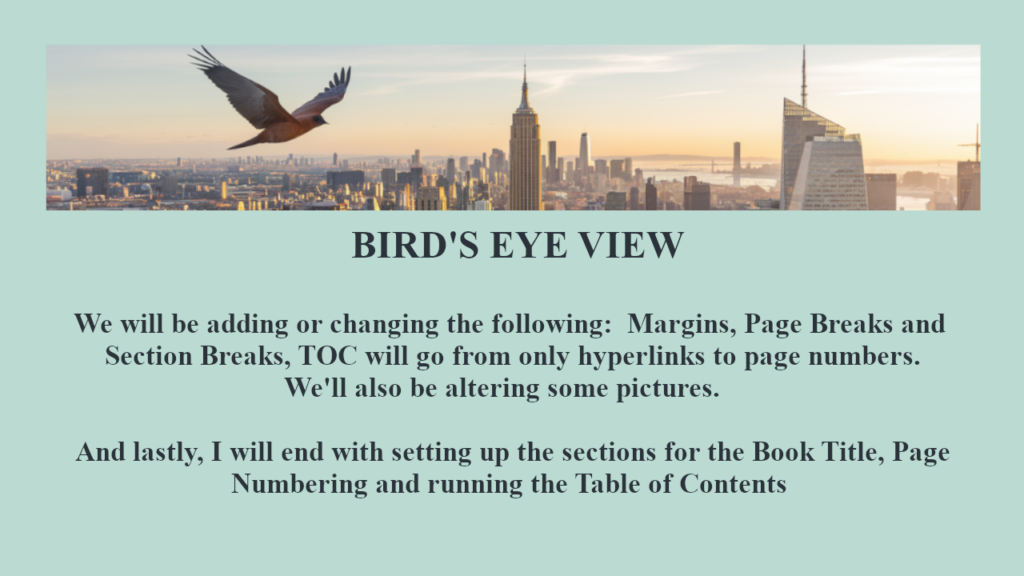
We will be adding or changing the following:

  • Margins
  • Page Breaks and Section Breaks
  • TOC will go from only hyperlinks to page numbers
  • We'll be altering some pictures
  • And lastly, I will end with setting up the sections for the Book Title, Page Numbering, and running the Table of Contents

❖❖❖❖ - Have your scene ending marks handy so you can copy and paste if needed.

NEXT – WE WILL SET THE MARGINS FOR THE ENTIRE DOCUMENT:

Fix the Margins:

Layout > Margins > Custom Margins
Margins:
0.75"
0.75"
0.13"
0.75"
0.5"
Gutter left grayed out
Portrait
Mirror Margins
Whole document

Paper:
Custom Size:
Width:  5.06"
Height: 7.81"
First page:  Default Tray
Other Pages:  Default Tray
Apply to:  Whole Document

Layout:
Section Start:  Odd Page
Headers & Footers
Checkmark by Different odd and even
Checkmark by Different first page
Header:  0.35"
Footer: 0.35"
Page:  Vertical Alignment:  Top
Whole Documents


NEXT – Let's talk for just a minute about the style gallery.

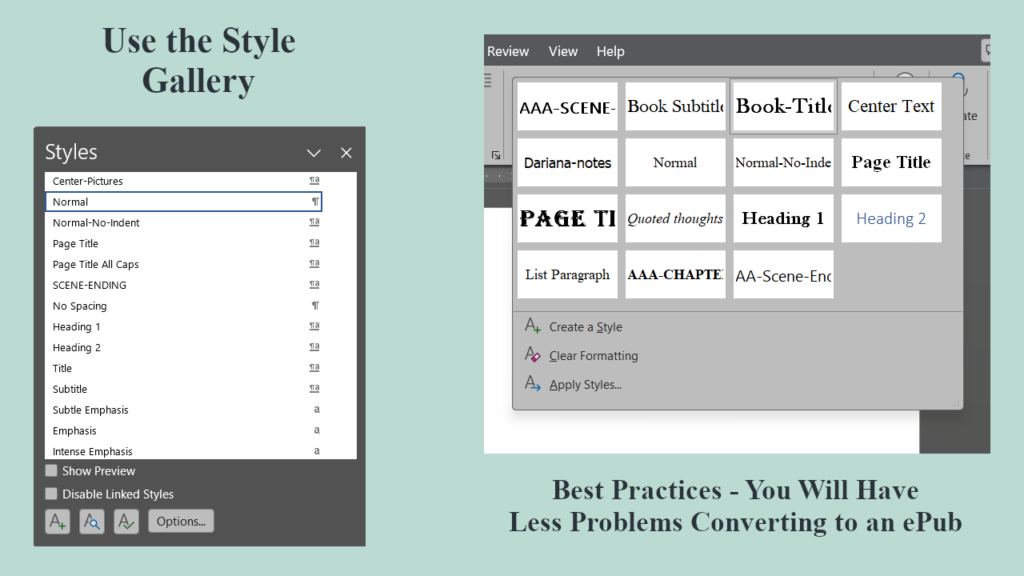
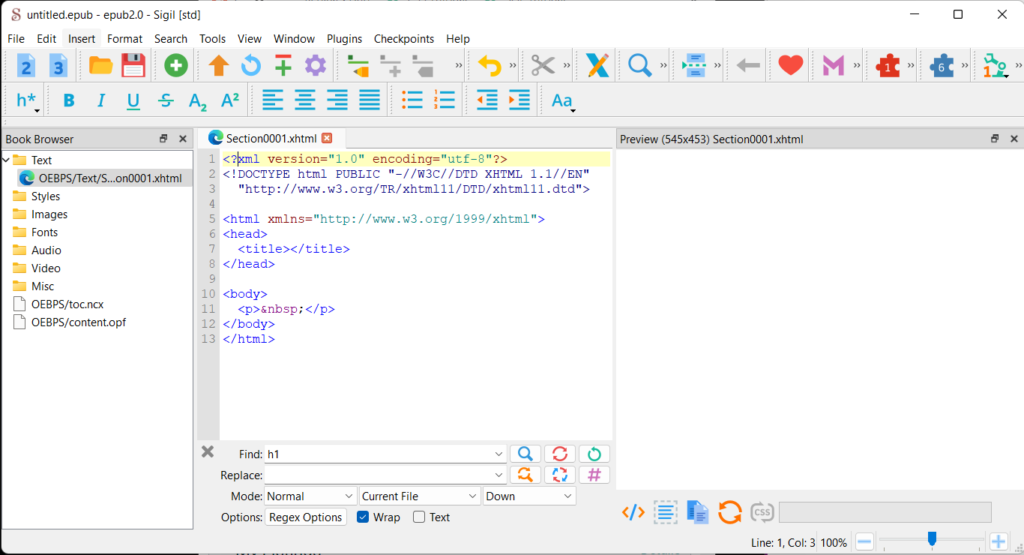
This video is targeting people who are creating a paperback from an ebook, but for anyone who is new and you don't have a finished eBook, I'll give you my quick lecture on using the style gallery.  There is a new message on the KDP upload dashboard indicating after 03/18/25, they will no longer allow uploads of manuscripts other than those created in Kindle Create and/or an ePub, so you should use the Style Gallery for ALL STYLE and then you can write in Microsoft Word and convert the document yourself into an ePub.

You can try your hand with Kindle Create but I was never able to work in that environment.  I'm sure they have ironed out a lot of the kinks by now, but I've already taught myself to make an ePub and knowing how to do it gives you the most control.

You can create an entire novel using about 10 to 12 styles.  Once you go through creating the styles in a document, save it as a template to use over and over again.

  • Book Title
  • Heading 1
  • Heading 2 (If you have sub-titles)
  • Page Title (for pages you don't want to show up in your TOC)
  • Normal
  • Normal-no-indent
  • Center Text
  • Scene Ending marks
  • Quoted Sections

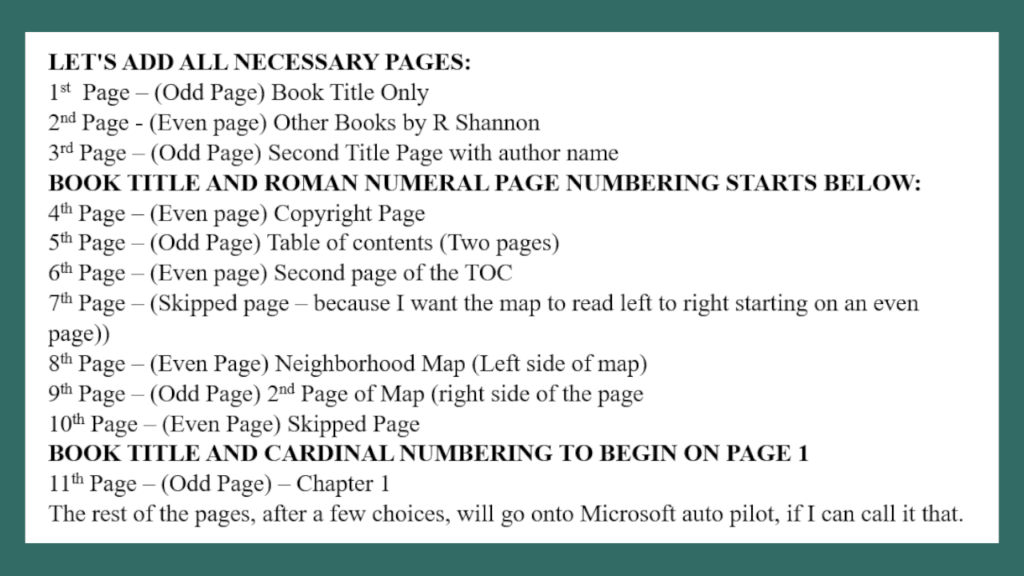
NEXT STEP – MAKE SURE YOU HAVE ALL THE PAGES YOU NEED:

Below is a list of all of my pages, whether they need to be on an even page or odd page, and where I want the book title, roman numerals, or cardinal numbers to begin.

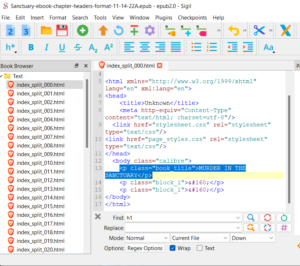
LET'S TALK ABOUT CHAPTER TITLES

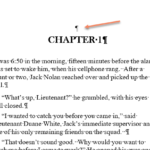
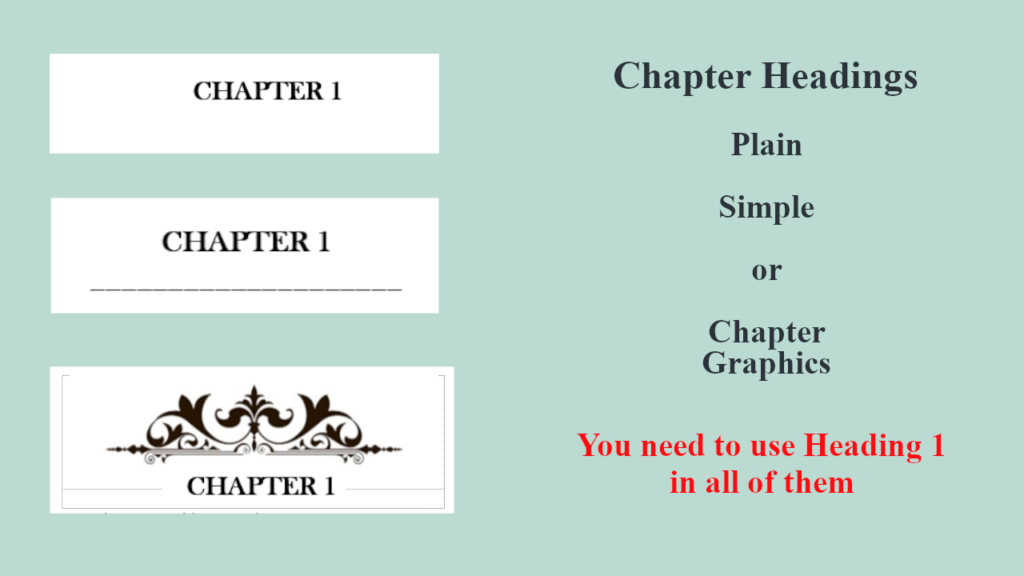
Chapter title graphics can be very tricky with the 'easy flow' settings and all the different eReaders that use the Kindle App.  I've started using a simple Chapter underline and seem to have no problems with it.

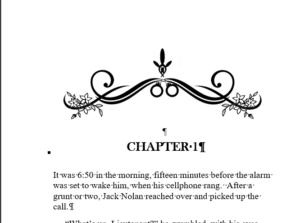
But since the KDP upload is in pdf format, it's the equivalent of a photograph of each page of your book, so you can get a bit fancier.  I'm going to demonstrate how I've been able to get chapter header graphics to work for me.  It's probably not the only way, but it is the only way I was able to get them to work without any glitches.

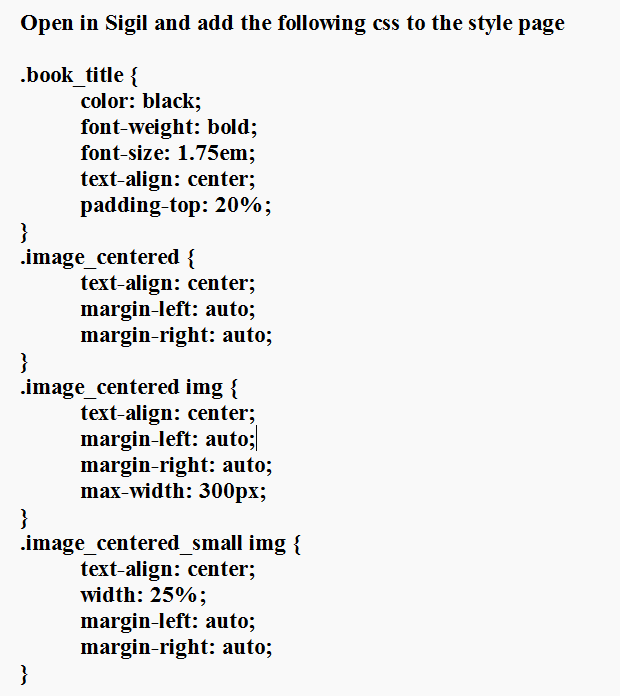
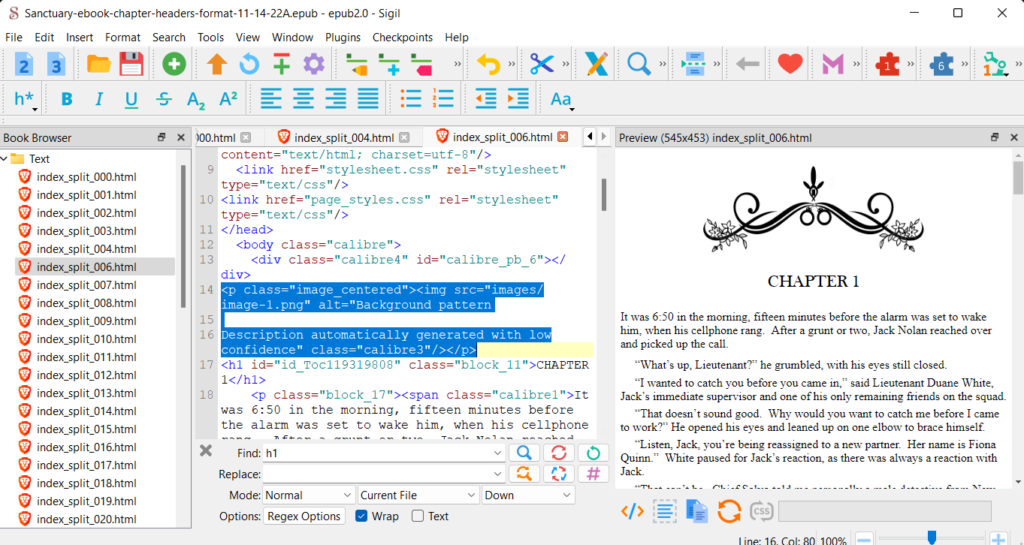
SIMPLE CHAPTER HEADINGS & CHAPTER GRAPHICS:

In the Video below, I go over creating simple Chapter Headings followed by how to add chapter graphics.  For a simple heading, you will modify the Heading 1 style by bolding the font, adding spaces above and/or below the chapter header.  It's very easy.

For the chapter graphics, you will need to create a one-cell, two-row table.  You will want to remove the borders, center the spacing and align it to the bottom.  If you don't know what I'm talking about, you need to watch the video about this.  I have time stamps below the video so you can find the exact section to watch.

The second half of the video I pick up with adding the section breaks between chapters, setting up the Book Title in the headers, and adding the page numbering.   It's best to watch the video and follow along as I demonstrate.

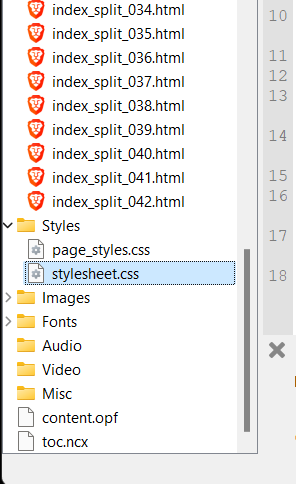
HOW TO EMBED THE FONTS:

Click on File => Then Options => Then Saving => and scroll down until you see three boxes having to do with embedding fonts.  Check the top box but leave the other two boxes unchecked.  This is how the KDP help pages instruct us to do it.  However, be aware that when you upload, you may still get a warning that you didn't embed the fonts correctly but 'they have done it for you'.  But when I preview the finished manuscript in the KDP previewer and purchase an author copy, the books look perfect.

LEAVE THE PICTURES ALONE:

One other setting that is worth correcting is on the Advanced tab.  It is the setting that tells Microsoft Word not to compress your pictures.  You want your graphics and/or maps to remain as they are in the document.  So be sure to check this setting on.

LET'S CREATE THE TOC NOW

Once you have all of your Chapter Title Pages formatted with Heading 1's, most of the TOC work has been done. 

There are two important settings that control the TOC:  One is  Paragraph formatting (how much space will be between each line) and the Tabs formatting (which will tell Word how far away to put the page numbers from the Chapter Names).  All the other programming has been done with the odd and even page breaks.

Once you set up the font size and style, the paragraph spacing, and the tab formatting, then you can run the table of contents.  The tab settings for a 5.6 x 7.81 paperback is 3.25".

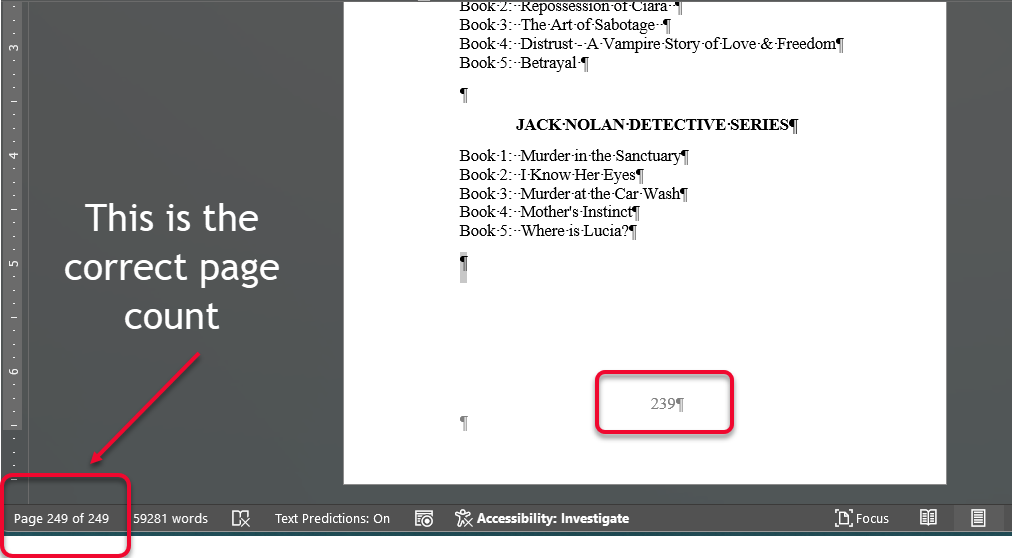
NEXT – NOTE DOWN THE REAL NUMBER OF PAGES: 

Determine how many pages the book will have BUT make sure you have the real number of pages.  The real number of pages is what you will use in the Paperback Cover Template Calculator.

NEXT – You will need the page number to run a Paperback Book Cover Template, so note the proper number of pages.  If you need to go to the KDP cover template calculator, it's here:  https://kdp.amazon.com/cover-calculator

SAVE YOUR DOCUMENT AS A DOCX AND AS A PDF.  

Once you have converted this to a Paperback, it is easy peasy to save another copy and change the margines to 6" x 9" for the Hardcover.


★★ What this video will cover  ★★

All Changes needed to turn an eBook manuscript into a 5.6 x 7.81 paperback

★ Margins, Page Breaks, Section Breaks ★
★ Book Header Titles, Page Numbers ★
★ How to add a two page map ★
★ How to add Chapter Header Graphics ★
★ Setup and Demonstration of Table of Contents ★
★ Time Stamps below ★

Time Stamps Below:

00:01 – What I will cover in the video
03:00 – Style Gallery and ePubs
06:00 – Adding a Map image and sizing it
11:00 – Page Breaks
20:00 – Adding Book Title to the Header
22:00 – Adding Page Numbers
29:00 – Simple Chapter Heading
32:00 – Adding Chapter Heading Graphics
39:30 – Embedding fonts/turning off compression of pictures
41:00 – Run as PDF to check for right page skips
42:00 – Set up and running of the Table of Contents
47:00 – Final alignment of two-page map
48:00 – What I'm planning next for a video


Self-Publishing Tip – How to Add Chapter Header Graphics

START WITH A SIMPLE WORD FORMAT

I've been struggling with trying to do this for about three years!  I finally figured it out, thanks to some other YouTubers, one of which was Derek Murphy -- who knows all things when it comes to self-publishing!

I write in Scrivener and when it's time to proofread, I compile into Word and do the proofreading and editing there.  So I start with simple formatting.  This simple formatting will make adding the chapter graphics easier.  You need to trust me on this.  You will want to embed your fonts in Word also.

We will be going from DOCX to an ePub file.  So as a reminder, make sure you do your Table of Contents using the Heading 1 links.  I only have 3 pictures that I use in my books.  One is a small publishing icon, one is a small scroll I use on the Note to Readers page, and the last one is the Chapter Graphic itself.

IMPORTANT:  One more reminder to do your Table of Contents in Word using the links and Heading 1.  If you forget this, you will have to redo the entire process I'm showing you!  (Speaking from experience)

IMPORTANT:  See above.  Leave one blank before your Heading 1/ Chapter Titles.  You will thank me for this later!


Chapter-graphic-example

IMPORTANT:  Only add one chapter header picture right before Chapter 1.  Make sure it is wrapped “top and bottom” and also aligned to center.  See above picture.

Save the document as a .DOCX file.


CONVERT TO A ePUB

I use a service called convertio.ca.  (https://convertio.co/) I believe you can use this once for free, but I pay for it as I use it all the time.  If you search for 'free ebook converter', you may find another free ebook converter.  I  used to use a Chrome extension that was similarly named, convertio or something, but it stopped working for me.  You can see if they have another one in the app store if you don’t want to pay to convert.

Go to https://convertio.co/ and upload the manuscript.docx file and choose to convert into an ebook and then choose ePub.  Then click on the convert button.  It may take a few minutes to throw up a download button.

NOTE:  During this process, your ePub will pull in all of your pictures and separate your chapters into separate files.  That’s why you only want to add the one chapter picture.  You can use the same one over and over in your document and keep the transfer cost down.

Once this is done, click on the download button.  It will most likely save to your download folder.  If you want to download it into your manuscript folder, you will need to choose that folder.   In any event, it will be downloaded onto your hard drive.


DOWNLOAD SIGIL PROGRAM - THEN OPEN IT:

ONCE IT IS DOWNLOADED, open your Sigil program.  If you don't have it yet, it's a free download.  Go to https://sigil-ebook.com/sigil/download/ and download your version.

Once it's downloaded, open the program up.  When it opens up, it will be sort of blank, like above.  This is what a blank ePub document looks like.  We won't be using the blank document.

Click on File => Open => Choose your recently-downloaded manuscript.ePub file.  It will open it up in the Sigil program.

sigil open program

Once you open your manuscript epub file, it will pull in all of your chapters as individual html files.

Then there is a Styles folder.  We will be making changes to the individual html files, the Title pages, and the stylesheet.css.  Be sure to use the style sheet I have highlighted to the right.

Your images from your eBook will be pulled into the Images folder by the convertio process.  You will be using the one chapter header graphic over and over.  You have everything you need to begin to format the chapter titles.


LET'S ADD THE CUSTOM STYLES:

Sigil-css-styling

You will have to type out these codes.  Each digit and space is important.  If you forget one semi-colon or bracket, the codes won't work.  So double check your work before you copy and paste into the Styles document.

DIRECTIONS:  Go to the File Listings on the left side.  Find the Styles folder and double-click on the stylesheet.css file.  When it opens, scroll all the way to the bottom of the file.

Copy and paste the above coding into the page and save.  There is a save icon on the top menu of the Sigil program.  Or you can use Control S to save.

** See below for further coding explanation

FIX THE TITLE PAGES:

Nowt that we have saved the new css codes, it's time to change the files to pull in the new coding.

Looking at the diagram above, double click on the first file, marked index_split_000.html.  This is the first page, which is my Book Title page.  Now, even though I have coded this in Word to align to the center of the page, the ePub converter ignores this and throws my title onto the top of the page.

So I will change the class name from whatever it is (this will be auto-generated by your ePub converter) to "book_title".  (Note:  Be sure to use an underscore, not a dash)  This will then move the title down 20% from the top of the page.  I use 20% because when someone reads on a tablet in landscape, I don't want the title to disappear from the page.  By moving it only 20% down, it is still 'above the fold'.  If you don't understand this, don't sweat it.

I do the same thing on the second Title Page in my manuscript.  Make the same change to "book_title".   Changing the class name to "book_title" is the only change you need to make.


NOW WE WANT TO ADD THE CHAPTER GRAPHICS:

Sigil-book-image-coding

Double click on the first chapter page in the document above.  There will be auto-generated html coding referencing the picture.   If you look below, I have changed the coding to reference the class of "image_centered".  That's the only part of your coding that needs to change.

Once you have made this change, copy this to your clipboard.  (Control C).

Sigil-html-before-picture

One by one, you want to double-click each chapter to open it, and copy and paste this coding right above the CHAPTER 2, CHAPTER 3, CHAPTER 4, etc, in each file.  It will be a little time consuming, but believe me, it is MUCH EASIER than hoping and praying that you can get a converter to get the spacing and alignment right.

Once you have finished each one, you can then save your work, and email it to your Kindle account and check it on your ereader and on your cellphone.  I have had a perfect conversion using this method.

I hope I have helped you save all the frustration and hair-pulling I did in searching for a way to do this!

** FURTHER EXPLANATION:

The css codes added some alignment codes, to make sure they are centered.  The max-widths of 25% are to make sure my publisher icon is not too big, and the max width of 60% is to make sure the chapter header graphic does not come up too big.  The rest you don't really need to know, but if you are curious, you can go to W3School CSS to learn more.

These codes are used to style my chapter graphics, the book titles and the small publisher icon and another small graphic I use.  So if you are only adding the chapter headers, you will only need to add those codes.

Sign up below to get a download of a checklist on everything covered in this blog article.  Learn how to use Sigil and create an eBook.

Sign up below for the weekly newsletter.