SUPPLIES AND COMPONENTS NEEDED:
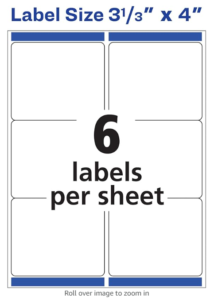 Printable Shipping Labels - 6 per page, approximately 3.5 x 4 inches
- Graphic Frame of some kind (DepositPhotos or search "Fancy Square Frame" on Pixabay
- Author logo or some other icon, if desired
- Microsoft Word (or Google Docs)
NOTE: Any postal labels that are approximately 3.50" x 4" will do. Avery has them on Amazon or you can use the Office Depot brand. Most of them come in the color white which works well.
LET'S DESIGN THE LABEL IN GIMP:
There is a video below where I demonstrate how to pull together the design of my bookplate, but I will describe it here for those of you who like to have written instructions. I start out with an image size 4 inches x 4 inches with a white background.
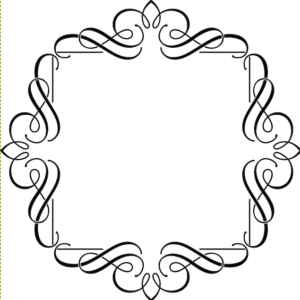 I started with a frame I purchased from DepositPhotos.com. This is a paid service, but I always wait to get their 100 pictures for $100 package so each photo I use only costs one dollar. However, I went to Pixabay.com and found this frame by searching the keywords "Fancy square frames". There were several other similar ones that came up as well.
 I insert the frame, then type in the text elements onto the label. If you have a website, you may want to add this onto your book plate, as well as the name of a series if your book is part of a series.
After I add the text, I decide how I want to decorate the book plate with a logo or icon or some other background wall paper.
On the bookplate above, I used handcuffs because this is for a Police Procedural book series. In the video below, I create a new one using a police badge.

Above are my three book plates as of the date of the writing of this blog post. The first one has fanged teeth at the top for my vampire books, the second one has a hint of private detective holding a camera for my private investigator series and the last one with the handcuffs is for my police procedural series. You can add whatever emblem or icon fits your brand or book genre.
CAN I USE CANVA?
I know many people use Canva these days and I do believe you can use Canva. Especially if you are advanced enough with Canva to make an image or template from scratch, I don't see why you can't do the same thing in Canva. I don't use Canva myself except for inspiration at times, but I believe it can do amazing things.
SAVE AND EXPORT YOUR IMAGE DESIGN.
If you are using Gimp, I would suggest you save your image as an .xcf file. This is a gimp file but it will save your book plate in layers. So when it's time to make another book plate for another book, you can open this file in Gimp and quickly make a second book plate.
Then you want to export the image as a .jpg or .png file. Since the background of the labels will be white, you can save as either. Next, I will explain how to create the book plates for printing.
NEXT STEP IS WORD OR GOOGLE DOCUMENTS:
GOOGLE DOCS:
Unfortunately, I don't know how to use google docs as I have always used Microsoft Word. However, I believe people who use google docs are familiar with how to translate instructions from Word into Google docs, so I will assume that here.
MICROSOFT WORD:
1. Open a blank document in Microsoft word.
2. Click on the Tab entitled Mailings. Then choose Labels.
3. 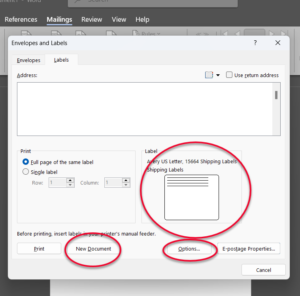 Now my system defaults to a return address and your Word may default to something else, but we need to choose a setting to print the 6 postage labels. So first choose the Options button, which is at the bottom on the right hand side. The big red circle shows the small label that my system defaults to and I'm just pointing out the "New document" button for later.
4. Once you click on Options, another dialogue box will come up which should look similar to the picture below:
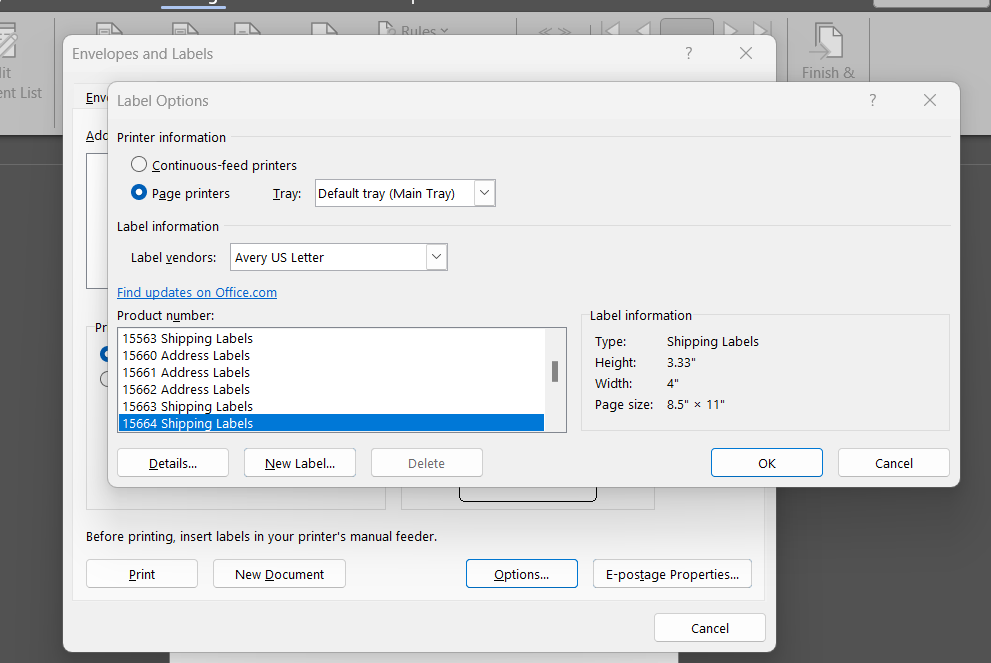
This is where you will choose the label,. First choose Avery US Letter from that top drop-down list.
Then you will find another drop-down list of at least a hundred labels to choose from. Labels 15664 will give you the 6 labels per page. But if your system doesn't have this number, look for one that has the same measurements as are posted on the right hand side: 3.33" x 4". That will give you the 6 postage labels per page.
5. Then go back to Gimp and make sure nothing is selected (Select >none).
Then right click on the finished design and choose copy visible
Go back to the labels, click inside the label and hit control v to paste the artwork into the first label spot. Choose the image alignment of "through" as this will give you the most flexibility. Then center the image into the center of the postal label template.
6. Then click off of that label and then click back onto it. Click Control C to copy the label in this new size, and paste into each of the other 5 template spots on the postage sheet.
7. Once they are all there, save this as your book plate file. You can print onto the postage labels and also save it so you can print again when you run out and need more labels.
VIDEO DEMONSTRATION BELOW:
I did a video on the whole process if you want to watch as I pull together the design in Gimp and then set up the postage labels for printing.
