WHY SCRIVENER AND NOT JUST MICROSOFT WORD?
I have published a couple of craft books through the years as publishing on Amazon KDP is pretty easy. Craft books are mostly pictures with instructions and you really don't "need" Scrivener to write a craft book.
The only organizing you need to do in a craft book is to make sure you cover all of the instructions in chronological order, have a list of supplies and take high resolution pictures and file them where you can find them during the writing of the book.
I wrote three of these books in Microsoft Word and it worked very well. But what about fiction?
Fiction is a whole different animal. There is no chronology in fiction. Even in true crime, you have to decide how you will lay out the chronology of the crime attempting to create the most mystery and suspense as you can. So this requires a high level of organization.
SCRIVENER FEATURES THAT HELP NEWBIE WRITERS:
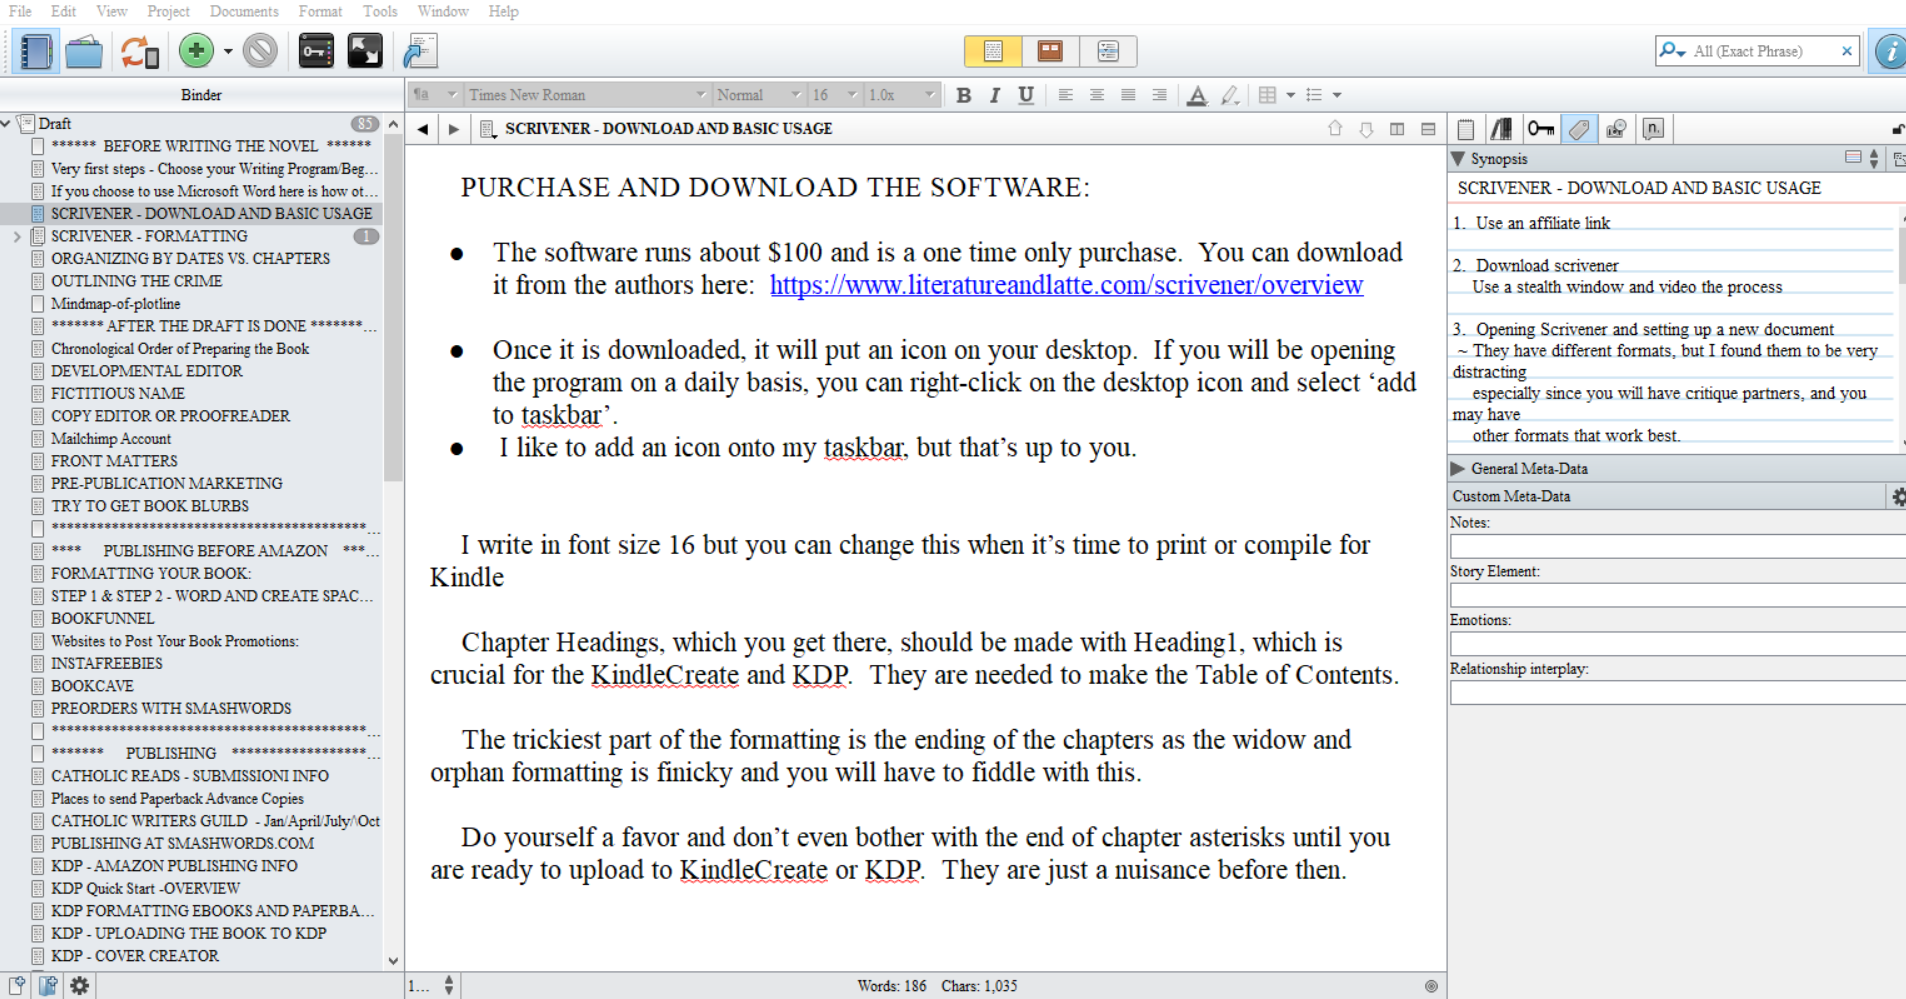
After seeing my first YouTube video on the software called Scrivener, I knew this was what I needed in order to even think about writing fiction. Looking at the layout above, on the left side, you can name your scenes first and this gives you a birds-eye view of the chronology of your story, where the story beats are, where you are in Act 1, Act 2 and Act 3.
The center pane is where you write the actual manuscript draft.
The upper section of the right-hand side is where I put my Scene Summaries using this format:
Scene 1 - POV - Character Name
TIME/LOCATION: 9am - In Character's Office/Home, etc.
PURPOSE/CLUES DROPPED:
1. List clues dropped
2. List what happens in the particular scene
3. Write down the purpose of the scene.
 Custom Meta Data - Scrivener allows you to set your own Custom Meta Data entries and I use the following:
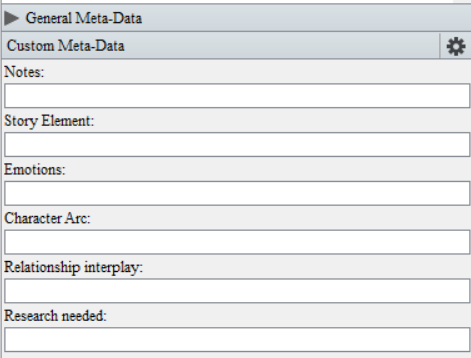
~ Notes: This one is automatic in Scrivener so I use this area for any notes I need to write to myself.
~ Story Element: is where I put things like opening hook, or inciting incident, or first pinch point, or any other dramatic or mystery notation that is crucial to follow the story.
~ Emotions: I added this one so that after the manuscript gets large enough, you can lose track of where the reader is emotionally, so I like to put things like mystery, or main clue, any words that will let me know that this is a sort of marker in the story.
~ Character arc: Before beginning, I usually know where the characters will be going in their emotional or personal growth and I keep track of this arc throughout the scenes by referencing it in this section.
~ Relationship interplay: This section I use to add the names of the characters an who is relating to who. This way, towards the end of the first draft, I can look at the entire novel in outline format and see how often each of the characters are in the story. This prevents you from overdoing it on some characters and making sure you don't leave anyone out. It gives a great birds-eye-view of the story when you are finishing the first draft.
~ Research needed: This section is where I make notes to myself about research I need to do in order to check facts or find out the legalities of something, anything I need to check. Again, I can see everything I need to do or look up by putting the story in outline format.