![]() So now you have downloaded Scrivener , it’s time to talk about how to create a project. Whether you are using Scrivener to write an eBook, a novel or keeping track of your blog posts, everything begins as a new project.
So now you have downloaded Scrivener , it’s time to talk about how to create a project. Whether you are using Scrivener to write an eBook, a novel or keeping track of your blog posts, everything begins as a new project.
Once you double-click on the Scrivener icon, it will open up the program in a neutral state if you have not created a project yet, or it may, by default, open your last project. I would suggest leaving this setting as is, because you will tend to work on one project for awhile and it makes things easier when it open to where you left off.
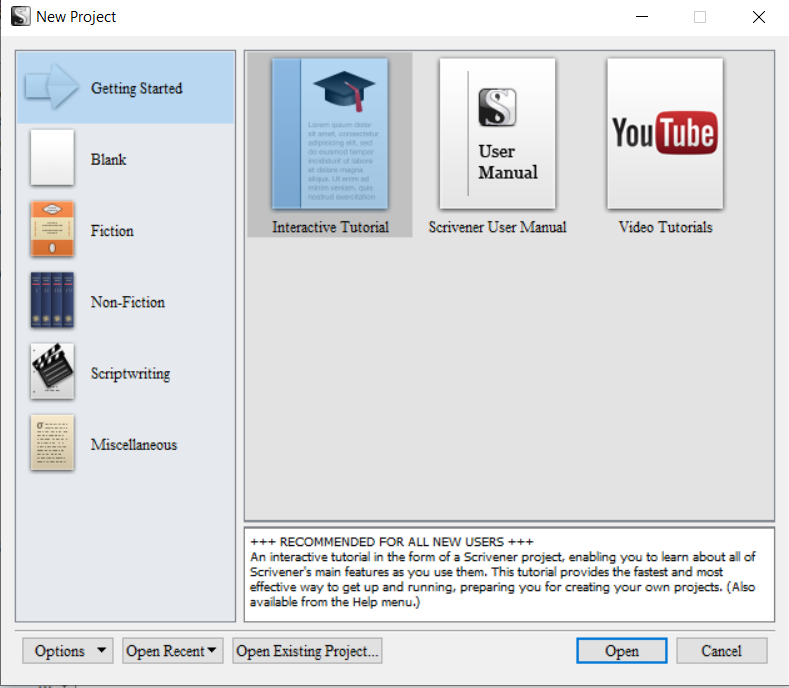
I suggest you open a Blank project rather than opening one of the templates. and let me explain why. As a newbie, I selected the fiction book and wound up having to fight against everything that was put into the folders. It made things all the more confusing.
It had a folder called “front matters” that I never heard of before. I know what front matters is today, but I still prefer to set things up my own way. So to keep it simple, just open a Blank project. That selection is in the left-hand column.
In order to get the dialog box above, click on File => New Project. This dialog box opens, and then you select Blank.
Once it opens, it will look like the graphic below.
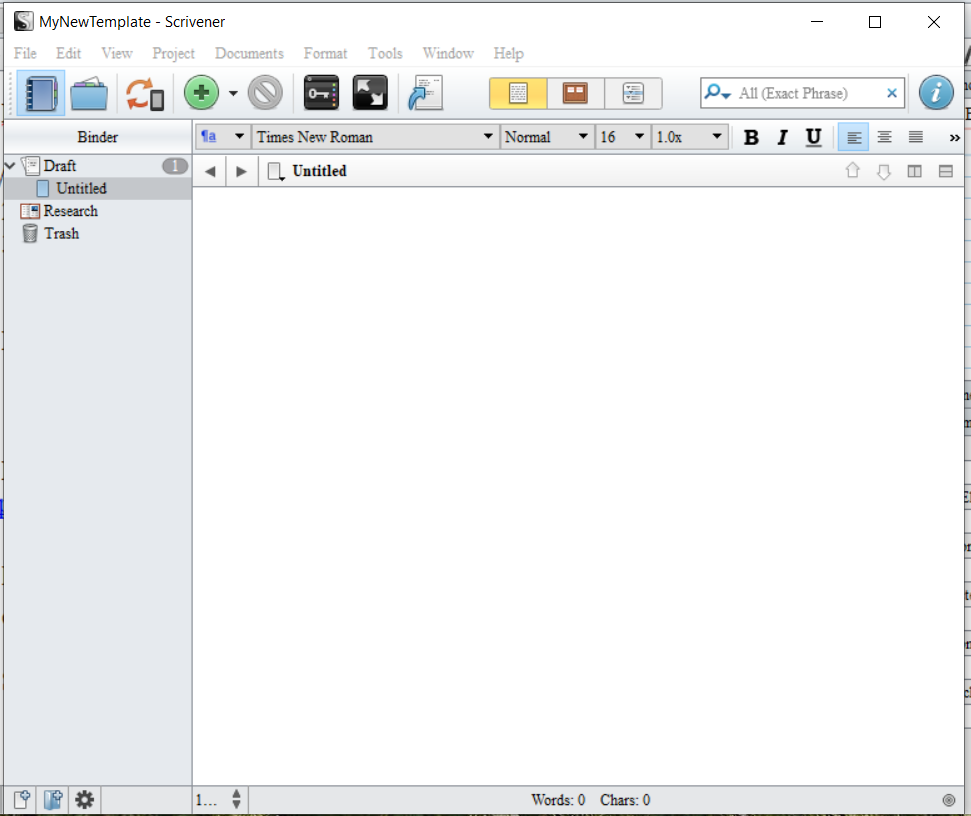
HOW SCRIVENER FILES YOUR WORK:
For each new project you create, Scrivener creates a Folder with the name of your project. The actual scrivener file is inside.
HOW TO USE SCRIVENER:
Below is a snapshot from the novel I’m presently writing. I will identify the sections to give you an overview of how I set things up.
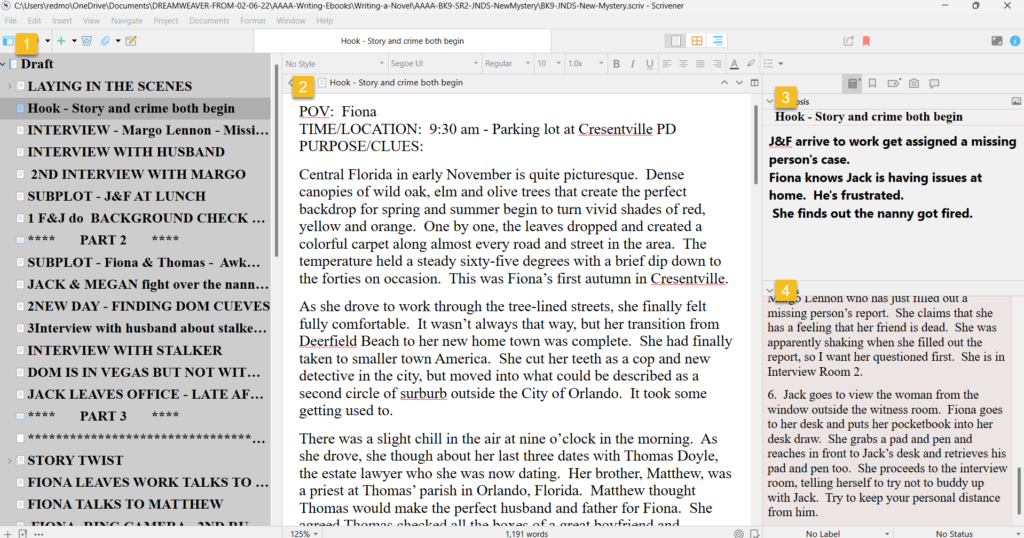
- On the left hand side, each new document is a single scene. I arrange them into Parts 1 to 4. I follow the 4 part story structure. In the early stages of writing, I name the scenes with a few words that will let me know what is happening. For example: Interview with Husband.
- The middle section is where the actual writing of the novel draft takes place. Each scene begins with an outline that records the Point of View (POV), the time, location and purpose and clues dropped.
- Once the scene is completely drafted, I put a summary in the Synopsis section on the upper right hand side. This allows me to know what happened in the scene in as few words as possible.
- The last section, on the lower right hand side is the Notes section. Before I begin writing the draft, I copy and paste my scene outline into the Notes box so I have it in case I need to trace the roots of anything. I usually don’t need it, but I’m leery of deleting things.
HOW TO CREATE NEW SCENE FILES:
You can either click on the green plus sign on the upper menu and choose “new file” or you can click control N and it will put in a new file under the one you are presenting in.
HOW THE SCENE EVOLVE:
Once I finish the first draft, I begin my 8 layers of writing and proofreading. Around Layer 7 or 8, it’s time to change the names of the scenes to actual Chapter names. I combine scenes into chapters and when I’m done, the book is now in Chapters with multiple scenes.
There’s a lot that goes on between the first draft and compiling into Microsoft Word, which is where I handle the formatting of the books. I think as newbies, it helps to know how things evolve.
HOW TO SAVE YOUR PROJECT:
Click on File => Save As and this will throw up a dialogue box and you can choose where you want to save your project. If you have created a Book1 Folder, then save your first Scrivener project into that folder.
NEWBIE TIP: Be sure to choose File => Save as and not File => Save because the program will save your project to a file inside your scrivener folder or somewhere else that you may have to hunt down.
Now you have a new Scrivener Project started, named, and saved to a place where you will be able to find it! Next we will talk about the options or properties of the project.
If you would like to see more blog posts on Writing in Scrivener, click here.
I also have a few Scrivener videos on YouTube you may like:
If you would like to download Scrivener, I would appreciate it if you used my affiliate link. Every little bit helps me keep doing blog posts and videos.

