#writingcommunity – Read First Chapter.com

Peek Behind the Novel – Layer 8

QUICK REFRESHER OF WHAT I DID IN LAYER 7:

Just as a refresher, in Layer 7, this was a long and tedious proofread.  Using my list of troublesome words, I searched out all of them all throughout the manuscript and made corrections, deletions or additions.

This technique breaks up the proofread into different formats.  By doing this, it prevents me from just "reading over" all of my mistakes, which is too easy to do as the author.

WHAT HAPPENS IN LAYER 8:

In Layer 8, I do a read-back.  In Microsoft Word, I use the Read-Aloud feature that is contained on the Review Tab.  By listening to the book read aloud by someone else, it doesn't skip over mistakes like I do as the author.  By the time I'm finished with Layer 7, I've read and reread this book too many times to trust my eyes to spot every error.

The Readback:

I listen to every word during the readback.  In this layer, I not only catch whatever misuse of words escaped my view in the last layers, but I also choose to change a sentence or two based on how it sounds.  Many readers repeat every word in their heads, so if a sentence is back-to-back with one that makes it hard to say or understand, I rewrite it to correct that problem.

After Layer 7, I always feel that the book is picture perfect -- but I find at least several words or areas that I choose to change.  I read-aloud the entire book.


word table of contents

CREATING THE TABLE OF CONTENTS

The last thing I do is create the Table of Contents which I will explain here, but you can see done live in the video below.

While the manuscript is open in Microsoft Word, click on the References Tab.  Select Table of Contents.  Choose Custom Table of Contents.  (Picture on left above)

Once the next dialogue box opens (Picture on right above), uncheck both boxes under show page numbers.  I reduce the headings number from the default of 3 to 1.  This is because I only use Heading 1 for my Chapter Headings.

This is all you need to do before clicking OK, which will produce the Table of Contents for an eBook.

IF YOU NEED TO CHANGE OR MODIFY THE FONTS OR SPACING, ETC:

The picture above is where you change any or all of the settings.  The dialogue box in the middle comes up when you click on modify in the first dialogue box.  This is where you can change the font family and/or the font size.

This would be useful if you have a short TOC and want to fill the page; you can increase the font.  Likewise, if you have only one or two lines of the TOC that spill over to the next page and you want to fit it onto one page, you can reduce the font size or change the spacing on the third dialogue box (that opens if you click on modify in the second dialogue box).  You can alter the spaces before and after the paragraphs and this will help you add or subtract space.

IMPORTANT:  Be aware, that once you click on the first modify choice in the first dialogue box (on the left), when you click out of this, Microsoft word will -- on its own -- recheck the boxes asking for page numbers.  So if you modify anything, you will need to uncheck the page number boxes again!  This can reek havoc with beginners!   I'm talking from experience.

Once you "Okay" to close all of the dialogue boxes, the last okay will set off Word to create your Table of Contents.

THE EBOOK IS OFF TO THE EDITOR:

At this point, the eBook is now ready to go off to the line-editor.  Because I have taken the time and made the effort to give my book a thorough proofreading, the editor won't be spending time on correcting silly mistakes I should have found on my own.  She will be focused on my prose and how things look and sound.  That's what I want her focused on.

If you take the attitude that "why bother with all the proofreading, it's going off to the editor?" -- you may wind up with a book that comes back merely proofread with very little line editing.  At the end of the day, you are paying for an editor's time as well as their expertise.  So my advice to beginners is to do all of the proofreading so you get more line-editing, which is what you want.

HERE'S A VIDEO ON THIS SAME MATERIAL:


Book Launch – Early Market Research – Part 3

***    EARLY MARKET RESEARCH   ***

While your book is still being edited, you can do early market research.  Begin by going to Amazon.com and searching out your main category.  Record the names of the authors, the name of the books, and any series names.  These will come into play later on when I tell you about two YouTubers you should watch and subscribe to.

Below are two videos from these two YouTubers who really helped me the most when it came to marketing eBooks on KDP and also researching eBooks with marketing in mind.  You should watch these videos and comb their video library for other helpful advice.   The only additional thing I will mention is that I also scroll down the book pages on Amazon and notice what other categories my competition is listed in.  Write the category names down.  You will get many more categories this way as Amazon is adding new ones all the time!

PICKING THE BEST CATEGORIES FOR YOUR BOOK LAUNCH:

Below is the video from Self Publishing Titans.  He offers a free tool that I have used and it is great for picking the best categories for your eBooks.  The tool is free and it’s a cinch to install.  He goes over the tool and what it can do in the video below.  I would also recommend that you subscribe to his YouTube channel as he has amazing insights and his videos are straight to the point.

I learned from Self Publishing Titans about doing my pre-launch research.  I found many more categories that I never knew existed.  By doing this early research, I was ready with my 7 keywords and 10 book categories that I would need when it came time to upload my eBook.  So have a look see at his video.

THE BEST LAUNCH STRATEGY VIDEO:

Below is a Best Book Launch Strategy video that I found amazingly helpful as a beginner.  He also has wonderful insights into how the algorithms work, etc.  Be sure to watch the video and subscribe to Dane’s channel as he has a lot of great information.

This could take several days, but your eBook is with the editor anyway,  so you should have the time!

Below is a signup to download the entire 8-page checklist:


Book Launch – Writing Descriptions and Blurbs – Part 2

***    WRITE DESCRIPTIONS & BLURBS   ***

I start by writing a rather long (350 to 450 word) description.  This is good for Amazon and the paperback cover.  To be honest, I’m not that great at blurbs and descriptions, so I find someone on Fiverr and have them write a blurb and description.  I paid about $25.00 a piece for two blurbs.

From the larger description, I keep reducing the description down to one or two lines.  I do this because if you run ads on Amazon, you only have a couple of sentences.  Same with Bookbub and some other websites.  So it’s a good idea to do this when you have the time.  I get antsy when my book is being edited so this is a good way to spend my time!

I also begin work on 3 new possible stories for new novels to get my juices going.

***   CREATE A LAUNCH CALENDAR   ***

I don’t pick a launch date until my book is back from the editor and ready to upload.  I prefer stress-free writing and launching, so I wait until I’m ready to go.   Once the book is done, I pick a date 2 months away.  This gives me a chance to get Advance Review Readers and some feedback from at least some people.

book-launch-calendar

You can create a separate Google calendar for this.  I use an Excel sheet, as shown above, and fill in the dates and what is going on at that time.  This allows me to keep adding and removing things.

Below is a download for the entire launch checklist:


Book Launch – From Proofreading to Editor – Part 1

***    FROM PROOFREADING TO EDITOR    ***

Go over your proofreading check list and make all the changes.  Read it on NaturalReader.com or use Microsoft Word to read it aloud to yourself.  Then hand it off to an Editor.   They will take a minimum of one month to do a line edit.

Once the Editor has the book, I usually rewrite the first chapter to see if I can improve upon it.  And often, I do the same for the last chapter.

***   BEGIN ON YOUR BOOKCOVERS   ***

If you do your own creative work, make at least one eBook cover.  The template for Amazon KDP is 1600 pixels wide x 2560 pixels tall.  Make the front cover using the template and a back cover using the same template.

If you do not do graphics, find a eBook cover maker on Fiverr or somewhere on YouTube.  Copy about 5 bookcovers from your genre to show to the eBook  creator.  Tell him/her that you want yours to “fit on the shelf with these”.

The Paperback cover will need to know the page count in order to get the proper template from KDP.  When you have a page number for the paperback, go to the KDP Paperback Calculator:  https://kdp.amazon.com/cover-calculator  Once you have your template, you can add the front eBook cover and the back eBook cover that you made and blend them.

Below is a link to download the entire 8 Page checklist:

Writers Tip – Keeping Track of Background Info

DON’T TRUST ONLY YOUR MEMORY:

Reading through the first draft of my first novel, I realized that I had repeated background information up to three times!  I had no idea I was doing this until I was already done writing the draft.  Although Scrivener, which is a software tool for authors, has lots of tips, tricks and gadgets that are designed to help authors in every stage of writing, there was no way to check background info that was designed into the software.

What I learned the hard way was that I cannot trust  my memory on what information I have written into the story.  After my 8th novel, I have now devised a strategy that helps me eliminate that problem and am passing it on.

I make up a separate document inside scrivener where I track this background and descriptive information.  Or if you are old school, you can write a list in pen and paper keeping track of the information as you add it into the book.

HOW I KEEP TRACK OF BACKGROUND INFORMATION:

Technique 1:  Keep Track of Background and Descriptions As You Write:

The first one is to keep a separate document with a table containing 2 columns.  The left column has a notation regarding the background information or character description.  The right column, I put in what chapter I have that information in.

TABLE DOCUMENT EXAMPLE:

Background & Descriptions Chapter Number
Physical description of Hero Chapter 1
Description of job history Chapter 4
Reference to past case (for series info) Chapter 10

The only drawback to this technique is interrupting the creative process.  I was stopping while writing to record the background info, etc.  I did this for a while, but that’s when I found Technique 2 which I describe below.  That one worked better for me.  You can pick which one you would like better.

Because I work with a plot outline, I write the entire story going from scene to scene to scene in Scrivener.  I write using Day 1, Day 2, etc. instead of Chapters.  This allows me to carefully watch my storyline and timeline together.   Like I said above, I write the first draft and never look back.  (You see how I like to repeat things!)  I only re-read in order to “get my bearings” between writing sessions.

Technique 2:  Begin Tracking Background after first Draft:

I stopped interrupting myself during the draft writing stage and paid no real mind to the background and descriptions.  I added them as I was writing and kept moving.  Then, after the draft is done, I shift into reading for context, to make sure the story is all there and all the dots connect.

This is the point where I begin tracking and checking on the background and descriptive info.  This is the point where I made the table document and begin tracking the background and descriptions.  If I have repeated something — and I always do — I remove it in one of the chapters.

This way, you can keep track of all of the background and other crucial info that you need to track.  By putting it off until after the draft is finished, you prevent yourself from having to stop the creative writing process.

This is the technique I use now all the time.  I wait until I’ve even set up with Chapters and I’m reading for context.  That’s where I start checking on the descriptions and background info and anything else I want to keep my eye out for.  Any repetition comes out easily in this stage.

WRITING A SERIES BACKGROUND:

This same technique works with writing a series.  I write each book as a stand-alone as well as being a numbered book in the series.  This means I have to include background information as well as series information in each of the novels, without spoiling the surprise if they read the novels out of order.  Some surprises can’t be helped, but some can be hidden.

I make a list of all of the facts and background information the reader of Book 4 would need to read the stand-alone in context.  I print out this list and as I begin to read through the novel for context (after the draft is done), that’s when I check off and make sure all of the needed information has been included throughout the book.


Writers Diary – Planning your Mystery Template

just keep writingIn my humble opinion, writing mysteries requires a bit more planning than a novel about other subjects.  You have to manage character arcs, crime arcs, clue dropping, red herrings, passage of time, as well as add pressure and suspense into the mix.  This is a lot for a new writer.

I found this overwhelming as I began writing back in 2018.  The two biggest tips I can pass on at this point are (1) write in Scrivener as you get a bird's eye view of your project all all times and (2) you need a template or an outline of some kind  to work from.

WHAT I WISH I HAD WHEN I WAS NEW:

The main reason I've started this Writer's Diary is because I had searched and searched for writer's diaries online and never found anyone who was sharing their whole novel experience.  That's why I am doing this.  This is another one of the things I wish I had when I was new.  I still consider myself new, by the way.

MY OUTLINES WERE TOO FLEXIBLE:

In my first few novels, I would start off with a loosely-planned outline in order to give the characters space to organically develop. I had noticed within the first novel that the characters did develop their own voice and personalities.  I thought this open template would give me the leeway to let the novel sort of write itself.  It didn't.

In hindsight, I was too open-ended about how the story would end.  The characters would take on their own voice at some point in the story but because I had this loose outline, somewhere in Part 2 or Part 3, the story would start to veer off course.  As I got to Part 3, I would notice I was too far away from the ending of the story that I had planned originally.  But I wouldn't have any great ideas for a better ending either.  I would even forget what the original concept for an ending was.  Or I would look back and realize the story had veered too far away from a logical ending of the story or solving of the crime/mystery and I would need to go back and start rewriting.

I NEED A WRITING DESTINATION:

What I found by about the sixth novel was that I can leave the beginning and middle of the outline very loose, but I need to know where I am ending the story.  I need to know how the crime will be solved, who the bad guy is, and how the clues will be dropped in order to manage the suspects, the red herrings and the suspense.

So I still keep my outline loose in the beginning sections but I make sure I know where I am heading, what corner I need to lead the bad guy into in order to wrap up the story.  This gives me more security while I'm writing.  It also helps me stay on course.

REMAIN OPEN-MINDED BUT CHANGE THE OUTLINE:

checkline and outlineThere have been times when a better story did strike me during the writing process.  I can go with the new direction, but I must alter my outline so that the new ending is the new destination.  I rewrite my outline of how it will end so I will have the self-confidence that I still know where I'm going.

This is a much more workable way to remain flexible but still have the boundaries and guard rails I need to write tight scenes and know where I am in the story.

START BY PICKING A PROTAGONIST OR A CRIME:

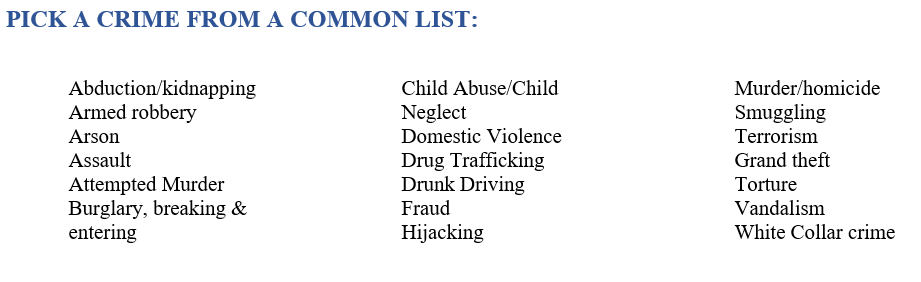
I start by picking a crime.  My inspiration can be from a novel I'm reading, or a news article, an episode of Forensic Files, or sometimes they can be a combination of all of these.   I am beginning to think more like an author and am starting to envision crimes happening in strange places or interesting environments.

PICK YOUR PROTAGONIST/HERO:

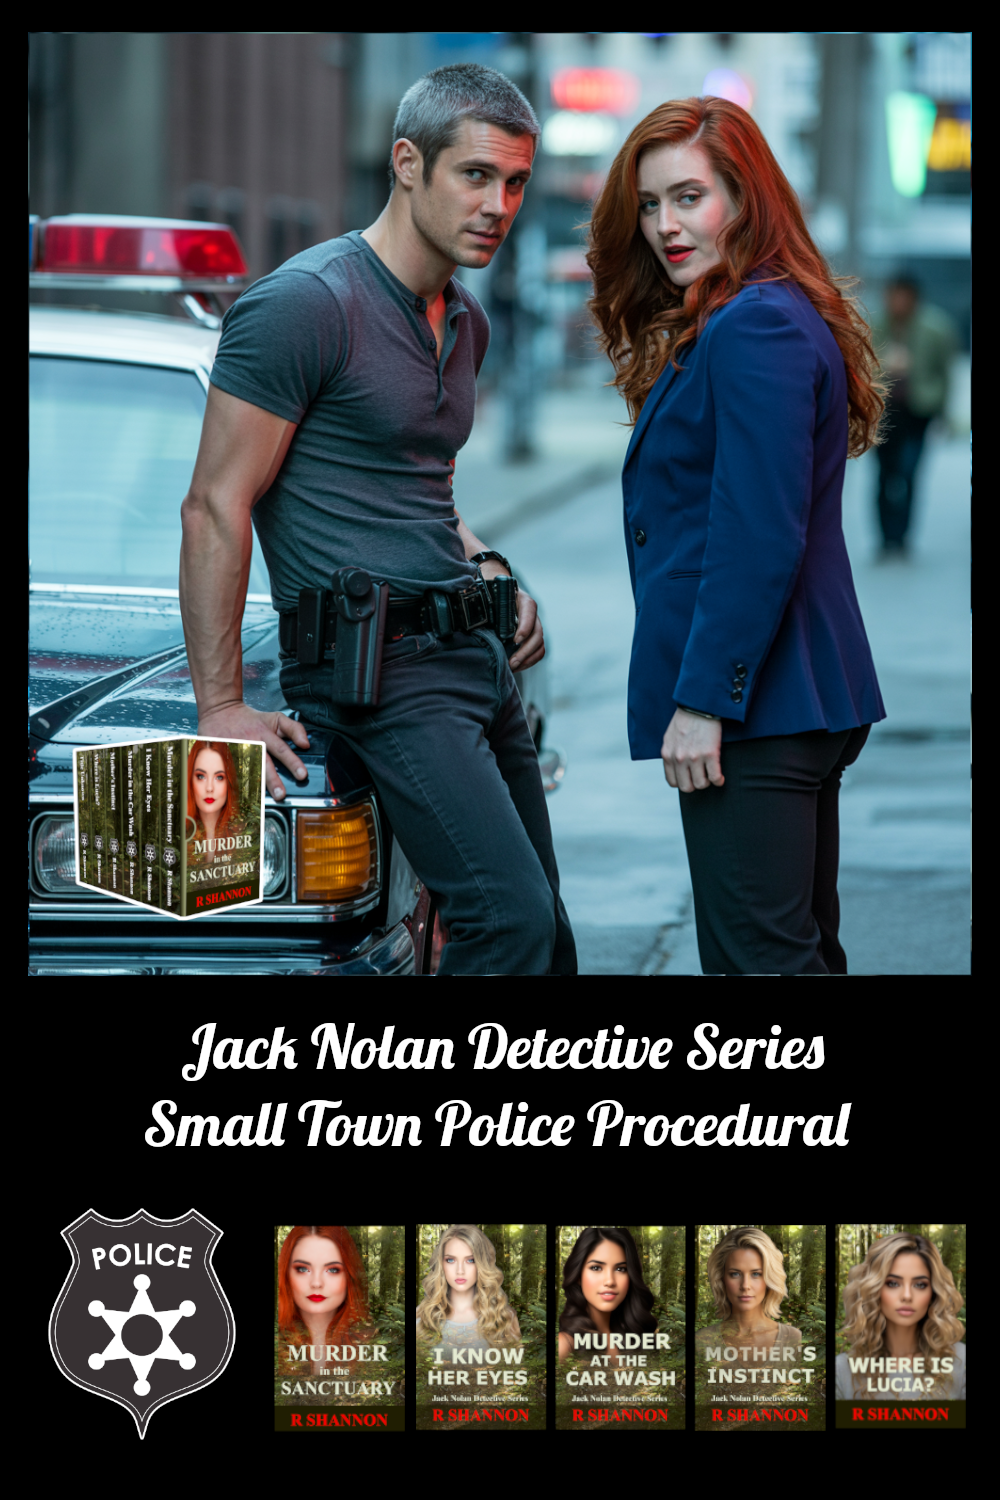
The most popular choices for heros/mystery solvers are police officers/detectives, private investigators, and amateur sleuths.  I chose a private investigator as my first protagonist as PIs are easier to write about because police procedure is very complicated these days and that would have been too much to take on as a new writer.

I pick a Protagonist/Hero based on a personality type I think I can write convincingly about.  If you are planning a series, you will want to give your Hero at least a few people that are anchors in his life.  This will also give you leeway if you need to come up with a second novel as the stories can come through people in his/her life as well as from working.

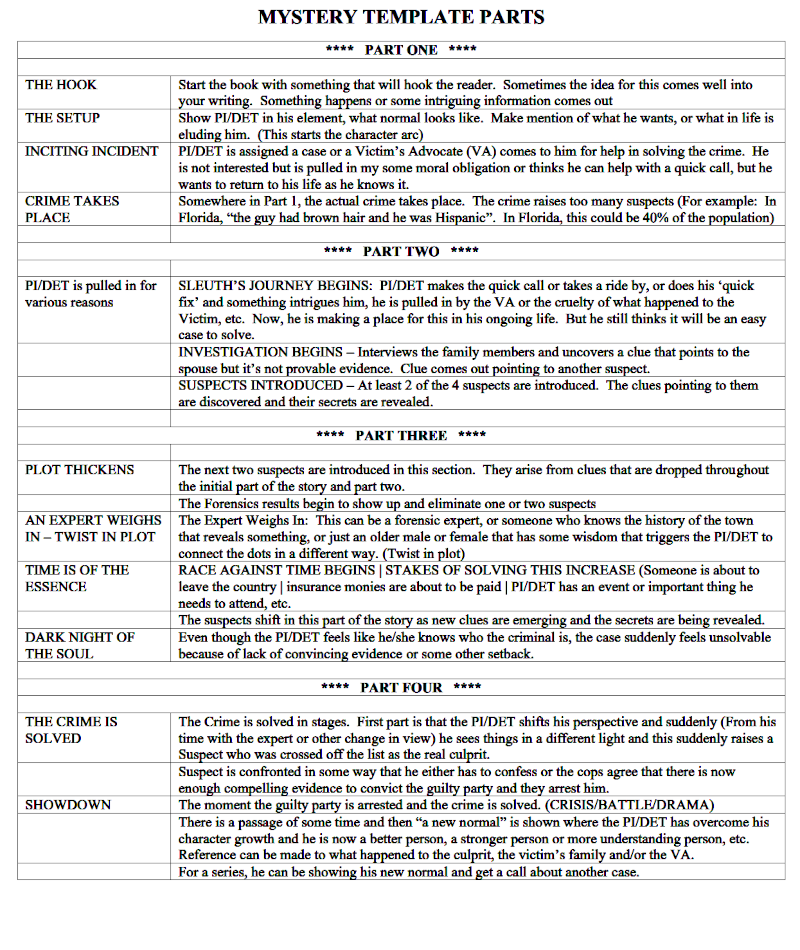
I will reveal my Template - Planning Your Mystery in our next writers diary installment and how I start organizing my mystery elements.
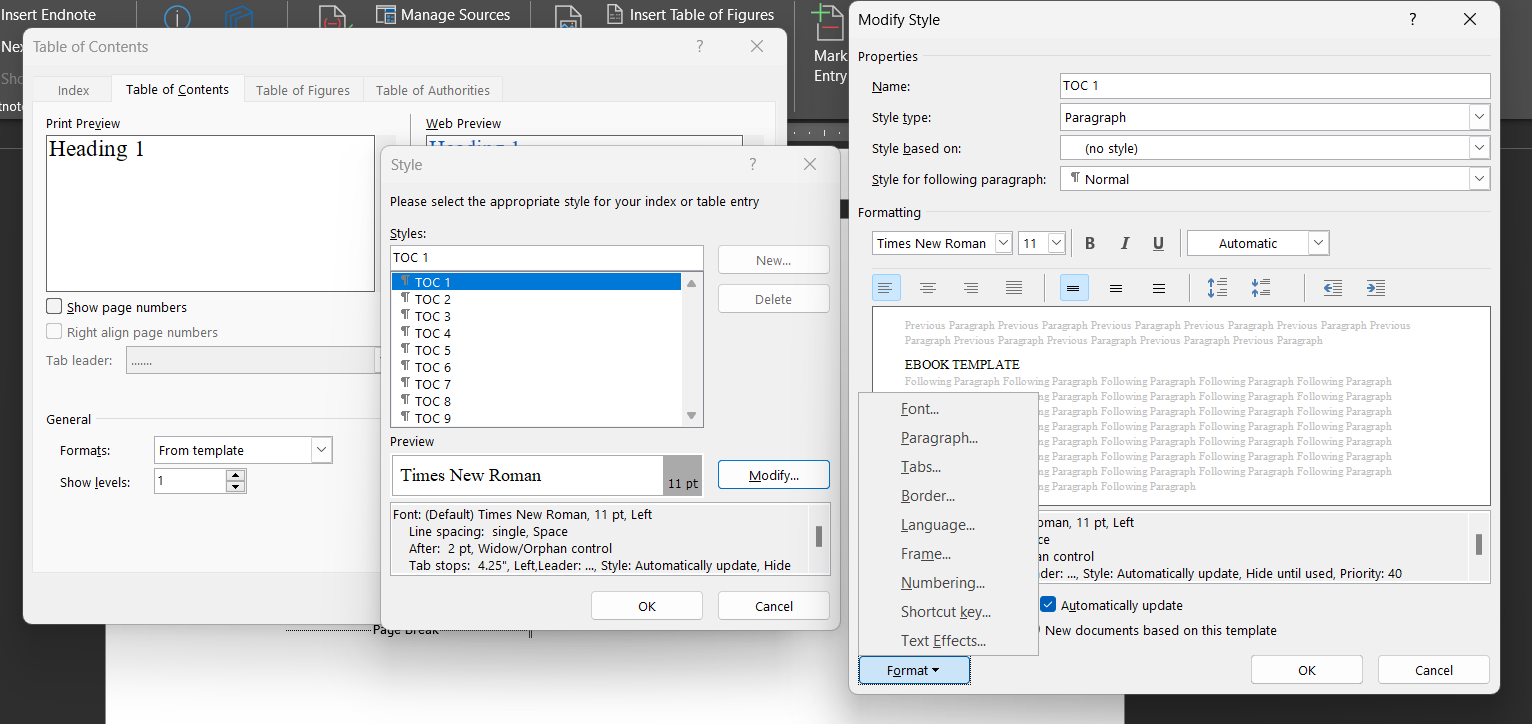
 

Make Things Easy on Yourself!

Download a Copy of the Mystery Template

Writers Diary – Pantser vs. Plotter

CHOOSE A PATHWAY:

I was lucky when I started as I knew, without a doubt, that I was a plotter.  I don’t write a letter without a short list of points I want to cover.  But this can be a choice that can help you not get lost in the overwhelming number of things you need to keep in mind for any novel.

I won’t go into too much detail as there are hundreds of youtube videos about being a pantser and being a plotter by more experienced people than me.  But in one sentence, a pantser is someone who sits down and begins writing ‘by the seat of their pants’ without an outline or a template of any kind.  Steven Kind is a pantser.  Being a plotter means that you start with a template, and then an outline, and then begin writing the novel itself.

There are natural-born pantsers like Steven King, and if you are one of those, that should be your pathway.  However, my suggestion to a newbie writer, especially if you don’t know if you are a pantser or plotter, is to  try to at least have a template and at least three-act play structure to keep you on track.

#WRITERS TOOL – MYSTERY TEMPLATE

mystery-novel-template
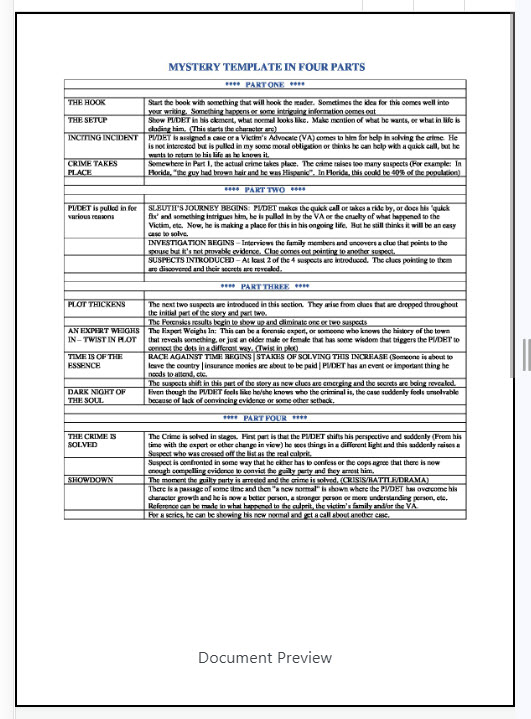
There are probably hundreds of templates out there for you to choose from.  If you search “writing template” at images.google.com, you will find hundreds of them.  I incorporated several of them into my  own custom Mystery Template.   You can click here to download the template to have a look at it or use it.

This is the template I wound up using after at least a year of struggling with the other confusing templates.  In time, I began to use a template that was divided into four acts, so to speak, but I’ll talk about that one next.


Writers Diary – First Day – Whys and Wherefores

groomed for marriage ebook
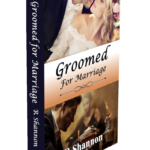
My pen name is R Shannon and I started writing in late 2019.  I self-published my first novel on KDP on 10/01/2020.  The name of it is Groomed for Marriage.

I am set to retire from many careers in February 2023 at which time I hope to devote myself more to giving back to the DIY Writing Community.  I learned everything I know today from the generous people who have shared their ideas, skills, and knowhow with the #writingcommunity on YouTube, their books, and their personal websites.

I have published 7 novels and am about to release my 8th book around August of 2022.  The purpose of this blog is to help other people who are just beginning too.  I have done HOURS AND HOURS of research and my hope is to save you some hours of research.

Most of what I’m sharing comes from other authors.  My contribution is to try in some way to organize the information in some curriculum so that a newbie can learn what they need for the process of writing to publication to self-marketing.

I started writing in Word, but the tool that launched me as a writer was Scrivener.  This is a reasonably-priced software that allows you to always have a bird’s eye view of all that is happening.  It can also be used to do initial plotting, outlining, writing the book, and even marketing.  When I purchased it, it was $99 and it made all the difference in the world.

WRITING TIP:

This is a screen shot from Scrivener during the initial of writing.  As you can see, I can keep track of new days, and chapters on the left-hand side, the writing itself is in the middle, and on the right hand side are various other tools, but this shot is showing the keywords. #writingtip

HOW I USE SCRIVENER KEYWORDS:

scrivener-keywords
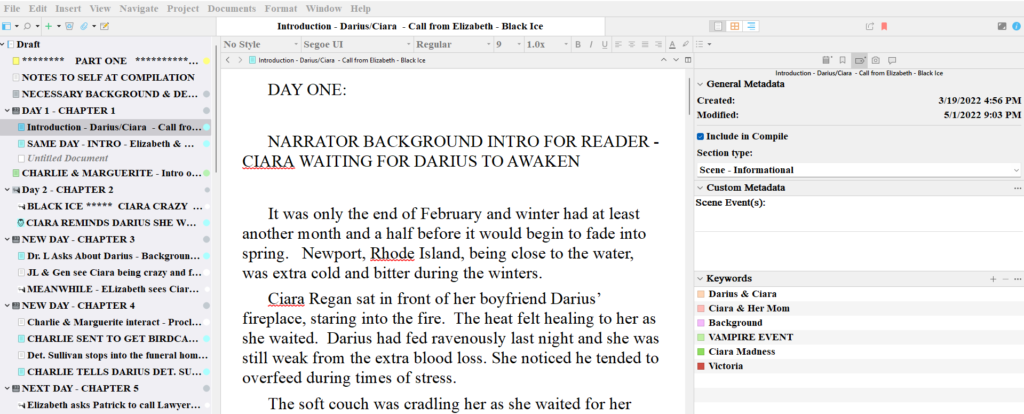
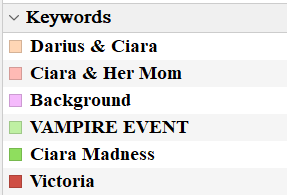
For this novel series, I use the keywords to allow me to name every relationship in the chapter.  Then at the end, I can select only one keyword and track the character arc and/or the action in that plot or subplot.  I didn’t use keywords as a brand new writer, but I wish I knew this was a tool I could use.  It is so very helpful. #writingstrategies