
ONE DRAFT MANUSCRIPT DOCUMENT IS EASY!
 When writing your book, especially if you are writing in a management system like Scrivener, it's easy enough to keep track of your manuscript.
However, once you compile the manuscript and pass it onto a beta reader, or an advance copy reader, or even an editor, suddenly, there are now 'multiple copies' of the same manuscript.
PRE-MARKETING DOCUMENTS AND GRAPHICS:
Then once your manuscript leaves, you should shift over into marketing mode. You will start creating graphics to use in marketing your book, or you will be working on the ebook cover or even the paperback cover.
You'll have original royalty free pictures, and then you'll have various copies of those oncoe you remove a background or two -- you get the picture.
Pretty soon, you have 25 files, some graphics, some blurb files, etc.
Below is a list of the documents you may accumulate just starting after you pass your manuscript on:
- royalty free graphics (for cover)
- templates from kdp (for cover)
- descriptions (written by you)
- blurbs for different websites (written by you)
- graphics or documents by Fiverr
- newsletter graphics
- ebook sale graphics
- ebook release notices
- ebook promotions at bookfunnel
This is just a sampling of how many documents you will begin to accumulate.
The only document that is precious and that needs to be tracked like a hawk is your "present final manuscript".
WHAT IS A PRESENT FINAL MANUSCRIPT?
A present final manuscript is just that. It's the last true final manuscript as of today. You will make changes after you hear back from advance readers and you may make other changes after you hear back from your editor.
My biggest tip is to use a date on final manuscripts. So if you are fearful of throwing out previous final manuscripts -- as most writers are -- you can be sure that a new final with a later date is a more recent final.
GIVE THE FINAL MANUSCRIPT ITS OWN FOLDER
I also put the actual final manuscript that I upload to KDP in it's own folder called FINAL MANUSCRIPT UPLOADED TO KDP. Then I also date the final manuscript inside that folder.
This is an added safeguard so you don't wind up making new changes to an already older manuscript. Trust me, I'm speaking from experience unfortunately.
USE A CONSISTENT FILE NAMING CONVENTION:
I'll share below my naming conventions with a few explanations below:
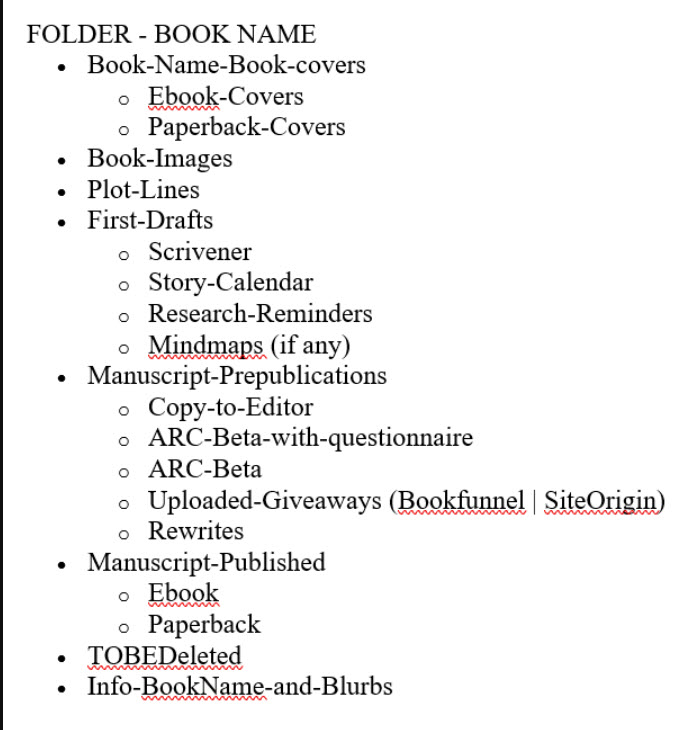
Most of the above files are self-explanatory with the exception of two or three. The reference to Bookfunnel and SiteOrigin are two websites that I use as a self-published author to market my books. I give away free copies of my new book the six to 8 weeks before publication. I often have a giveaway in them for taking the time to fill out a questionnaire about how they enjoyed it. So that's a different "final manuscript".
The other file that may need some explanation is "TOBEDeleted". I am paranoid about deleting anything before publication. So the old final manuscripts or anything else that I know I don't want or need, I put into the TOBEDeleted file. Once my book is safely published, I then delete everything at that time.
Check out my YouTube Channel

Subscribe to Substack
Brainstorming Workbook


 When I wrote my first novel, I worried about grammar, spelling, sentence structure in the first draft. I didn't even know what a draft was. I sat down and started writing 'a manuscript'.
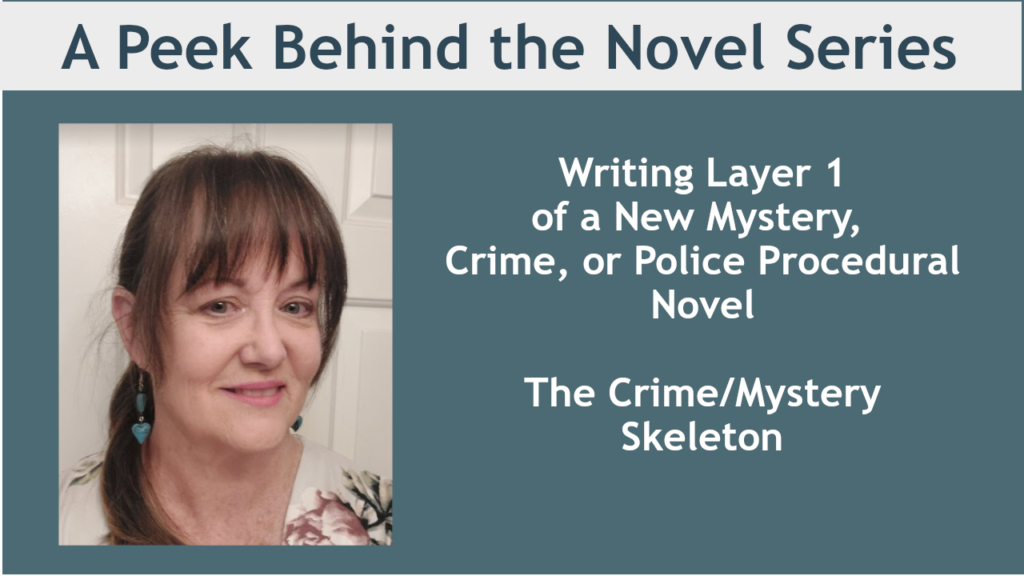
 First there's the mystery outline of a novel. It's important to know where the mystery begins, the names of all suspects, everyone's motivation for murder or kidnapping, theft, etc. But once you have your crime and mystery outline, what then?
 The subplots should not detract from the main plot, but should instead enhance it. They should add depth and complexity to the story, and they should help to drive the main plot forward. In a mystery, it's easy to mirror a main character's personality trait in a witness and create some inner dialogue. This ties it in nicely.
 If you're writing a first-person novel, try using a different POV for your subplots. This can help to add variety to your story and to give readers a different perspective on the events. This is not a technique that I would suggest to beginner novelists, but for authors who are more seasoned, yes, this is a way to shake things up a bit.
 Subplots can be used to ramp up the tension in your story. It's a great way to add a little more pressure onto your main character or characters! Not only do they have to catch the bad guy, but their landlord is threatening them, or their wife is threatening to leave them, etc. If the main mystery plot is getting a little slow as you drip in clues, you can spice up the subplot that will add some excitement and suspense.
 Subplots need to be interesting, yes, but it's easy to go overboard with them too. So the arc needs to be short but concise. They should be short and sweet, so to speak. They should be short enough to keep the reader's interest, but not so short that they feel underdeveloped.
 For anyone who is new here, I use a Four Act Structure as opposed to the more-popular three-act structure. I find that middle section in the three-act structure too confusing. Over the writing of 12 novels, I gravitated to a four-part structure as it is more symmetrical and makes more sense to me. I also believe, for whatever it's worth to anyone, that this three-act structure is responsible for the 'lagging' that often occurs in the middle of a story.

 The end of Part Two usually marks the midpoint of the book. I like to end this section with a .big reveal of some kind. Or maybe a clue that turns the investigation into another direction. There could even be a new murder, or the surfacing of an unusual suspect, or someone gets caught in a big lie that changes the direction of the investigation.
 Now the investigation gets a little stressful. The detectives may not agree on who the guilty party is, or maybe they know who it is but can't find the legal evidence to prove it. Maybe they are operating only on gut feeling and speculation at this point. They are rushing against the clock or against other forces working against them to solve it, catch the guilty party or find compelling and irrefutable evidence.
 Part four is broken down into two parts. In the first half of Section 4, the crime or mystery is solved. There will be whatever drama you want to add about the solving of this crime. Whether your detectives are battling physically with someone, bullets are being fired back and forth, or entrapping the guilty party, or just uncovering that last piece of evidence that will legally prove guilt, this is where this is revealed.
 The second half of Part 4 is the 'wrap up'. This is where you will show the new normal, everyone's life 'in resolution'. This is where you will also explain the full growth of your characters. Many author's don't do this, but I don't like to read books where things end where the reader is left to decide what it all means. I may have my own opinions, but I like to know what the author meant by the story. So I make sure I explain, again very quickly, how things are ending in a narrator voice.


 Write forward only. Don't look back.
 As a self-published author, all marketing for my books falls to me. I can outsource it, but that costs money too. I have figured out, after publishing 11 novels, where my money is best spent. The answer is on line-editing, which costs between $400 to $500 or more depending upon how long your book is.
 Two of the most popular websites to give away or sell your book is through bookfunnel.com and siteoriginapp.com. These two companies offer the opportunity to join other authors in featuring your book. Everyone has a 'share date' and they share the promotion with their newsletter list and also with their social media following. It's a win/win for everyone.
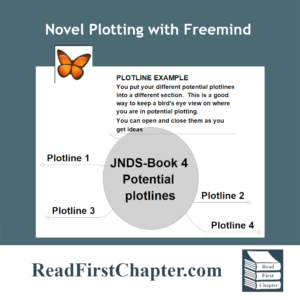 In the first installment of the Peek Behind the Novel Series, I wrote about working four different plotlines before choosing one. By working on four of them, it helps me 'improve' on some storylines and when I have four to choose from, I am able to go into the project knowing that I have chosen the best one. It's a technique that I use to build my author confidence.
 In the first layer of writing, I focus only on the crime or mystery. I make a list of the chronology of the crime. How it happens, who it happens to, how the detectives are assigned to the case. I focus only on the crime. I don't think of subplots, or dialogue or even the outcome. Only on the crime itself, almost like a Forensic Files show.


 In writing mystery romances and police procedurals, it's important to keep track of time for a few reasons. One reason is that it's too easy to get lost in the writing and forget the time line. It may be morning in one scene and in the next scene you're referring to something happening at 4PM. Problems like these are very tedious to clean up after you're done writing. It's easier easier to track the timing while you create the scene, while you write.
 I mentioned writing in layers above. This is a secondary technique that I will blog about as I move along in my present book. I'll also give you a sneak peek behind the novel to see what levels I write in.
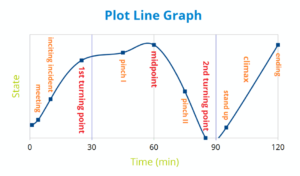 Each new book requires a new plotline. I used to come up with a plotline and go with it. But I noticed I had a lot of insecurities as to whether it was good enough or whether I was choosing a plotline too soon.
 So I could tell the four plotlines was a working strategy going forward. The first time I did this, I opened a new Notepad document, plotted a crime and a potential storyline. When I finished, I named it the first potential plotline and filed it. Rinse and repeat. Sounds pretty straight forward, right?
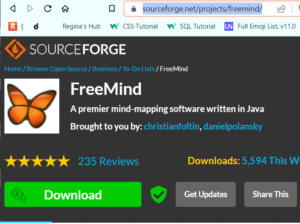
 Since I began writing full time, I've noticed a difference between the type of energy writing fiction takes. Because I'm using creative energy, there's risk involved. It requires me to make decisions and choose to go down one avenue of story and not another. There's always a possibility that I may wind up in a dead-end or wish I had chosen another route. No one likes disappointment, especially the type where you look back and see hours and hours of wasted writing time!