
ALL AUTHORS NEED A PLOTLINE:
 Each new book requires a new plotline. I used to come up with a plotline and go with it. But I noticed I had a lot of insecurities as to whether it was good enough or whether I was choosing a plotline too soon.
By the third book, I started to write four potential plotlines from the beginning. Each one was good enough. They all had a crime or a mystery, they had suspense and even a satisfying or surprise ending. By writing four plotlines, at some point, the one plotline that I "should be writing" clings to me and I to it. I know instinctively that 'this is the one'.
HOW TO QUIET WRITING INSECURITIES:
When I had only the one plotline, I still had an insecurity as I began to write. What I found with starting with four is that I know I worked on all four and I know I'm writing the best one I came up with. I feel like the plotline I chose wants to be written. The characters are already coming alive before I even finish the plotline.
It's more work to start with four plotlines, but the satisfaction of knowing I'm writing the right book, and being able to let go of any self-doubt and insecurity, it's well worth it.
THE TECHNIQUE OF OUR PLOTS WORKED, BUT I GOT SCATTERED!
 So I could tell the four plotlines was a working strategy going forward. The first time I did this, I opened a new Notepad document, plotted a crime and a potential storyline. When I finished, I named it the first potential plotline and filed it. Rinse and repeat. Sounds pretty straight forward, right?
Well, after I chose the one potential storyline, I went on to write the book. The technique worked but, as usual, I got scattered pretty soon thereafter. What do I mean? I mean I couldn't remember where I filed each plotline. Did I put it into my blogging folder? Was it in the last book folder? Was it filed as a general document in my website folder? I couldn't find them no matter what.
I don't know if everyone is like this, but as soon as I have more than three pages of anything, I start going upside down if I don't have a "system" to keep myself organized.
ALL IN ONE DOCUMENT?
![]() Then in response to getting scattered, I just wrote all four plotlines in one document, but then I was overwhelmed by how long the document was and it wasn't easy to see which plotline I was in. The Notepad has a tendency to return to the top when you flip out of it to check a spelling or anything. Ugh, I again went upside down.
Then in response to getting scattered, I just wrote all four plotlines in one document, but then I was overwhelmed by how long the document was and it wasn't easy to see which plotline I was in. The Notepad has a tendency to return to the top when you flip out of it to check a spelling or anything. Ugh, I again went upside down.
FREEMIND - The solution:
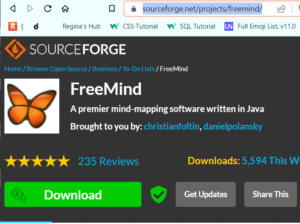
Then I found Freemind. Of course I saw it on YouTube, where I learn all of my author tricks and tips. Freemind allows me to keep all four plotlines on the same 'board'. BUT I can close each one and it is very easy to determine which plotline I'm on. This is also a way where I can scan over all past plotlines to get ideas when it's time for the next book.
This was a game changer for me, which is why I pass this on to other new authors -- or just authors who go upside down like I do!
I made a very short video on YouTube showing how this works. Most of the FreeMind is intuitive and self-explanation when you begin to use it, but it's always helpful to just see it in action.
 Since I began writing full time, I've noticed a difference between the type of energy writing fiction takes. Because I'm using creative energy, there's risk involved. It requires me to make decisions and choose to go down one avenue of story and not another. There's always a possibility that I may wind up in a dead-end or wish I had chosen another route. No one likes disappointment, especially the type where you look back and see hours and hours of wasted writing time!

 I am a diligent plotter and planner when I write. Starting in Scrivener, I construct the story and go over it from six or seven different angles before I even compile it to be worked on, massaged and proofread in Microsoft Word.
 I keep my book covers in a separate folder. Inside the Book Cover folder are sub-folders named Ebook-Covers and Paperback-Covers folders. This seems like a lot more work, but believe me, you may have four copies of one cover before you finish making all tweaks or corrections.
 Using a Notebook document, I begin each new book with about four potential plotlines. Then I pick one and begin to outline. So I keep this document in it's own file.
 At some point, the book actually gets published! The Final Manuscript copies are kept in this folder and they are the only documents in this folder. I cannot tell you how many times between the editor and corrections and ARC changes, etc., that I lost sight of what my actual final copy was named and where it was! Keeping the final manuscript in a clearly-marked separate folder eliminates this problem.
 As you go from first draft to second draft, to editors copy, to arc copies, to any rewrites, you will wind up with copy after copy after copy. I'm a bit paranoid about just deleting the copies I don't need anymore until the end of the project and the book is safely uploaded. So as I save corrected copies, I put the old ones in the TOBEDeleted folder. Then when the book is safely published on Amazon and wherever else I'm uploading, that's when I open this folder and delete everything.
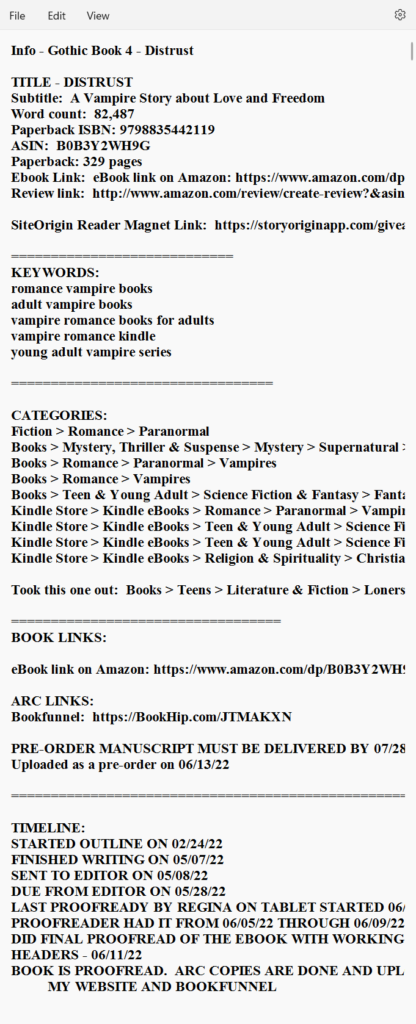


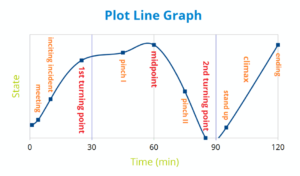
 Once my novel is now in Chapters and I have proofread it while still in Scrivener, I mark each of the scenes that have exciting events, vampiric events, even humor, to make sure the story is balanced and has events and surprised all throughout the story. Some books I read sag in the middle as everything is gearing up for a big bang at the end.
 There are two levels of proofreading. The first level is proofreading for plot context to make sure the novel is complete. Before I leave Scrivener, I go over the different chapters and scenes and mark the following beats and make sure that everything is included.