Before Amazon.com became a behemoth online bookseller, there may have been 20 genres in all of Bookdom. It was all based ono the space available, book cases available and how large he bookstore or library was. All fantasy books were in one section of the store. From there, you needed to come through the author names alphabetically or ask a store clerk if they remembered seeing the book. KDP Publishing and the Website whiz kids at Amazon put an end to that over the last decade or two.Now there are multiple genres of Fantasy and each one can be differentiated by a slight difference. Let's take a look at them starting with the three largest categories: High Fantasy, Epic Fantasy and Low Fantasy.
💥💥 High Fantasy 💥💥
This genre is made up of stories that open up a whole new world, with its own geography, culture and even people -- there could be creatures of any and all kinds. These stories are alive with lots of magic, mythology, legends and folklore. High fantasy usually deals with large-scale problems and conflicts. There are life and death stakes and the main characters are heroes, heroines and most are destined for greatness. Their journey is about fulfilling their destiny and/or saving their world from disaster. High fantasy can be more personal than Epic fantasy. High fantasy can be about personal drama, relationships while Epic Fantasy is usually bigger and more about saving the Kingdoms or a whole group of people.
The Lord of the Rings by J.R.R. Tolkien
The Chronicles of Narnia by CS Lewis
The Wizard of Earthsea by Ursula K. Le Guin
💥💥 Epic Fantasy 💥💥
Epic fantasy is very similar to High Fantasy in that it introduces the reader to a whole world conjured up by the author, with a unique geography, weather, history and creatures. Epic fantasy also has lots of magic and other worldly powers, all of which have rules and boundaries that are followed. Epic fantasy can have folklore, but there is more of an emphasis on myths and legends that are weaved in and out of the story.
Epic fantasy has the highest stakes, world-altering stakes, life and death stakes. They have sweeping narratives, a large cast of characters with the emphasis on kingdoms, countries or large tribes of people.
Epic fantasies are long sweeping narratives with complex plotlines. They are long stories, detailed, even multi-generational sagas.
Three classic examples of Epic Fantasy:
The Lord of the Rings by J.R.R. Tolkien: This series, again, is a prime example of Epic Fantasy due to its vast scope, world-altering stakes, and large cast of characters.
The Wheel of Time by Robert Jordan: A monumental series known for its intricate plot, expansive world, and numerous characters, embodying the essence of Epic Fantasy.
The Malazan Book of the Fallen by Steven Erikson: This series is renowned for its complex mythology, morally ambiguous characters, and epic scale, making it a cornerstone of the genre.
NOTE: Lord of the Rings was cited in both High Fantasy and Epic Fantasy as it fits comfortably in each one. It stared out as high fantasy, but due to the sequels, it is now more of an epic fantasy.
💥💥 Low Fantasy 💥💥
When I first heard of this genre and found out that many vampire books fit into this category, I wasn't happy. It sounds awful -- 'low fantasy'. What kind of a name is that? However, the low fantasy refers to the level of magic and world-building that takes place in a low fantasy book.
In low fantasy, there are elements of magic, but not quite as much as you would find in high fantasy or epic fantasy. Low fantasy is the genre where magic enters the ordinary world. The narratives are grounded on earth, and the focus is on how the magical elements and powers or supernatural creatures living on earth interact with he real world. It contains elements of the supernatural that take place against the normal world.
Often, the supernatural or fantasy takes place in our world but is hidden only known to one or two characters in the story. These stories usually take place in a suburban or rural setting -- as opposed to a city setting, which would make it more of an urban fantasy -- which we will cover next.
Four classic novels that would fit into the Low Fantasy Genre:
The Picture of Dorian Gray by Oscar Wilde: While not strictly fantasy, this novel introduces supernatural elements into a realistic setting, making it a precursor to Low Fantasy.
The Strange Case of Dr. Jekyll and Mr. Hyde by Robert Louis Stevenson: This classic tale explores the duality of human nature through a fantastical lens, fitting the Low Fantasy mold.
Dracula by Bram Stoker would also fit into the Low Fantasy genre. Dracula could also fit into a few other newer more nuanced genre categories which we will also cover next.
The Lovely Bones by Alice Sebold: This is a best selling contemporary novel that incorporates supernatural elements into a realistic setting, blurring the lines between the mundane and the magical.
Look what I found! This young man explains all of the different subgroups inside the World of Romani. These are the gypsies that are often referred to in fantasy and even vampire stories. I thought this was a great find because these subgroups exist all over the world.
He gives the names of each subgroup on screen, so if you want to do further research, it will be easier to do. This was a great find, so that’s why I’m including it in my Writer’s Research section.
LIKE WHAT YOU SEE? WANT TO SIGN UP FOR MY NEWSLETTER?
I send out a weekly newsletter with eBook freebies, deals & steals, along with bits & pieces of other interesting things for book and reading lovers. Sign up below!
Each writer or author will have slightly different goals. My blog post will speak directly to website bloggers and/or to fiction authors. However, if you publish low-content books or children’s books — or even coloring books, all of these techniques will be relevant to you because they are about basic marketing. Just change up whatever technique is mentioned and make it more fitting to whatever type of marketing you need to do.
ESTABLISH REALISTIC MARKETING GOALS:
Marketing is not something that you do. It’s something that you build. Everyone has a first day and sits behind a computer not knowing what to do first. So let’s start there.
BUILD A READERSHIP:
If you are self-publishing any kind of books or launching a blog from scratch, you will need to build a readership. Building a readership is also something you build over time. Everyone starts with no readers but their parents or spouses. However, once you establish a building process, the readers will accumulate slowly but surely.
One of the only things left that professional publishers can offer authors is an automatic reader list. They have gathered millions of names, addresses and emails over fifty years or more. So that is a valuable commodity and the one and only reason you should think about being with a professional publishing company.
However, some younger people who are social media savvy have been able to build millions of followers as an “influencer” so don’t count yourself out as someone who may have good luck with self-marketing.
If you are authoring fiction and selling books, your first order of business is to start collecting emails into a reader list. A reader list is referred to as a “newsletter list” in the industry, but when you are building a readership, I prefer “reader list”. Going forward, just know they are the same thing.
START COLLECTING EMAILS: Collecting emails to send to people about your book or books. I would recommend MailerLite as they are the least expensive but professional platform for a beginner. Everyone starts with a free account. They allow you to collect a couple of hundred emails before they want to get paid. And then they charge you per hundred or so. So your expenses keep steady with your marketing results.
JOIN GOODREADS: Establish a presence on GoodReads.com where the most avid and voracious readers hang out. Sign up for an account with them and you will get a chance to upload your book cover. It can be a little confusing at
Goodreads so I’ll post a video about joining and navigating around there.
The biggest tip I can give you is that Goodreads is a website about readers. When you log in, it recognizes you only as a reader until you go to your author dashboard. It took me a long, long time to figure this out. I was always looking for my book and I was disoriented within five minutes.
ESTABLISH LOCAL COMMUNITY CONTACT: Every library would be interested in who their local authors are. You can set up a talk and sell some books when you do a book launch.
I personally am too shy (and too old) to go this route, but if you happen to be a bit younger or extroverted, this can create a HUGE BUZZ. Local people become fans, they tell people they know you, they buy paperbacks and hardcovers — and many want you to sign them! So don’t underestimate the life of the buzz you can create by talking about your book in front of a few people at the local library.
KINDLE SELECT: Seriously consider entering your book into Kindle Select on Amazon so you can give away many books each quarter. This is the quickest way to get attention and reviews. The more readers you have, the better the odds of getting a review.
Many new authors get too hung up on how long it took them to write the book and they don’t like the idea of not getting paid for it. However, Amazon is the biggest search engine for books. That means that your competition is Steven King, Nora Roberts, Lee Childs, Agatha Christie, etc.
It’s important to understand that allowing people to read your book may create a fan, a repeat reader. That’s your realistic goal. Unless you have hundreds or thousands you can put into marketing each month, you will be building a readership one reader at a time.
LOW-BID AMAZON AD STRATEGY: And the last step for absolute beginners is to learn strategies for low-bid strategies (going for the low-hanging fruit) using Amazon Ads. This is where you bit .12 cents a click. You won’t rocket to the top of the best seller list, but this is a great strategy to begin to crawl your way out of oblivion. I’ll have a dedicated blog post about how to set up a low-bit strategy.
BUILD A SOCIAL MEDIA PRESENCE:
I personally don’t like social media — the whole thing. However, I also don’t really like marketing either! But in today’s world, if you want to self publish, you need to market your books or blog and there are lots of ways to market even if you are shy or introverted, like I am.
First establish Social Media Accounts in your professional Name. This could be your author name, pen name, website name, blogging handle, or some other name that is dedicated to your business. Don’t blend any personal social media with your professional social media presence.
So the first thing to do is to establish accounts at all of the following social media platforms:
FACEBOOK – Facebook is the biggest arena for Boomers, who are retired and have the most money and the most time to read. So you need to establish a presence on Facebook even if you are younger and don’t use it yourself. As stated above, create a Business Page in your author name, blog name, website name or pen name. This will be dedicated to subjects around your writing. If you don’t know how to do this, just search on YouTube for “How to start a Facebook Page”.
TWITTER-NOW-KNOWN-AS X: This website is growing quickly. It has the largest political group and finance group, both left and right, on the internet. This group too also tends to be economically comfortable and will buy what they want. If you don’t write about politics, it’s okay. You will be “posting to google analytics”. More on that below.
Posting to Google Analytics means that Google spider bots crawl the internet without stop. They are constantly cataloguing and making decisions about who is an authority on what subject all the time. So even if you don’t get a lot of views or reposts, the google bots are still absorbing what you are doing.
I don’t get that many reposts, but the most traffic that comes to my website is from Google. So it’s still working. It’s important to know this so you don’t feel like you’re being ignored or wasting your time.
LINKEDIN – If you write on business or off any type of service, anything business people would need or like, then you want to establish a presence on LinkedIn as well. Most people don’t look for their next book or interesting blogs on LinkedIn, but again, you are posting to the algorithms. In the next installment, I’ll be going over how to find complementary products and/or interests to post about, especially if you only have one book.
GAB – This website is a bit controversial because they had a big fight years ago with the ADL, but it is still a place that has a huge Christian presence. I’ve never seen anything anti-Jewish or antisemitic posted so I’m not sure what the big todo was about, but in any event, I thought I would mention this. It could have been just a big ego fight between two guys. But if you write Christian fiction, like I do, or write things that fellow Christians, patriots, or other spiritual people may be interested in, you will want to establish a presence on Gab. Just don’t let this be your own social media because it really specializes in Christian and Patriotic users and they are not the only readers out there.
INSTAGRAM: You also need to post to Instagram. This social media website has a much younger demographic that uses it, but they are also glued to their screens all the time. Instagram is very popular and has lots of graphic posts as well as videos.
PINTEREST – Establish a business page with Pinterest. Pinterest has millions of users and is probably the biggest search engine next to Google and Amazon. So this is a must. Again, don’t mix business with personal. Establish a page as an author, blogger, or writer.
There are ways to create many different pictorial posts representing one book, so be sure to join Pinterest right away.
TIKTOK: If you’re thirty-five and older, I would recommend holding off on TikTok, mainly because it is a platform for videos. Candid videos. There was a trend called “Booktok” that was pretty popular for awhile, but it got so competitive, I think it has blown over — unless you can post videos everyday.
Tiktok is also battling for survival with the US Courts. No one knows their fate at the time of this writing. However, like I said earlier, their platform is for video only. People under 35 have grown up videoing themselves all day long, so posting on Tiktok is easy for them. But for those of us over 35, making a video could be a half day or full day affair. So with that warning, I’ll leave it up to you to decide whether Tiktok is for you.
ESTABLISH A PLAN OF ACTION:
First: It’s only a plan of action if you do something about it all. So be sure to open your social media accounts in the next days if you haven’t established them already.
Second: Establish a mailing list on one of the many platforms out there. I would recommend MailerLite as the first email collection platform. There are others out there but the last time I did research — which was about six months previous to this blog post — they were the best deal for the monthly money. I was paying almost $135 a month to Mailchimp (I had about 3500 emails) and I got the same program for $35 a month at MailerLite.
Most programs start free, but don’t underestimate how soon you will build up a following.
LIKE WHAT YOU SEE? WANT TO SIGN UP FOR MY NEWSLETTER?
I send out a weekly newsletter with eBook freebies, deals & steals, along with bits & pieces of other interesting things for book and reading lovers. Sign up below!
Above is a diagram of most of the moving parts involved in setting up a give away using a double opt-in email and automation at Mailerlite. Seeing it visually will help you understand all the bits and pieces I talk about in the video that goes along with this post.
The video below is a comprehensive tutorial about setting up a giveaway using a double-opt-in email, and sending an email containing a link to a download for an infographic.
For self-publishers, building a reader list, sometimes referred to as a newsletter list, it is important to find ways to build your readership. By offering occasional giveaways, you can build your list a little faster.
People love infographics that organize and simplify information, so that is what I decided to offer as a giveaway in the offer in the video.
WHAT IS A DOUBLE OPT IN EMAIL?
A double-opt in email is one where the person signs up but then they must go and retrieve the email in order to confirm it is a live email. It presents you from gathering made up emails. It keeps your reader list clean of fake emails.
WHAT WILL BE COVERED IN THE VIDEO?
Like the picture above, I will cover the entire process from uploading the giveaway to Google drive and getting the proper link for the ultimate email form.
Then we go to Mailerlight and I walk you through the system as I set up a give away using the double opt-in email.
At the end, I then show you how it works. I also give a secret tip at the end about what to do with all the links you have gathered in order to put something like this together.
VIDEO TIMELINE:
00:01 – What we will cover in the video
Outlining all the components and links we will need
07:57 – Uploading the document at Google Drive
11:17 – MailerLite – First Form, the Sign up form and Success Message
15:20 – Email Settings (I leave them all unchecked)
16:00 – Creating the automation, the workflow
17:50 – Create the Email that is launched when the form is filled out
18:40 – Selecting a Mailerlite Template
20:00 – Creating an Email Template
20:50 – Adding the Google Drive link to the Email Form
22:00 – How to save the finished Email as a reuseable Template
23:00 – Set up the double Opt in
24:00 – How to find the direct link to the Mailerlink Form
27:00 – How the form works
Here is the video for your review:
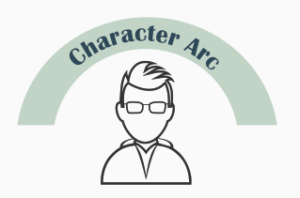
If anyone is interested in getting a copy of the Infographic about How to Create a Character Arc in a 4-Part Story Structure, you can sign up below!
LIKE WHAT YOU SEE? WANT TO SIGN UP FOR MY NEWSLETTER?
I send out a weekly newsletter with eBook freebies, deals & steals, along with bits & pieces of other interesting things for book and reading lovers. Sign up below!
I write novels in series and like there to be a personal subplot that takes place over each book, but another longer arc that takes place over the entire book series. In order to pull this off, I need to be very organized and deliberate in how I let the character arc play out not only over time but over the book series as well.
This blog post is about my process in doing that. Now, I don’t claim this to be the only way to go about it, but it is the way I do it and it works for me. This process is not how I started out working on character arcs! I learned the hard way that it’s important to know in the very beginning how you will allow the book arc and the series arc plays out.
I know there are long multi-book series where the main character is more of an action hero and he/she doesn’t change much. Legal thrillers and the Jack Reacher book series comes to mind. This does work as Lee Childs and other successful authors can attest to. They have sold millions of copies with these stock hard-boiled characters who remain generally the same over the entire series.
I prefer there to be more character growth in each book, plus, I like there to be a series arc as well. My series are shorter than Mr. Child’s but each writer has to find their own place. I like shorter series with the main characters participating in more of a family drama and/or a romantic subplot.
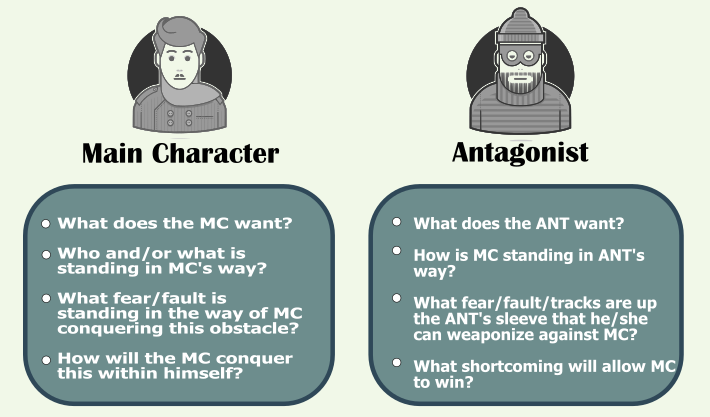
THE FIRST STEP IN SETTING UP A CHARACTER ARC IS TO ESTABLISH THE FOLLOWING:
Sketch out on a mind map or even a piece of paper the answer to each of the above character development questions. MC stands for Main Character and ANT stands for Antagonist. By sketching them out at the same time in the beginning stages, it will give you a strong direction for your writing right from the get go. Of course, if you have more than one main character, you will want to repeat this process for every main character.
This also allows you to see and create a conflict between the main character and the antagonist. This is particularly helpful to new writers who lean towards making all characters “too nice”. Without some level of conflict, there won’t be enough conflict or drama to move forward in the story. It will simply be an “and-then-this-happened, and-then-this-happened” kind of story.
BREAK THE ENTIRE CHARACTER ARC INTO THREE OR FOUR PARTS:
I use a four-part plot structure, so I break my character arc into four sections. This allows me to keep up with the character development and also don’t resolve the inner conflict too early.
I find this technique also gives me solid writing boundaries and/or writing guideposts. When I’m in Part 2, I know my goal for this section is to make sure the planned character arc for Part 2 is completed before I move to part 3.
A LITTLE ADVICE ABOUT WRITING IN SERIES:
Now that I’ve written my third book series, I think in terms of multiple-book character acts. As I start out with new characters in a new series, I make sure that I have many options of where these characters can go over the entire series.
A special note to pantsers: This technique gives guideposts and boundaries, but every story or novel takes on a creative life of it’s own. I find by having the character arc written down and sectioned, it makes it easier to change the story as this creative process takes over. I simply look over the character arc and alter it with the new “better idea” that has come up.
I find it gives me the best of both worlds. I have a strong direction when I am writing, but flexibility and ease are built into the process itself. It’s super easy to change mid-stream by just tweaking the character arc a bit.
I hope this helps new writers!
If you would like to download the Infographic referred to in this blog article, sign up below:
LIKE WHAT YOU SEE? WANT TO SIGN UP FOR MY NEWSLETTER?
I send out a weekly newsletter with eBook freebies, deals & steals, along with bits & pieces of other interesting things for book and reading lovers. Sign up below!
WHAT TO DO IF YOU NEED TO WRITE A STORY AND YOU’RE STUCK:
Mastering the art of writing captivating mysteries. Unleash your creativity and weave intricate tales of crime and suspense.
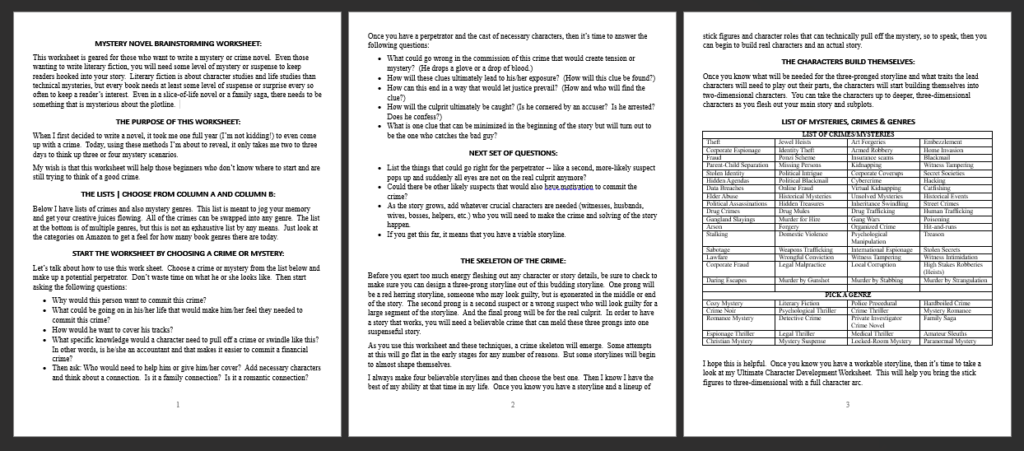
MYSTERY NOVEL BRAINSTORMING WORKSHEET
This worksheet is geared for those who want to write a mystery or crime novel. It helps with writer’s block too. It breaks down the process into small bite-sized pieces and it will get your motor going without any effort.
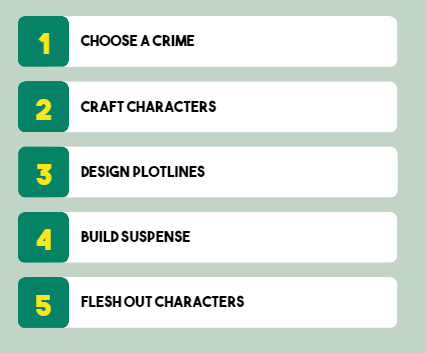
Just follow the suggestions, summed up easily below, and you will have at least the start of something within minutes. There is a link below to download the three-page instructional and checklist.
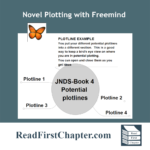
If you are an intermediate novel writer, here is a graphic of the overall process without the instructional questions:
THIS WORKSHEET HAS MULTIPLE PURPOSES:
If you are stumped for a main story, or if you are stumped for what happens now, or even if you have written yourself into a bit of a corner, this instructional will help, along with your own creativity and thinking, to bring about new possibilities.
Jump into the series of steps wherever you are in the writing process and it will help you restart your engine. Once you go through the process a time or two, I’m sure it will become your go-to procedure.
THE LISTS | CHOOSE FROM COLUMN A AND COLUMN B:
Below is a closer look at Page 3 of the Worksheet where it will give you a wide birth of choices for mysteries and/or crimes. It’s hard for one mind to think of all the possibilities without some kind of aid no matter how creative one is.
START THE WORKSHEET BY CHOOSING A CRIME OR MYSTERY:
Let’s talk about how to use this work sheet. Choose a crime or mystery from the list below and make up a potential perpetrator. Don’t waste time on what he or she looks like. Then start asking the following questions:
Why would this person want to commit this crime?
What could be going on in his/her life that would make him/her feel they needed to commit this crime?
How would he want to cover his tracks?
What specific knowledge would a character need to pull off a crime or swindle like this? In other words, is he/she an accountant and that makes it easier to commit a financial crime?
Then ask: Who would need to help him or give him/her cover? Add necessary characters and think about a connection. Is it a family connection? Is it a romantic connection?
THE NEXT SET OF QUESTIONS TO ASK:
Once you have a perpetrator and the cast of necessary characters, then it’s time to answer the following questions:
What could go wrong in the commission of this crime that would create tension or mystery? (He drops a glove or a drop of blood.)
How will these clues ultimately lead to his/her exposure? (How will this clue be found?)
How can this end in a way that would let justice prevail? (How and who will find the clue?)
How will the culprit ultimately be caught? (Is he cornered by an accuser? Is he arrested? Does he confess?)
What is one clue that can be minimized in the beginning of the story but will turn out to be the one who catches the bad guy?
NEXT SET OF QUESTIONS:
List the things that could go right for the perpetrator — like a second, more-likely suspect pops up and suddenly all eyes are not on the real culprit anymore?
Could there be other likely suspects that would also have motivation to commit the crime?
As the story grows, add whatever crucial characters are needed (witnesses, husbands, wives, bosses, helpers, etc.) who you will need to make the crime and solving of the story happen.
If you get this far, it means that you have a viable storyline.
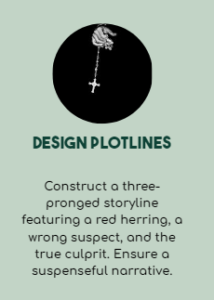
THE SKELETON OF THE CRIME:
Before you exert too much energy fleshing out any character or story details, be sure to check to make sure you can design a three-prong storyline out of this budding storyline. One prong will be a red herring storyline, someone who may look guilty, but is exonerated in the middle or end of the story. The second prong is a second suspect or a wrong suspect who will look guilty for a large segment of the storyline. And the final prong will be for the real culprit. In order to have a story that works, you will need a believable crime that can meld these three prongs into one suspenseful story.
As you use this worksheet and these techniques, a crime skeleton will emerge. Some attempts at this will go flat in the early stages for any number of reasons. But some storylines will begin to almost shape themselves.
I always make four believable storylines and then choose the best one. Then I know I have the best of my ability at that time in my life. Once you know you have a storyline and a lineup of stick figures and character roles that can technically pull off the mystery, so to speak, then you can begin to build real characters and an actual story.
THE CHARACTERS BUILD THEMSELVES:
Once you know what will be needed for the three-pronged storyline and what traits the lead characters will need to play out their parts, the characters will start building themselves into two-dimensional characters. You can take the characters up to deeper, three-dimensional characters as you flesh out your main story and subplots.
LIST OF MYSTERIES, CRIMES & GENRES
I hope this is helpful. Once you know you have a workable storyline, then it’s time to take a look at my Ultimate Character Development Worksheet. This will help you bring the stick figures to three-dimensional with a full character arc.
Pulp Fiction become popular during the depression of the 1920s and 1930s. Publishers at the time used a very cheap “pulp” paper in order to produce these short stories and magazines that cost about a quarter. Yes, twenty-five cents!
During the depression, life was difficult and people didn’t want to struggle to make sense of what authors meant by long run on sentences. They didn’t have the stomach or patience for prose. During a depression, people are lucky they can concentrate at all. They wanted escape and the publishers gave it to them in the form of pulp fiction.
Pulp magazines were filled with adventurous stories with hard-boiled detectives, larger-than-life heroes, space travelers. There was no subtlety. It was all straight-talking dialogue. The plots were fantastical and melodramatic, but easy to follow and easy to read.
A QUICK HISTORY OF PULP FICTION:
In the late 1800s and early 1900s, classical literature was popular. I would even refer to it as high-brow fiction. Oscar Wilde, H G Wells, Jack London, Upton Sinclair, F. Scott Fitzgerald, Ernest Hemingway, William Faulkner. These authors are known not only for their storytelling ability, but their prose, their wordsmithing. This is what I consider ‘high-brow’. Their books are not read-’em and toss-’em books. They are written to read and contemplate, maybe even read again and again.
Agatha Christie was also a part of this list of popular authors at the time, but she may have influenced the pulp fiction genre more than any of the other authors. Her multi-suspect mysteries were extremely popular
Pulp fiction’s prose was everyday tough talk. There were clever phrases to read and re-read. There was no deep concepts to contemplate. It was mostly action, reaction and romance. The plots were sensational, violent and maybe strange, but they were easy to read; perfect for people who are distracted and worried.
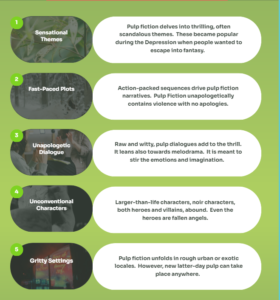
WHAT MAKES PULP FICTION DIFFERENT?
WHAT CAN NEW AUTHORS LEARN FROM READING PULP FICTION?
Reading pulp fiction can help new authors know the difference between believable action and over-the-top action.
It can help an author know the difference between writing emotions and over-the-top melodrama.
It can help an author know how to quickly introduce a character.
It can show a new writer how to quickly get to the point of a story and keep it lean and tight.
It can help an author learn how to handle the passage of time, and much more.
Because most of the pulp fiction is short, it can help an author to easily see how the pulp fiction writer handled foreshadowing, passage of time, action scene descriptions, fight scenes, how much and how little back story is needed in a short story. There is much more for a new author to learn from reading pulp fiction.
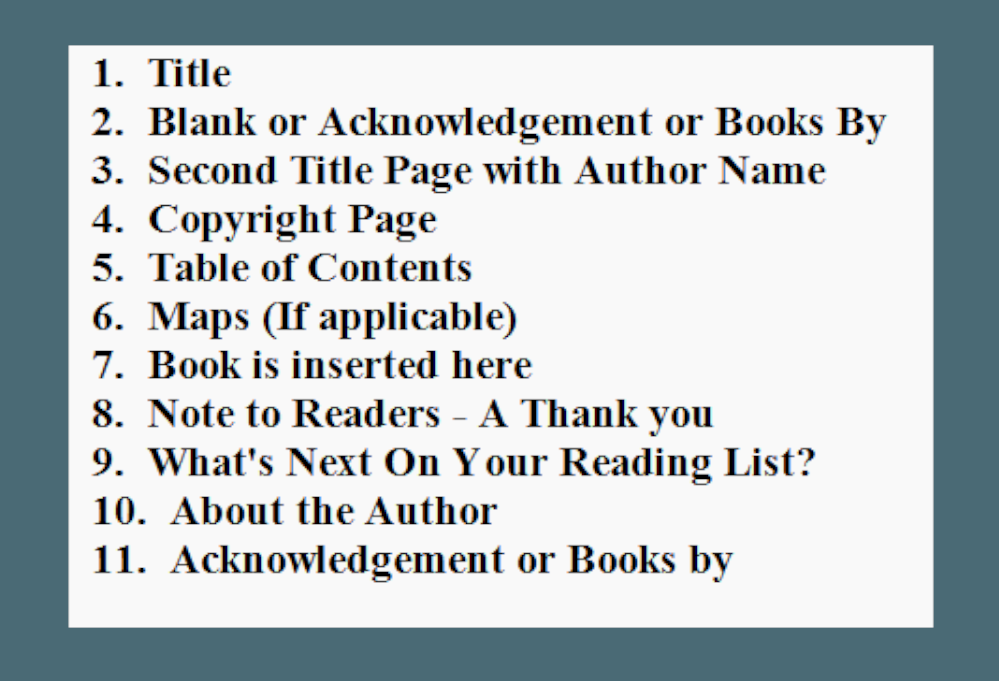
This book is for beginners who are publishing their first or second novel and they are still a little skittish about what else goes into a book. I’ll lay it out so you can easily follow the list and be confident that you’re not forgetting anything. These page suggestions are taken from the publishing industry. These are the pages that appear in a book published by a publishing house.
Often the pages before a book starts are referred to as “front matter”. Pages 1 to 6 would be considered Front Matter. The rest of the pages after the book is inserted are considered Back Matters.
PAGE 1: A Title page with only the name of the Book. The font is usually big enough for the title to stand alone. It is usually centered on the page horizontally and vertically.
Page 2: Either a blank page or a Books by Page. If you have other books that are published, you can list them on this page. The title should be something like “Other Books by AUTHOR NAME”.
Page 3: A second Title Page, but this one will have the name of the book, and below it the name of the author. Again, this is in larger font and it is centered vertically and horizontally on the page.
Page 4: Copyright page. I am not a lawyer so I can’t give you any information that is legally correct. However, I can tell you that I cobbled together different verbiage that I found in other author books. I made it long enough to cover my bases, but not too long. Below is the verbiage that I used.
Page 5: Table of Contents. eBooks require links for chapter beginnings and Paperback and Hardcover require page numbers.
Page 6: (If applicable) Any maps that you may be including in your book.
Page 7: Next comes your book.
Page 8: Note to Readers.
Dear Reader:
Thanks for giving your time to read this story. I hope you enjoyed it.
As a new fiction author, reviews are very helpful to me. If you enjoyed this novel, I’d be so grateful if you would leave a review on Amazon.com. Here is a direct link: (Add link to the review for this book).
[In order to create a review link, you will need the ASIN number of your book. Then swap out your ASIN Number or ISBN number for the X’s in the link below:
I love to hear any feedback about the book and enjoy interacting with my readers, so please feel free to email me at AUTHOR EMAIL
Thanks again!
AUTHOR NAME OR SIGNATURE
Page 9: What’s Next on your Reading List?
Verbiage: Below is a chapter or two of my next book (or the next book in a series) for you to sample. I hope you enjoy it.
Then insert up to 9% of the next book. I keep it under 10% in case you are in Kindle Select. They allow up to 10%, but I like to keep it on the lower side.
Page 10: About the Author: Add a biography of yourself. Be sure to add a contact email as well as a little personal information.
Page 11: Acknowledgements: This page can go here or in the beginning of the book. You can put it in lieu of “Other Books By Page.” If you do use the Acknowledgements in the beginning of the book, then you can add the Other Books By Page here at Page 11.
When I self-published my first novel, I finished it and uploaded it and waited. That’s when I learned how important marketing the book is. I also learned through the next several books how important it is to take advantage of each tiny phase of a book launch for marketing. That’s what this blog post is about.
Aside from the checklist, I have made a strategy video where I go over the checklist and give you an overview of how the launch happens, what is involved and how to set yourself up for the best outcome. I consider a good outcome to be a smooth and timely launch, and within a week to 10 days, you have at least four to ten nice reviews. It sounds easy, but for new authors, it’s not — But it is possible.
NEWSLETTER PROMOTIONS:
The following websites are ones where you build a email list and your books will be featured on these websites. Bookfunnel and Siteorigin both offer “author swaps” where you can swap your featured book with another author who has a sizable list.
I’m not a seasoned marketer and don’t even consider myself that good at it, and even I was able to build an email list of 5,076 emails within a two year period. To me, this is amazing!
Amazon ads is a very complicated program to learn. I only touched on the ad strategy in this checklist video. There will be more Amazon ad videos coming in the future.
Below I have left a list of book marketing websites that as a beginner I used. Now that I have built a newsletter, have a website, and post regularly to social media. I rely mostly on purchased ads with FreeBooksy, BargainBooksy, FussyLibrarian and purchased Amazon Ads. But you may find the following links helpful so I’ll leave them for you to try out.
BK Nights on Fiverr.com – Offers a different promotion for books that are marked down and free. For the free ebook, you don’t get to choose a date. They choose for you. (Permafree only?)
BookAngel – This is for the Uk and your book must be listed on Amazon UK
BargainBookAngel – This is for books that are listed for .99p on Amazon UK
Which font should you use when self-publishing? The more choices we have, the harder it gets to choose.
I always chose Times New Roman as that was the font default in journalism, for books and newspapers for my entire life. However, since Microsoft added hundreds of fonts, I now see any number of fonts show up.
Below are the most common fonts in my opinion:
As you can see from the picture above, even fonts of the same size are heavier and lighter than each other and even the numbers are larger and smaller. My favorites are Times New Roman and Trebuchet MS.
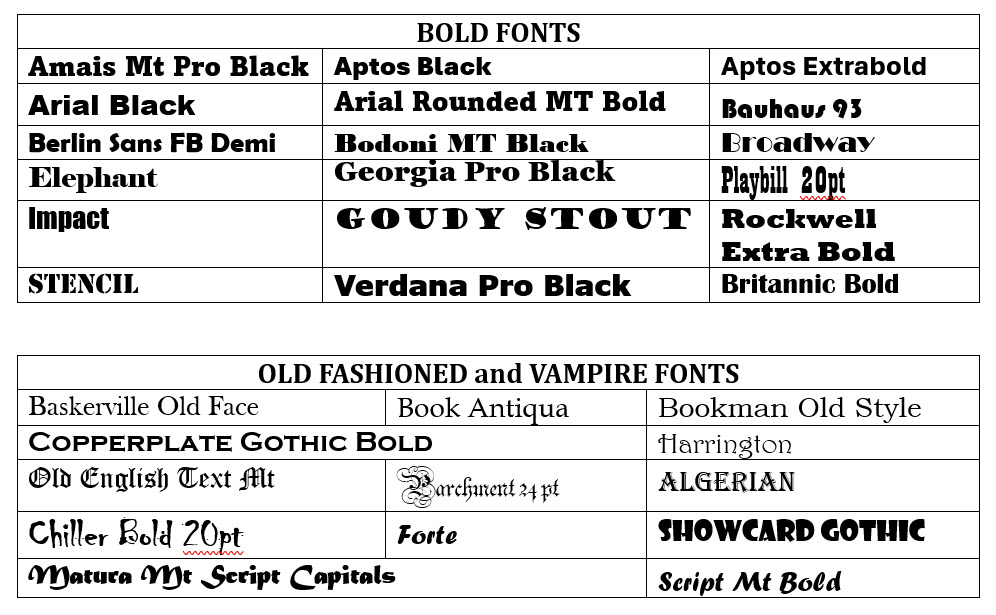
BOOK COVER FONTS – Pretty Fonts:
When it comes to Book Cover fonts, that’s another story. You want something that is attention capturing. I have gone through all of the fonts in Microsoft Word and below I have created a large list of the ones that would be appropriate for book covers.
Often you may want to also have fonts that are heavy and bold. I again went through all the fonts and made a table with those fonts too. I also added some old fashioned and vampire-like fonts.
I remember being new and overwhelmed while planning my first book cover. There were too many choices and I was trying to find the best fonts to “fit in” with other authors. In the beginning, this was very important to me.
I hope this helps.
You can print out this page or you can screen shot and save on your computer. But if you want to download copies of these lists in one download, click below:

 Before Amazon.com became a behemoth online bookseller, there may have been 20 genres in all of Bookdom. It was all based ono the space available, book cases available and how large he bookstore or library was. All fantasy books were in one section of the store. From there, you needed to come through the author names alphabetically or ask a store clerk if they remembered seeing the book. KDP Publishing and the Website whiz kids at Amazon put an end to that over the last decade or two.Now there are multiple genres of Fantasy and each one can be differentiated by a slight difference. Let's take a look at them starting with the three largest categories: High Fantasy, Epic Fantasy and Low Fantasy.
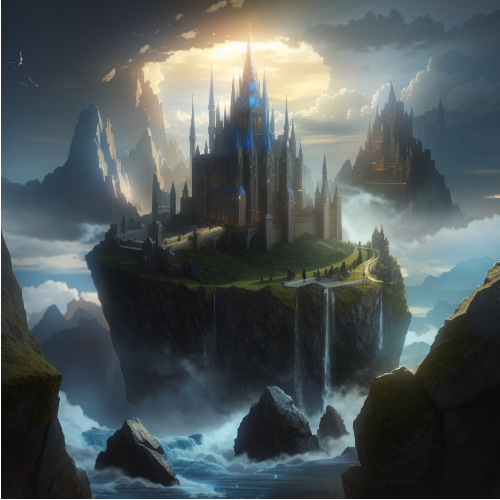 This genre is made up of stories that open up a whole new world, with its own geography, culture and even people -- there could be creatures of any and all kinds. These stories are alive with lots of magic, mythology, legends and folklore. High fantasy usually deals with large-scale problems and conflicts. There are life and death stakes and the main characters are heroes, heroines and most are destined for greatness. Their journey is about fulfilling their destiny and/or saving their world from disaster. High fantasy can be more personal than Epic fantasy. High fantasy can be about personal drama, relationships while Epic Fantasy is usually bigger and more about saving the Kingdoms or a whole group of people.
 Epic fantasy is very similar to High Fantasy in that it introduces the reader to a whole world conjured up by the author, with a unique geography, weather, history and creatures. Epic fantasy also has lots of magic and other worldly powers, all of which have rules and boundaries that are followed. Epic fantasy can have folklore, but there is more of an emphasis on myths and legends that are weaved in and out of the story.
 When I first heard of this genre and found out that many vampire books fit into this category, I wasn't happy. It sounds awful -- 'low fantasy'. What kind of a name is that? However, the low fantasy refers to the level of magic and world-building that takes place in a low fantasy book.
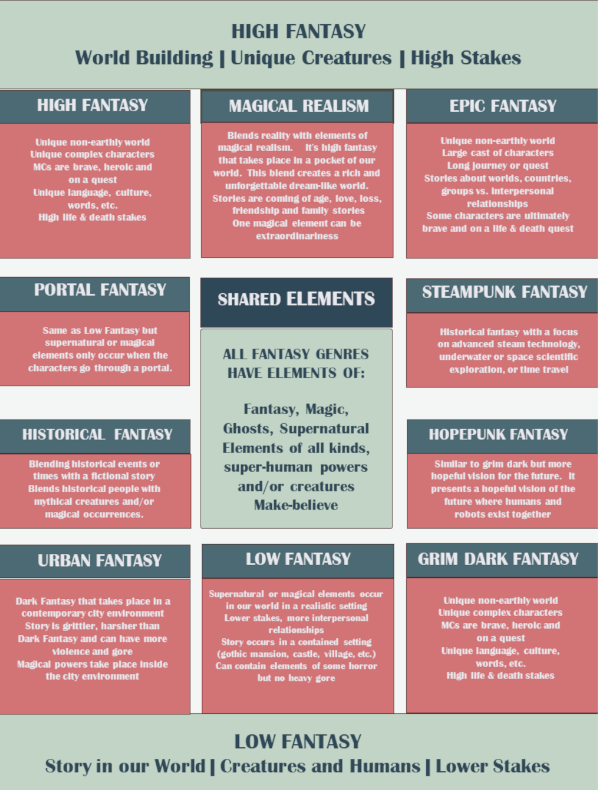
 Each writer or author will have slightly different goals. My blog post will speak directly to website bloggers and/or to fiction authors. However, if you publish low-content books or children’s books — or even coloring books, all of these techniques will be relevant to you because they are about basic marketing. Just change up whatever technique is mentioned and make it more fitting to whatever type of marketing you need to do.
 START COLLECTING EMAILS: Collecting emails to send to people about your book or books. I would recommend MailerLite as they are the least expensive but professional platform for a beginner. Everyone starts with a free account. They allow you to collect a couple of hundred emails before they want to get paid. And then they charge you per hundred or so. So your expenses keep steady with your marketing results.
 LOW-BID AMAZON AD STRATEGY: And the last step for absolute beginners is to learn strategies for low-bid strategies (going for the low-hanging fruit) using Amazon Ads. This is where you bit .12 cents a click. You won’t rocket to the top of the best seller list, but this is a great strategy to begin to crawl your way out of oblivion. I’ll have a dedicated blog post about how to set up a low-bit strategy.
 First: It’s only a plan of action if you do something about it all. So be sure to open your social media accounts in the next days if you haven’t established them already.
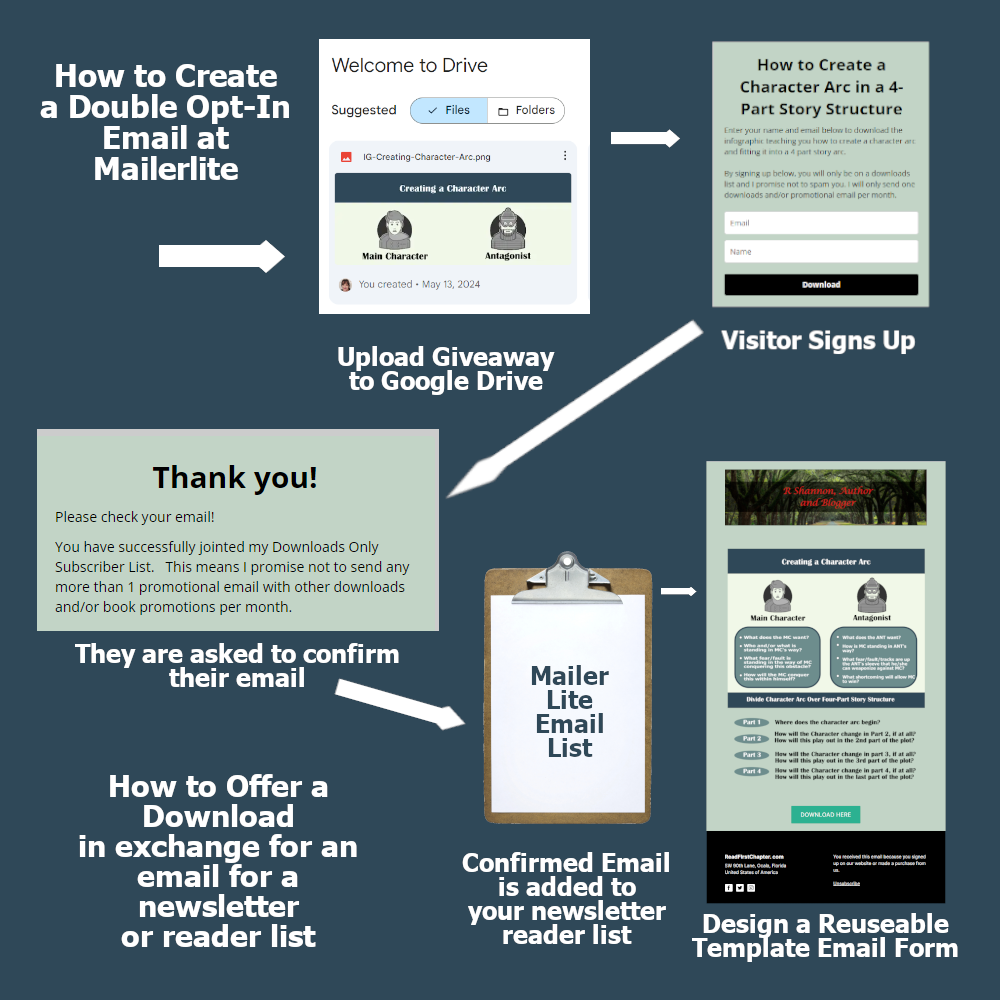
 I use a four-part plot structure, so I break my character arc into four sections. This allows me to keep up with the character development and also don’t resolve the inner conflict too early.

 If you are stumped for a main story, or if you are stumped for what happens now, or even if you have written yourself into a bit of a corner, this instructional will help, along with your own creativity and thinking, to bring about new possibilities.
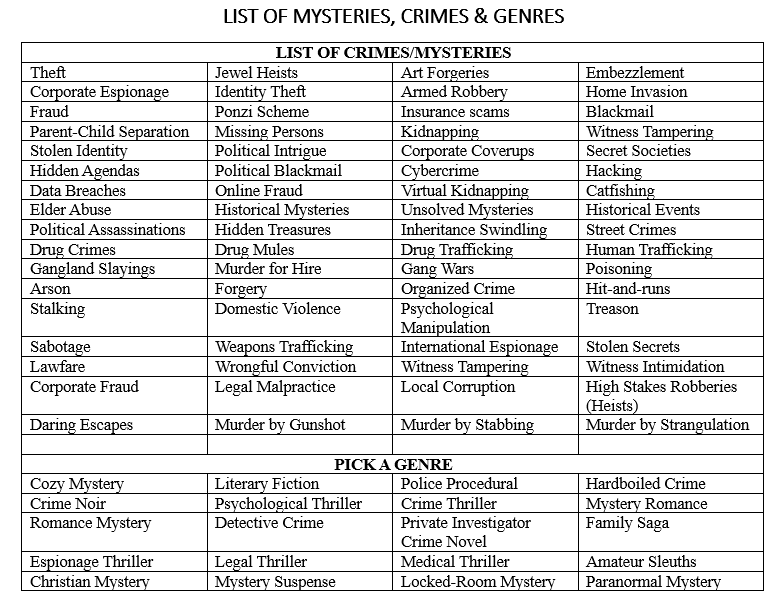

 Once you have a perpetrator and the cast of necessary characters, then it’s time to answer the following questions:
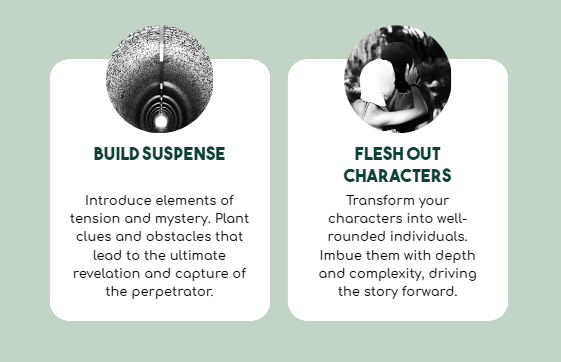
 Before you exert too much energy fleshing out any character or story details, be sure to check to make sure you can design a three-prong storyline out of this budding storyline. One prong will be a red herring storyline, someone who may look guilty, but is exonerated in the middle or end of the story. The second prong is a second suspect or a wrong suspect who will look guilty for a large segment of the storyline. And the final prong will be for the real culprit. In order to have a story that works, you will need a believable crime that can meld these three prongs into one suspenseful story.
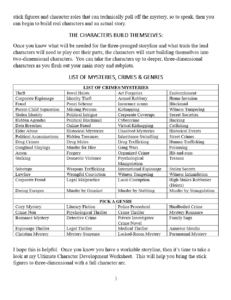 As you use this worksheet and these techniques, a crime skeleton will emerge. Some attempts at this will go flat in the early stages for any number of reasons. But some storylines will begin to almost shape themselves.
 Pulp Fiction become popular during the depression of the 1920s and 1930s. Publishers at the time used a very cheap “pulp” paper in order to produce these short stories and magazines that cost about a quarter. Yes, twenty-five cents!
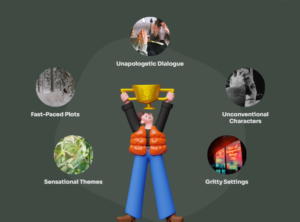
 This book is for beginners who are publishing their first or second novel and they are still a little skittish about what else goes into a book. I’ll lay it out so you can easily follow the list and be confident that you’re not forgetting anything. These page suggestions are taken from the publishing industry. These are the pages that appear in a book published by a publishing house.
 When I self-published my first novel, I finished it and uploaded it and waited. That’s when I learned how important marketing the book is. I also learned through the next several books how important it is to take advantage of each tiny phase of a book launch for marketing. That’s what this blog post is about.