THE BEST TIP I CAN PASS ON TO BEGINNER WRITERS:
 Writing a novel is a huge undertaking. There are many things that go into the writing of a fiction story. The best tip I can pass on is this: Break everything down into little bite-sized pieces. By doing this, you can reduce a huge project down to do-able portions that can be done whether you have 2 hours a week to write or two full days! It only requires a little planning and organization.
ALL NOVELS REQUIRE SOME SUSPENSE:
Regardless of what type of novel you choose to write, all stories require at least a semblance of suspense. Suspense is what hooks the reader into the story, and it is what pulls the reader along the story and keeps them reading. Suspense creates a question the reader desires an answer to. The greater the suspense, the more hooked the reader will be.
READING OTHER AUTHORS:
 It’s important to keep reading as your own journey as a writer continues. Each author has a different style and uses different storytelling techniques. The stories don’t even have to be great. You can learn from the good, the bad and the bland. Just analyzing what made a book bland is a great lesson in itself. Did the story need more action? Did the story get stuck somewhere?
When I read novels now, I can usually tell whether the author is a pantser or a plotter. If the story sags in the third section, I can tell the author got caught in part two of the three-act structure.
The books I read now are twice as enjoyable because I experience them as a reader but as an author too. I get to enjoy the story itself but also watch and learn the author’s storytelling techniques too.
WATCHING MOVIES FOR INSPIRATION:
When I am in the process of writing my own novels, I tend to read less because I’m reading and proofreading my own pages. During these times, I like to vegetate by getting lost in a movie. I watch movies specifically to learn from them. Believe me, you can learn a lot about the actual storytelling craft from watching movies. They can also be a source of inspiration for your own stories.
It took me almost a year to come up with my first story for a novel. One full year. I didn’t know where to start. I had ideas, but didn’t know how to brainstorm them into a potential story.
WHERE CAN DO YOU GET IDEAS FOR A FICTION STORY FROM?
Ideas for stories in the beginning will come from TV movies, Cinema movies 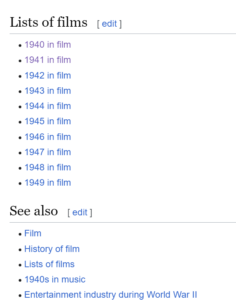 or other books you read. Reading other authors is crucial no matter where you are on the writing spectrum. However, when you’re new, you can learn a lot from watching mystery or crime noir movies. I like movies from the 1940s, 1950s, and 1960s. The movies in these decades didn’t have CGI and the directors had to use the stage to tell the story. They used wider shots and props to assist the storytelling. By watching these older movies, you can learn a lot regarding writing.
The movies of today show the location scenes once and then do close up shots of one character talking and then follow it up with another close-up shot of a character talking. There’s not that much to learn about storytelling from these movies. It’s a shame because the sets are absolutely gorgeous, especially in the fantasy movies.
To the left (or above) is a screenshot of the Wikipedia page that comes up when you search “1940 in film”. This will give you all of the films and a tiny synopsis of what the films are about. You can pick whatever decade appeals to you.
READ THE SYNOPSIS FOR THE MOVIE FIRST:
 It’s a good idea to read the synopsis before you view the movie. Knowing at least a basic outline of the story will allow you to absorb more as an author. If you go into the movie blindly, you will be “experiencing the movie” as a viewer only. By knowing ahead of time what story will be unfolding, it will allow you to watch specifically for certain scenes to unfold. You can watch what tools are used to move the story along.

For example: Notice in the scenes how much information is passing to the viewer by the setting. Besides the timeline of when the story is taking place, it often will give you shots of recognizable icons from certain cities. There are so many techniques you can learn from watching these older movies about all of the tools used to lay out the facts of the story and how suspense is created. Below is a list of things to watch for in stories:
- How does the movie show the location of the story? Do they use icons, or text on the screen? Do they use snippets of dialogue? Each movie you will learn different tricks for showing time and location.
- How does the story show either poverty or opulence?
- How does the movie present the premise? There will be at least dialogue about what the main character wants or needs. Notice how this is done.
- Notice where the suspense of the story starts. Even in non-mystery stories, there will be at least a thread of suspense. It might be suggested by a vision that one character and the viewer see and no one else does. Or it may be a little gossip that passes in a short conversation.
- Notice how the passage of time is handled. Is the passage of a few years spoken in dialogue or is it projected in some other way?
- Notice how the writers show the character’s weakness or fallen nature.
- Notice the change in locations in the story. This is often how the story is kept moving forward.
- Notice when the suspense gets stronger.
- Watch for how the writers will use lies to create a sense of worry or dread.
- For any twists in the story, notice how abrupt it happens. Also take the time to notice if this was foreshadowed in the beginning of the story. Readers love foreshadowing.
MY SUGGESTION FOR A MOVIE:
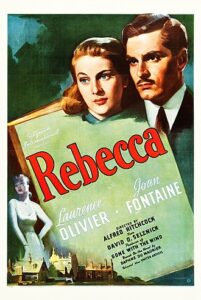 If you are looking for a suggestion, I would suggest Rebecca for the first movie. This movie was directed by Alfred Hitchcock and it has a lot of gothic atmosphere. There is also a psychological plotline in this story so it is a goldmine for learning storytelling tools.
Most of the synopses on Wikipedia give you an outline of the story but they don’t have spoilers in them. Sometimes I only read about six paragraphs on the really long ones because the purpose is only to know a little bit about what the story will be about so you can watch for how things are handled on film. You can easily translate any of these tools to novel writing.
GOTHIC MOVIES: Gothic movies are great at showing how to introduce fear and suspense into a story. They are also a great place to learn how to use the atmosphere and the location and backdrops to add to the suspense.
FILM NOIR: These movies are great to learn character development. Film Noir is usually about all fallen characters. In other words, they are all sinners, but some characters are bigger sinners than others. This is a great way to learn how to craft a fallen
LONG SERIES: These are great to learn about how the location and things in the room or backdrop help to relay the story. You can learn a lot about the passage of time, how flashbacks are handled, how to introduce new characters in preparation to take the story in a new direction. Miniseries like Downton Abbey and other miniseries are a great place to learn about what is going on.
MELODRAMA: Melodrama has fallen out of favor in recent times, but I personally think it needs a comeback. You can learn about melodrama from old world soap operas. I think the only one I can think of is Dallas. It’s on either Amazon Prime or somewhere else you can watch it. These types of shows are good for showing how to blend romance, cheating, and other emotional scenes into the story.
You don’t have to commit to watching the entire soap opera. You can learn a lot about storytelling tools by watching only a few shows.
Blow is a copy of the entire Brainwashing Sheet I referred to above. You can read the blog post about how to use it here.
And you can sign in to download your copy of the sheets below:
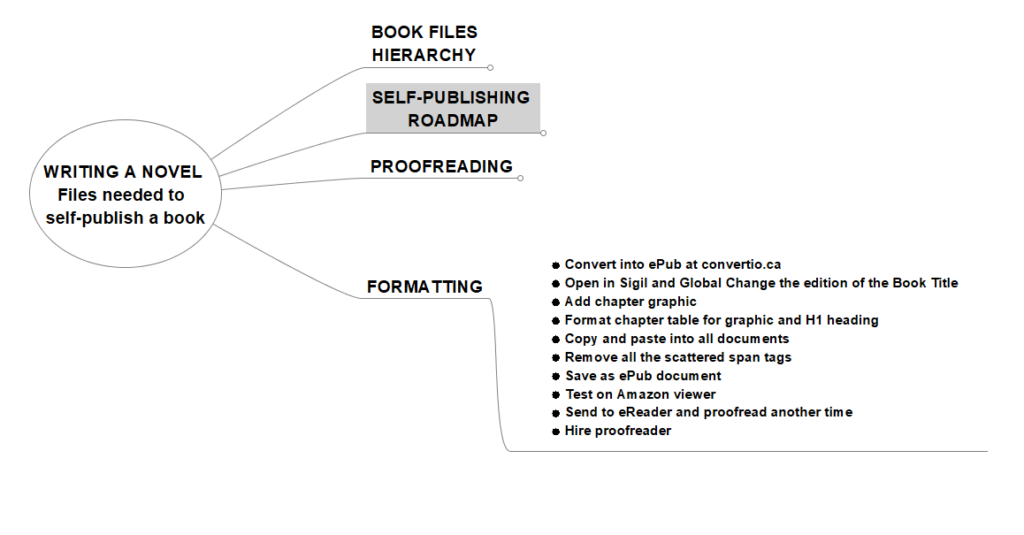
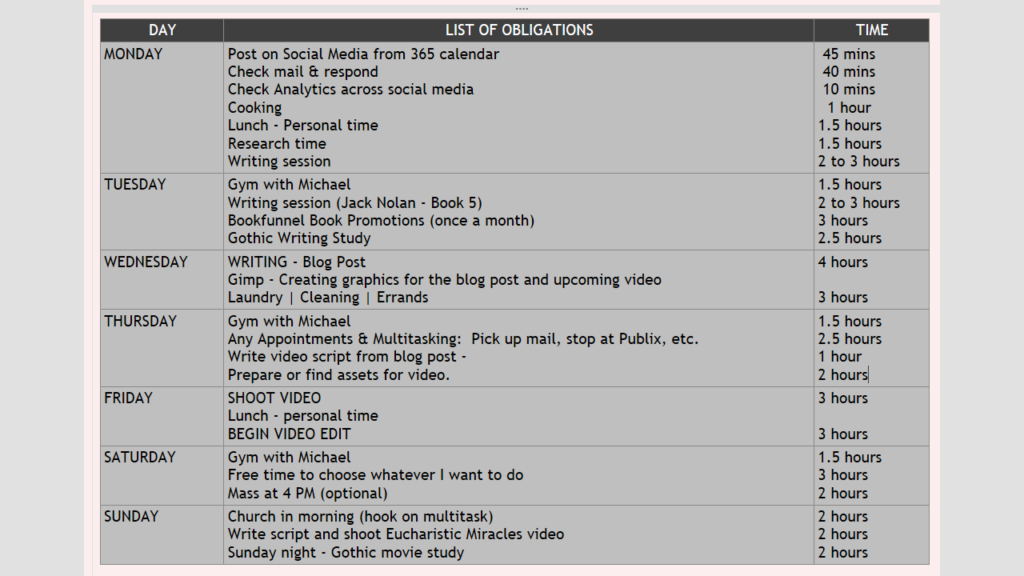 In the last installment, I described how to start your duties and obligations list with realistic times associated with each one. The list will prove itself over a week or so. Then you will be ready to expand on that list and make a series of workflows, templates, and procedure lists or diagrams. I have posted my own above to jog your memory as to where we left off.
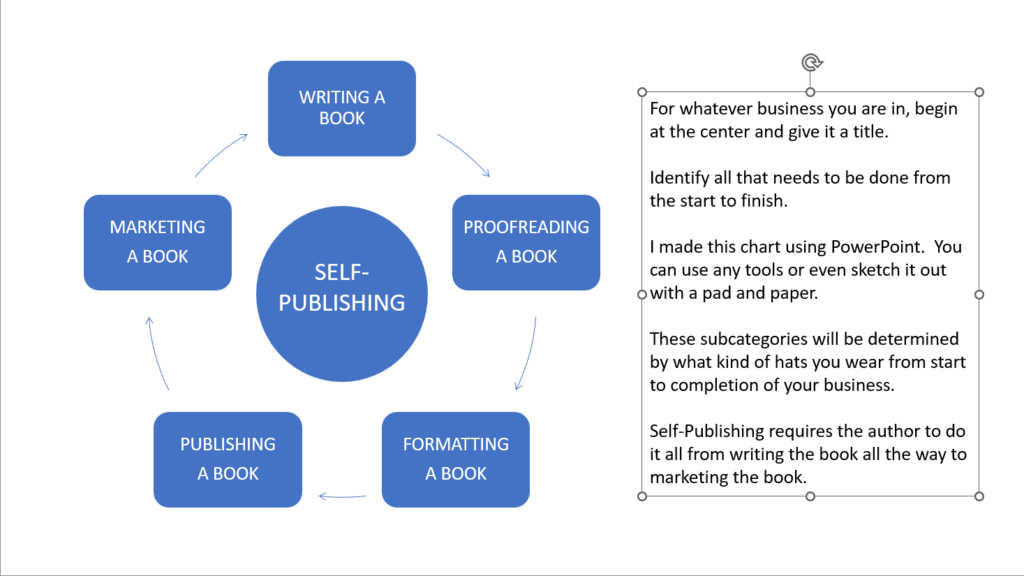

 veryone writes for a reason. Knowing why you write is important, especially as a beginner writer. Writing a book is not hard, but it can be a long process. If your purpose for writing is clear, this will give you the energy and inspiration to spur you on if and/or when the going gets a little tough.
 I'm old enough to remember 'phone guys' that worked for Bell South or whatever the phone company was called back then. These men -- they didn't have phone women back then -- would show up with big toolbelts and gaffs or lineworker boots on. These boots had cleats or little metal spikes in them that was a safety feature. These men know everything about the phone system. They would climb the wooden telephone poles and they could fix phones outside on the pole or inside in the houses. They were familiar with the entire system. That is one group of technical workers that have fallen away.
 Very often life dishes out some hard times to some of us. Did you experience, survive and prosper through some difficult times that you feel compelled to write a memoir about? You don't have to have been a famous celebrity or someone with a Moses-like mission. You may have fell on hard times and you want to share your experience, strength or faith that kept you going. People love inspirational stories.

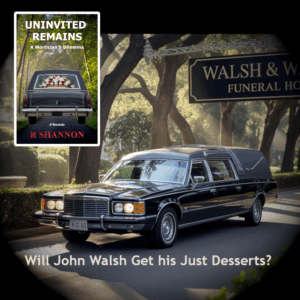
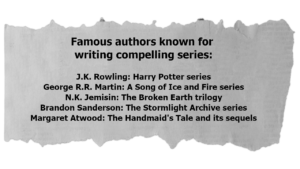 I found out later that more experienced authors even suggested that newer authors consider writing in series because it's easier to market the books. But my venture into writing book series was a happy accident.
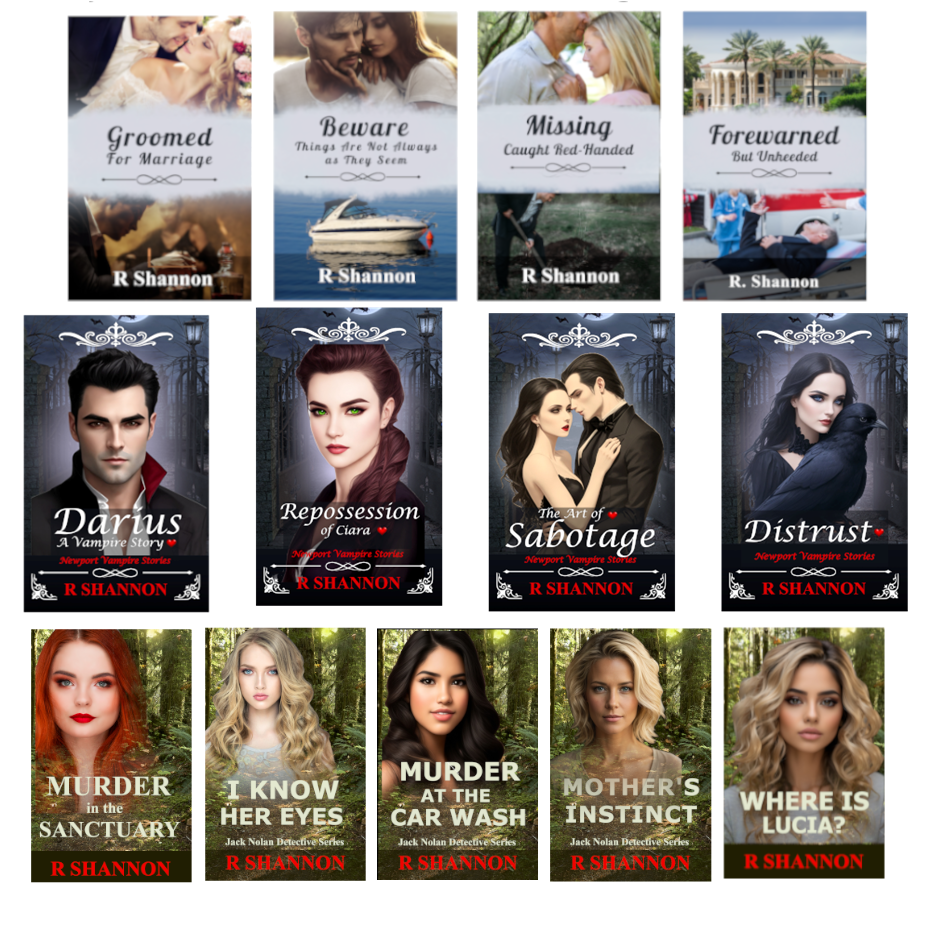
 I use broad-stroke character arc for the main characters that extends over all the books in the series. Each individual book, however, the character grows and changes a little bit. So each book contains its own arc, but there is a longer series arc for the main characters. It helps to know this before you start writing the series.


 This could be a person who works full time, lives alone, or has a few kids and there is just not enough extra money around to fund all the things necessary to do when self-publishing a book. Not to worry. There are a few choices for you.
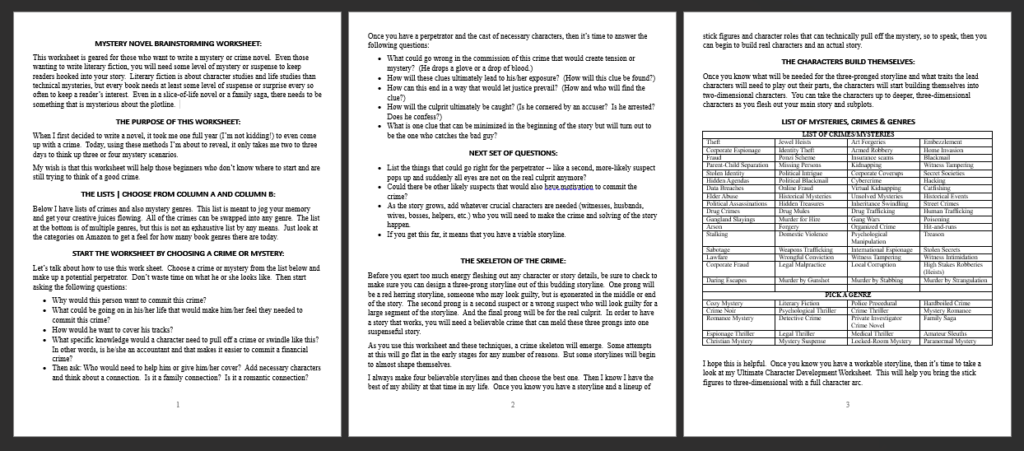
 When I first decided to write a novel, it took me one full year (I’m not kidding!) to even come up with a crime. Today, using these methods I’m about to reveal, it only takes me two to three days to think up three or four mystery scenarios.
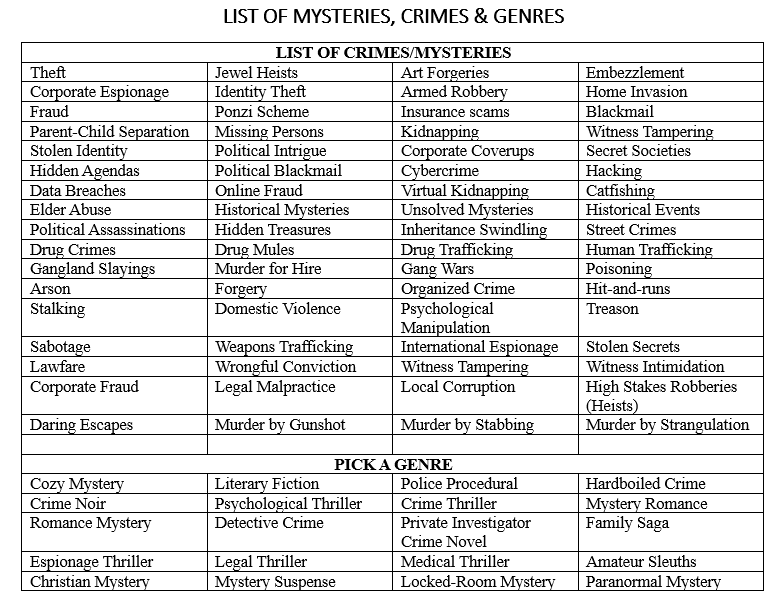
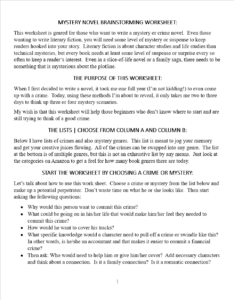 Let’s talk about how to use this work sheet. Choose a crime or mystery from the list below and make up a potential perpetrator. Don’t waste time on what he or she looks like. Then start asking the following questions:
 Once you have a perpetrator and the cast of necessary characters, then it’s time to answer the following questions:
 Before you exert too much energy fleshing out any character or story details, be sure to check to make sure you can design a three-prong storyline out of this budding storyline. One prong will be a red herring storyline, someone who may look guilty, but is exonerated in the middle or end of the story. The second prong is a second suspect or a wrong suspect who will look guilty for a large segment of the storyline. And the final prong will be for the real culprit. In order to have a story that works, you will need a believable crime that can meld these three prongs into one suspenseful story.
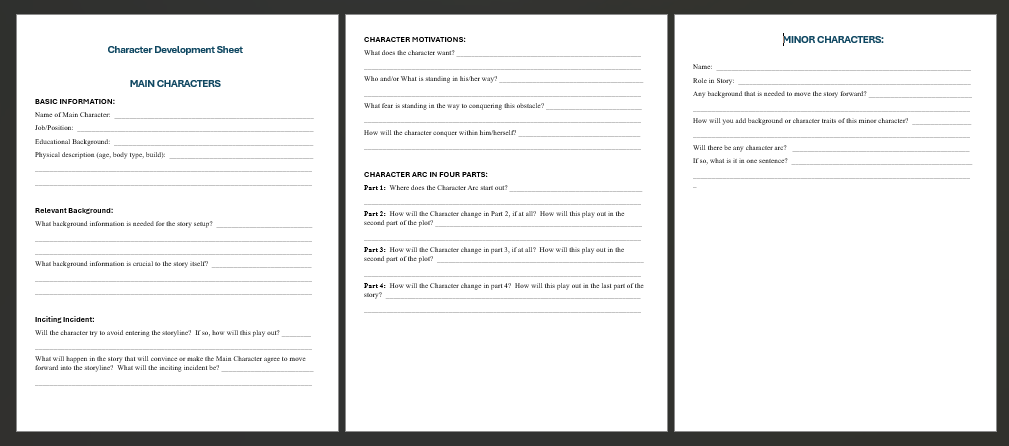
 When I started writing several years ago, I came across the standard character worksheet and it focused mostly on physical attributes, occupation but there was a disconnect regarding their role in the storyline, which is the most important part.
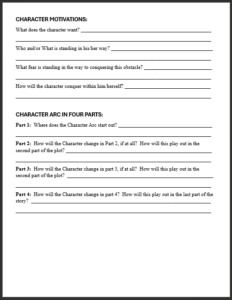 As a newbie, it took me awhile to remember that a character needs to have an arc over the storyline. So it's important -- and time saving -- to know what that arc will be before you even begin the draft. This character sheet can help you find this so you know where you are starting from and where you want to end up. The following questions should help you focus on what this character arc will be:
 For minor characters, you only need to answer a few questions. It helps to know what role these minor characters will play and what, if any, background information is needed to support them in the storyline:


 When I self-published my first novel, I finished it and uploaded it and waited. That's when I learned how important marketing the book is. I also learned through the next several books how important it is to take advantage of each tiny phase of a book launch for marketing. That's what this blog post is about.
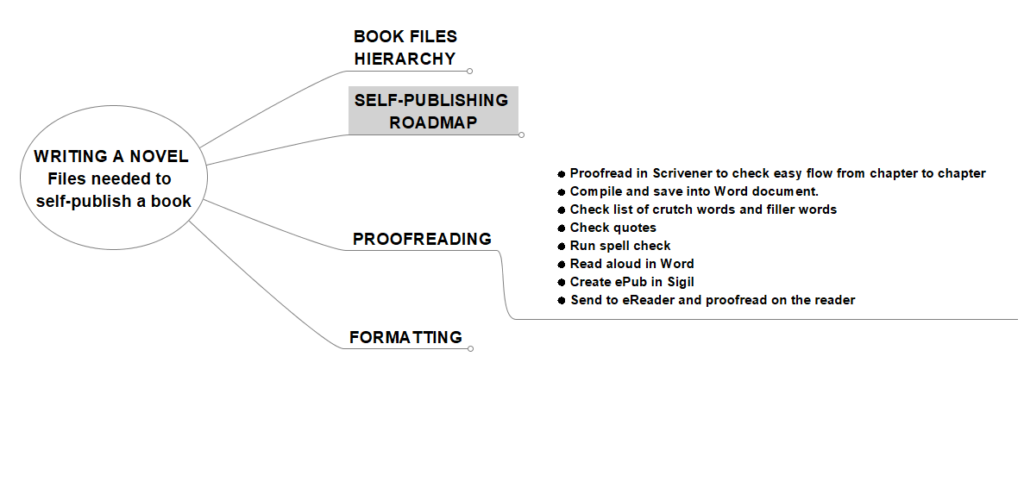
 In Layer 8, I do a read-back. In Microsoft Word, I use the Read-Aloud feature that is contained on the Review Tab. By listening to the book read aloud by someone else, it doesn't skip over mistakes like I do as the author. By the time I'm finished with Layer 7, I've read and reread this book too many times to trust my eyes to spot every error.